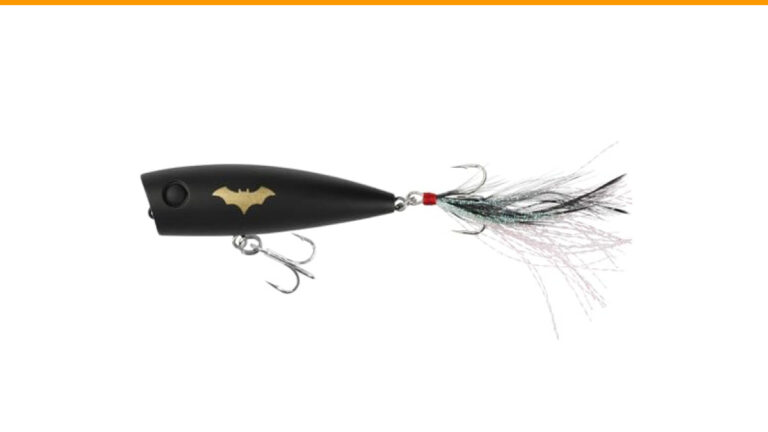
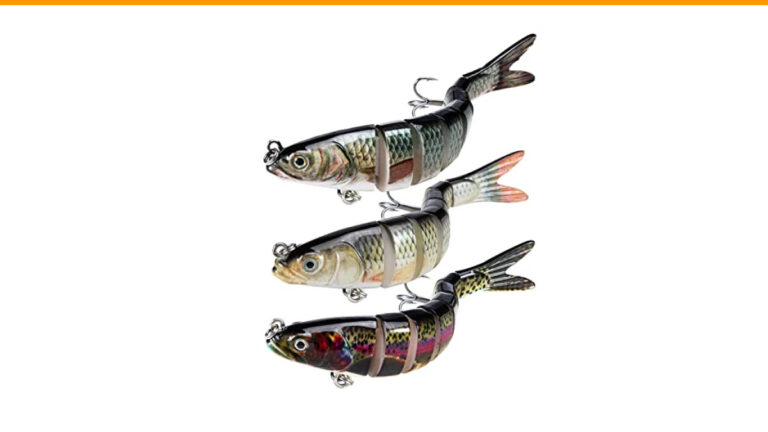
You’ve spent another evening scrolling through tackle catalogs, staring at a $12 crankbait that looks exactly like the three you lost last weekend on a rocky jetty. The paint chipped on the first cast. The hooks rusted after one saltwater trip. And the action? It wobbled like a shopping cart with a bad wheel. You know there has to be a better way.
There is. Building your own saltwater lures isn’t just about saving money, though you will save plenty. It’s about creating something that swims exactly how you want, painted in colors that match your local baitfish, and built to survive the abuse of salt, rocks, and toothy predators. This guide walks you through three complete projects: a wooden crankbait, a soft plastic swimbait, and a spinnerbait. You’ll learn the tools, the safety protocols, and the tuning tricks that separate a lure that catches fish from one that just catches water.

Dr.Fish
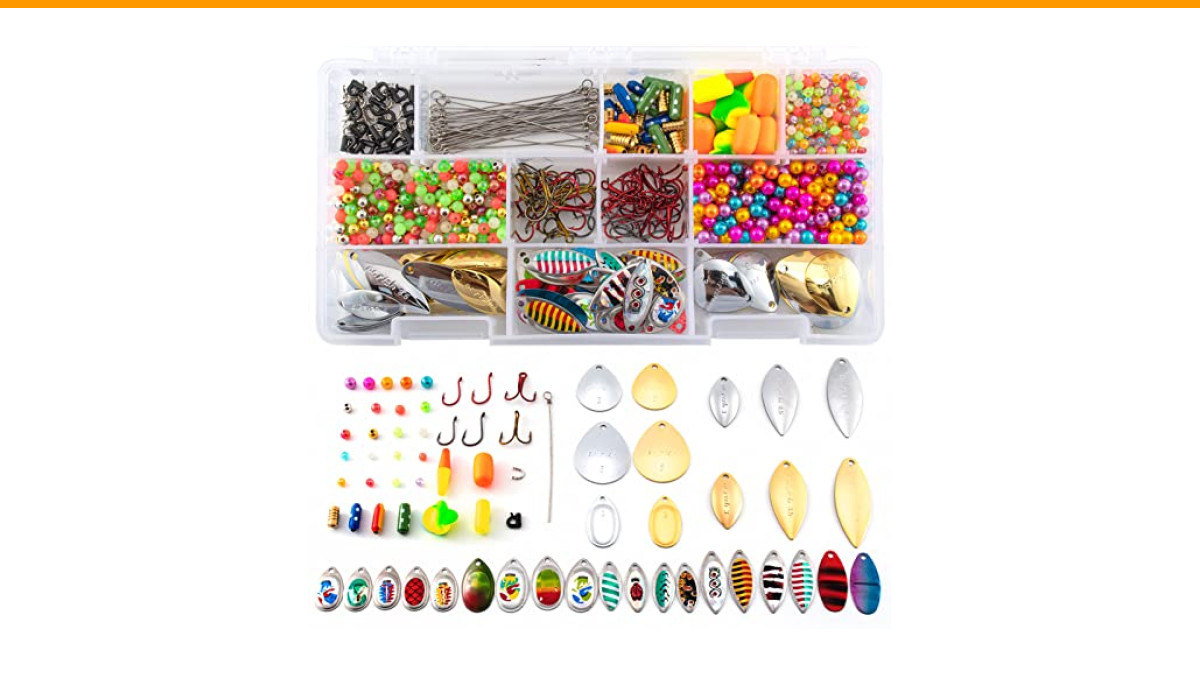
Dr.Fish 1310pk Spinner Making Kit Walleye Rig Lure Making Accessories
- 1310 pieces huge quantity lure making supplies including hooks, spinner blades, spinner shafts, clevises, lure bodies and rig floa…
- Includes total 100 pieces of spinner blade in multiple different styles, sizes and patterns
- Specially chosen tackles allow you to make spinners and walleye rigs with just one kit. We added rig floats, speed change clevis a…
Before we start, a quick note on supplies. A kit like the Dr.Fish 1310pc Spinner Making Kit packs a serious head start. It includes 100 spinner blades, 60 hooks, 70 clevises, shafts, lure bodies, and 1100 beads in a tackle box. You won’t need all of it for the projects below, but having a solid inventory of hardware means you can experiment without making a separate order for every little part. Check the current price on Amazon if you want to see if it fits your budget.
Why Handcrafted Lures Outperform Store-Bought
Store-bought lures are designed for the average angler fishing average conditions. That means compromises. A factory crankbait uses a generic bill angle to appeal to the widest audience. The paint is sprayed on in seconds and cured for minutes. The hooks are often the cheapest the manufacturer could source. You pay retail markup for that mediocrity.
When you build your own, you control every variable. You can weight a crankbait to dive to a specific depth. You can choose a bill material that deflects off rocks instead of snapping. You can use heavy-duty split rings and saltwater-grade hooks that won’t turn to rust after a week. And you can paint it to match the exact sand eel or bunker pattern in your local water.
There’s also the satisfaction factor. Catching a striper on a lure you carved from a piece of scrap wood and painted at your kitchen table feels different. It’s not arrogance. It’s the reward of solving a problem with your hands.
Essential Lure-Making Tools and Materials
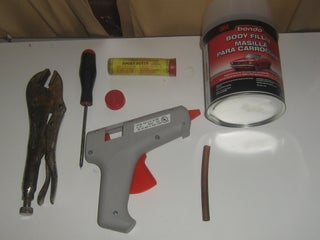
You don’t need a full workshop to start. A basic setup costs less than a few premium lures and covers most projects. Here’s the core list:
- Carving tools: A hobby knife, a small rasp, and sandpaper in 80 to 220 grit. A rotary tool with a sanding drum speeds things up.
- Drill: A hand drill or a small press for through-wire holes and hook hangers. A 1/16-inch bit is the most common size.
- Wire: Stainless steel wire in 0.035 or 0.041 gauge for through-wire construction and spinnerbait frames.
- Lead: For weighting crankbaits and pouring jig heads. Use only lead-free alternatives if you can find them.
- Epoxy: Two-part clear epoxy resin for sealing and coating. UV resin works for small touch-ups but costs more per ounce.
- Paint: Airbrush paints or spray cans. Createx and Auto Air are popular for their flexibility and durability.
- Hardware: Split rings, hook hangers, screw eyes, and hooks. Buy saltwater-grade (stainless or tinned) to avoid corrosion.
Sourcing Low-Cost Components
New components add up fast. The trick is to scavenge and repurpose. Old wooden furniture becomes balsa wood for crankbait bodies. Hardware store wire, like 302 stainless steel from a welding supply shop, costs a fraction of pre-cut lure wire. Melt down old lead weights or tire weights (check they’re lead-free first) for your jig heads.
Thrift stores are gold mines for old wooden spoons and kitchen utensils. A maple spoon carves into a beautiful popper. The handles of broken tools become durable bills. You’ll develop an eye for it after a few builds.
One honest caveat: cheap wire bends easier. For saltwater, you want spring temper wire, not soft annealed. Test a piece by bending it in half. If it stays bent, it’s too soft for through-wire lures.
Safety First: Handling Lead, Epoxy, and Sharp Tools
Lead gets a lot of attention in lure making, and for good reason. Melting lead releases fumes that are toxic. You need a well-ventilated area, ideally outdoors. A respirator with organic vapor cartridges, not just a dust mask, is non-negotiable. Wear thick gloves and safety glasses. Molten lead at 700 degrees will cause severe burns on contact.
Epoxy resin is less dramatic but still requires respect. The hardener is a sensitizer. Repeated skin contact causes allergic reactions in some people. Use nitrile gloves and work in a space with airflow. If you’re using UV resin, don’t stare at the curing light; it emits UV radiation.
Sharp tools are obvious but often overlooked. A slip with a hobby knife sends you to urgent care. Cut away from your body, keep blades sharp (dull blades slip more), and store them in a block or sheath.
Project 1: Building a Classic Wooden Crankbait
This project teaches the fundamentals: shaping, weighting, and finishing. You’ll end up with a shallow-diving crankbait that works for striped bass and bluefish.
Shaping, Weighting, and Installing the Bill
Start with a block of balsa wood or cedar, about 4 inches long, 1 inch wide, and 3/4 inch thick. Draw a side profile of your bait—a shad shape works well. Cut it out with a coping saw, then shape it with a rasp. Round the belly and taper the tail. Keep it symmetrical by checking the profile from the top and bottom.
Drill a hole through the center, from nose to tail, for the through-wire. This wire runs the entire length of the bait and holds the hook hangers and line-tie eye. Use a 1/16-inch bit and go slow to avoid splitting the wood. Thread a piece of 0.041 stainless wire through, leaving a loop at the nose for the line tie and a loop at the tail for the rear hook.
Weighting is where you dial in the action. Most crankbaits need weight near the belly to keep them upright. Drill small holes in the belly and insert lead shot or a strip of lead tape. Start light—you can always add more. The goal is a bait that floats at rest but dives when retrieved.
The bill is the most critical piece. Use a piece of clear polycarbonate or Lexan, about 1.5 inches long and 1 inch wide. Cut a slot in the nose of the bait, insert the bill at a 45-degree angle, and epoxy it in place. The angle determines dive depth: steeper angles dive deeper but create more resistance.
Sealing and Painting for Durability
Wood is porous. If you paint without sealing, water seeps in and ruins the action. Apply two coats of thin cyanoacrylate (super glue) or a water-based sanding sealer. Let it dry completely between coats.
For painting, use an airbrush if you have one. If not, spray cans work fine. Start with a white primer, then add your base color. For a bunker pattern, use a yellow-green base with a darker back and a white belly. Add gill slits and eyes with a fine brush or stencil. The key is to keep it simple; fish don’t care about intricate details.
Seal the paint with two or three coats of clear epoxy resin. This is the armor. A thin coat chips. Apply it in a warm room to avoid bubbles, and rotate the lure for an hour to let it cure evenly. It’s a tedious step, but it’s the difference between a lure that lasts one trip and one that lasts a season.
Project 2: Pouring and Rigging Soft Plastic Swimbaits
Soft plastics are the workhorses of saltwater angling. They catch everything from flounder to redfish. Making your own lets you customize colors and action.
Creating a Two-Part Mold and Injecting Plastic
You have two options for molds: buy a commercial swimbait mold or make your own. For a first attempt, buy a simple mold. Making your own requires a master bait, silicone mold putty, and a lot of patience. The silicone process works, but it’s messy and takes practice.
Once you have a mold, you need plastisol—the liquid plastic. Heat it to about 350 degrees in a dedicated pouring pot. This is not a kitchen project; the plastic is hot and sticky. Add colorant and glitter before heating. Stir slowly to avoid bubbles.
Inject the hot plastic into the mold using a syringe or a pouring spout. Fill the cavity completely, then close the mold and let it cool for a few minutes. Pop out the finished bait and trim the excess flash with scissors.
The trade-off here is time. Heating plastic and cleaning the pot takes 20 minutes per batch. You’ll produce maybe a dozen baits per session. But the cost per bait drops to pennies, and you can experiment with colors that no store carries.
Project 3: Wiring a Spinnerbait and Tying a Jig
Spinnerbaits are simpler than crankbaits but teach you wire-forming skills. You’ll need a pair of round-nose pliers, wire cutters, and your spinner blade kit.
Cut a 6-inch piece of 0.041 stainless wire. Make a small loop at one end for the line tie. Slide on a clevis, then a spinner blade, then another clevis. This assembly lets the blade spin freely. Bend the wire at a 90-degree angle about 1.5 inches from the line tie to form the arm. At the end of the arm, make a loop for the hook. Slide on a soft plastic body or a skirt, then crimp the loop closed around the hook eye.
Jigs are even simpler. Tie a feather dressing or a silicone skirt onto a jig head with thread, then coat the thread wraps with head cement or epoxy. The key is keeping the dressing sparse. Too much material kills the action.
The spinnerbait kit mentioned earlier shines here. You’ll have plenty of blades and clevises to test different combinations. A willow blade gives a tighter flash, while a Colorado blade produces more thump and vibration.
The Art of Tuning: Making Your Lure Swim True
You’ve built a lure. Now the real work begins. A lure that doesn’t swim straight is useless. Tuning is the process of fixing that.
Test the lure in a clear, shallow area or a large bucket. Watch its action. Does it wobble side to side, or does it roll? A roll is a common problem with crankbaits. It usually means the line-tie eye is off-center. Bend the eye slightly to the opposite side of the roll. A small adjustment—a few degrees—makes a big difference.
If the lure runs too shallow, bend the line-tie eye forward, toward the bill. This increases the diving angle. If it dives too deep and digs into the bottom, bend the eye backward. If the lure veers left or right, check the bill. A slightly bent bill causes a curved path. Heat the bill gently and straighten it.
For soft plastics, tuning is about the hook. If the bait spins on the retrieve, the hook point is off-center. Straighten it, or use a different hook. A belly-weighted hook helps keep the bait upright.
Troubleshooting Common Lure Failures
Lures fail. Here’s how to fix the most common issues before they ruin a fishing trip.
| Problem | Likely Cause | Solution |
|---|---|---|
| Paint chipping after one cast | Thin clear coat or not enough curing time | Apply 2-3 additional coats of epoxy resin; let cure 24 hours |
| Hook rusting in saltwater | Low-quality steel or no protective coating | Replace with stainless or tinned hooks; rinse lure in fresh water after each trip |
| Split rings opening under load | Cheap wire or too-small ring diameter | Use heavier gauge split rings; check for gaps before each use |
| Lure rolls on retrieve | Incorrect weighting or line-tie eye misalignment | Add belly weight or bend the line-tie eye opposite the roll |
| Spinnerbait blade won’t spin | Clevis is too tight or blade is bent | Loosen the clevis; flatten the blade with pliers |
| Soft plastic tears after one bite | Plastisol was overheated or not mixed enough | Use a thermometer; stir thoroughly before pouring |
Testing Your Lure: Field Trials and Adjustments
Bench testing tells you a lot, but the real test is on the water. Take your lures to a spot with structure—rocks, a jetty, a drop-off. Cast along the edge and vary your retrieve speed.
Watch the action at different speeds. A lure that swims great at a slow crawl might spin out at a fast burn. Note the depth it runs at. If it’s not reaching the fish, you have two options: slow down your retrieve or add a heavier jig head.
Keep a notebook. Record the conditions, the lure, and the result. After a few trips, you’ll see patterns. Maybe your crankbait works best in the early morning on a slow retrieve. Maybe your soft plastic catches more fish when you let it sink for three seconds before starting the retrieve. These notes are worth more than any fishing report.
Don’t be afraid to modify lures on the water. A pair of pliers to bend the line-tie eye, a file to sharpen hooks, and a bottle of super glue for touch-ups cover most adjustments.
Frequently Asked Questions
What is the best wood for saltwater crankbaits?
Balsa wood is the classic choice because it’s light and easy to shape. Cedar is denser and more durable, which matters when you’re casting into rocks. For saltwater, I prefer cedar with a good epoxy seal. It takes more effort to carve but lasts longer. Avoid pine; it splits too easily.
How do I make my lure dive deeper?
Three ways: increase the bill angle, add weight to the belly, or use a longer bill. Steeper angles create more resistance and push the lure down. Adding weight to the front belly helps it dive faster. A longer bill deflects water and drives the nose down. Start with one change at a time and test it.
Can I melt down old fishing weights to make new jig heads?
Yes, but check the weight first. Many modern weights are lead-free, which has a higher melting point and flows differently. If you’re melting lead, do it outside with a respirator and gloves. Never melt weights that are painted or coated; the fumes are more toxic.
What kind of paint should I use on soft plastic lures?
You don’t paint soft plastics the same way you paint hard baits. The paint flakes off as the bait flexes. Instead, mix colorant into the liquid plastic before pouring. For a custom pattern, use an airbrush with a flexible paint designed for plastics, then seal it with a thin coat of UV resin.
How long does a homemade lure last compared to a store-bought one?
It depends on the build quality. A well-sealed crankbait with epoxy and stainless hardware lasts several seasons. A cheaply made one might not survive a single trip. The difference is the clear coat and the hardware. If you invest in those two things, your lure will outlast almost anything from a tackle shop.
What You Can Do With This Tomorrow
- Start with the crankbait project. It teaches the most transferable skills: shaping, weighting, and tuning.
- Buy a small lure-making kit to stock up on blades, clevises, and hooks without a huge investment.
- Set up a dedicated workspace with good ventilation, especially if you plan to pour lead or use epoxy.
- Test every lure in a bucket of water before you take it to the salt. Fix the action before you waste a day on the water.
- Keep a notebook of your builds. Write down the wood, the bill angle, the weight, and how it performed.
- Invest in quality clear coat and stainless steel hardware. These two items determine your lure’s lifespan.
- Start a scrap bin for old wood, wire, and hooks. You’ll be surprised what you can repurpose.