
Why Bother Bringing Old Lures Back?
You open a dusty tackle box and find a battered crankbait from a trip ten years ago. The paint is chipped, the hooks are rusted, and the split rings look like they’ve seen a war. Most people toss it. That’s a mistake.
A restored lure doesn’t just save you twenty bucks. It carries memory. It might be the exact plug that landed your personal best bass. And honestly, the old ones often swim better than modern mass-produced junk because they were carved and tuned by hand.

DINGSEN
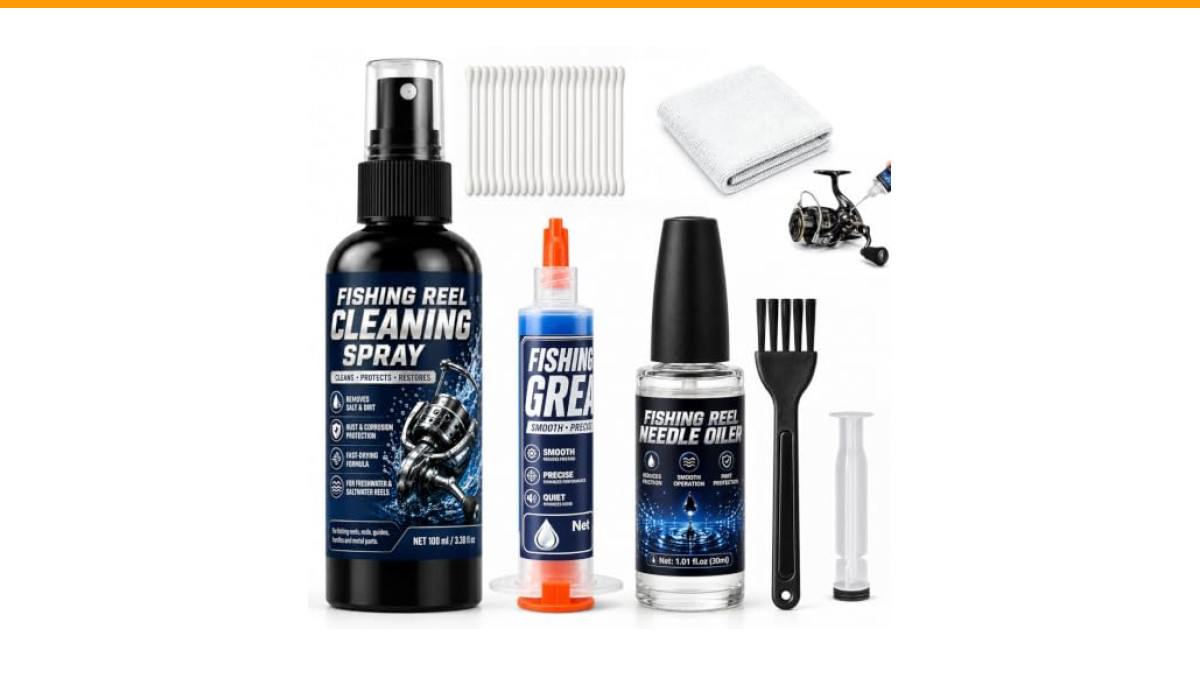
DINGSEN Fishing Reel Oil Kit – Cleans Rust, Prevents Corrosion & Smooths | 100ml Cleaner Sprayer, 30ml Oil, 10ml Grease, Cleans Salt & Sand, Prevents Rust, Lubricates Gears, Extends Reel Life
- All-in-One Kit for Reel Care: This fishing reel cleaning kit includes 100ml fishing reel cleaner, 30ml reel oil, 10ml fishing reel…
- Stop Rust & Saltwater Damage: Salt, sand, and old grease cause rough cranking and corrosion. This reel oil and grease kit removes…
- Clean & Lube in Layers – No More Grinding: Water, bait residue, and dried grease speed up wear. Use this tackle reel care kit to f…
This guide walks you through the whole process, from figuring out what material you’re holding to making it cast and swim like new. You’ll learn the specific cleaning risks for wood versus plastic, how to fix a wobble, and when to sharpen a hook versus replacing it entirely. No fluff, just the workshop steps.
One tool that makes the maintenance side of this much easier is the DINGSEN Fishing Reel Oil Kit. It’s not for the lure body itself, but it handles the reel side of the equation after you’ve cleaned everything. The kit includes a cleaner, oil, grease, and brushes, which helps keep your gear spinning smooth so your freshly restored lure actually runs at the right speed.
Step 1: Identify the Material Before You Touch Anything
Grab the lure and look at the belly weight and the bill. That tells you more than the paint job.
Wood lures (balsa, cedar, pine) are buoyant and fragile. They soak up water if the clear coat is cracked. You must dry them thoroughly before sealing. Never soak a wooden lure in water for hours. A quick wipe with a damp cloth is safer.
Plastic lures (ABS, polycarbonate) are tougher but chemically sensitive. Acetone or nail polish remover will melt the surface into a sticky mess. Stick to mild dish soap and warm water. Check the bill material too—some older bills are metal, which rusts differently than the body.
Metal lures (spoons, blade baits) are the easiest. You can scrub them harder, but watch for plated finishes. Aggressive abrasives will strip the nickel or chrome down to bare brass.
Here’s a quick reference for cleaning agents:
| Lure Material | Safe Cleaner | Avoid | Drying Method |
|---|---|---|---|
| Wood (Balsa, Cedar) | Mild dish soap + warm water (quick wipe) | Soaking, acetone, heat guns | Air dry 24-48 hours before sealing |
| Plastic (ABS, Polycarbonate) | Dish soap + warm water, isopropyl alcohol (70%) | Acetone, lacquer thinner, gasoline | Air dry or low fan, 1-2 hours |
| Metal (Nickel, Brass) | White vinegar + water (1:3) for rust, then soap | Steel wool on plated finishes | Dry immediately, then oil lightly |
Step 2: Disassembly and Hardware Prep
Take the hooks off first. Use a pair of split ring pliers—don’t use a flathead screwdriver, you’ll gouge the screw eyes.
Lay out all the hardware on a magnetic tray or a paper towel in the exact order you removed it. Trust me, you will forget which split ring goes on the front hook hanger versus the rear one. They wear differently.
Inspect the screw eyes. If one is bent or wiggling, now is the time to fix it. Put a drop of thin super glue on the base of the eye and twist it back into the wood or plastic. Let it cure fully before you hang any weight on it.
Check the belly weight (the metal strip or ball on the bottom). If it’s missing, the lure will float upside down or roll on its side. You can replace it with a lead wire or a split shot, but weigh it first. A 1/4-ounce crankbait needs roughly 1/4 ounce of belly weight to run true.
Step 3: The Deep Clean and Rust Removal
Mix a small bowl of warm water with a few drops of Dawn dish soap. Use an old toothbrush—a soft one for plastic, a stiff one for metal. Scrub the body gently to remove the film of old fish slime, algae, and dirt.
For rust on hooks and split rings, don’t use sandpaper. It removes too much metal and creates weak points. Instead, soak the hardware in white vinegar for 15-20 minutes. The vinegar dissolves the rust chemically. After the soak, scrub with a brass brush, rinse with water, and dry immediately.
If the rust is deep and pitted, just throw the hardware away. A pitted hook will snap on a big fish. New treble hooks cost a dollar. Your time and a lost trophy aren’t worth the savings.
For the body, if you see white chalky oxidation on plastic, that’s sun damage. A mild plastic polish (like Meguiar’s PlastX) works well. Apply it with a cotton cloth in small circles. It won’t restore lost color, but it clears the haze.
Step 4: Repairing the Body—Cracks, Paint, and Clear Coat
Wood lures crack. It happens when they smack a rock or get left in the sun. A small hairline crack will let water seep in and ruin the buoyancy over time.
Fill cracks with a thin cyanoacrylate (super glue) or epoxy. For deep gouges, use a two-part epoxy putty (like JB Weld) and shape it with a wet finger before it sets. Sand it smooth with 400-grit then 800-grit sandpaper once dry.
For paint touch-up, you have two good options. A sharpie works for tiny nicks. For larger chips, use model paint (Testors or Tamiya) applied with a fine brush. Match the base color first, then add the belly color. Don’t try to recreate the entire pattern unless you’re a patient artist.
Here’s where the finish matters most. UV resin is the easiest clear coat for small repairs. You paint it on, hit it with a UV flashlight for 60 seconds, and it cures hard. It’s perfect for sealing a single crack or a chipped bill.
Epoxy (like Devcon 2-Ton) is better for a full-body re-coat. It takes 24 hours to cure, but it’s much more durable and scratch-resistant. Mix it thoroughly for a full two minutes, apply a thin coat with a foam brush, and rotate the lure every 10 minutes for the first hour to prevent drips and pooling.
One honest warning: epoxy smells strong and drips everywhere if you’re careless. Work over a wire rack or a piece of cardboard. It’s not a quick job, but the finish lasts years.
Step 5: Restoring the Action—Tuning the Bill and Balance
A lure that doesn’t wobble is just an expensive sinker. The bill (lip) controls the diving depth and the wiggle. If the bill is bent even slightly, the lure will run to one side.
Test the lure in a sink or a shallow pool. Attach a line, give it a sharp pull, and watch the path. If it veers left, the bill is bent right. Use a pair of pliers to gently bend the bill back the opposite direction. Make small adjustments—a millimeter makes a visible difference.
Check the balance by holding the lure by the front hook hanger. The nose should dip slightly. If the tail hangs heavy, the rear hooks are too large or you’re missing a belly weight. Swap the rear treble for one size smaller to fix a tail-heavy roll.
Also check the line tie. If it’s a screw eye, make sure it’s pointing straight down the centerline of the lure. A twisted eye will cause a constant spin.
Step 6: Sharpening vs. Replacing Hooks
Sharp hooks are non-negotiable. A dull hook bounces off a bass’s jaw. You’ll feel the tap, set the hook, and come up empty.
To sharpen a hook, use a flat file or a hook hone. Hold the hook point at a 45-degree angle and file the inside edge (the concave side) only. Three or four strokes is usually enough. You want a sharp needle point, not a chisel.
Test the sharpness by dragging the point across your thumbnail. If it catches and digs in, it’s ready. If it slides, keep filing.
But here’s the rule: if the hook is rusted, bent, or has lost its temper (the metal springiness), replace it. Don’t sharpen a compromised hook. Replace it with a new treble of the same size. VMC and Mustad make quality replacements that are sharper out of the box than most old hooks ever were.
Step 7: Final Assembly and Waxing
Reattach the hardware in reverse order. Use new split rings if the old ones are stretched—a stretched ring will let a hook twist and tangle your line.
Apply a thin coat of carnauba car wax or a spray wax (like Pledge) to the lure body. This does two things: it adds a slick layer that repels water and it protects the new clear coat from UV rays. Buff it with a soft cloth. Don’t use silicone-based sprays; they can react with some plastic finishes and leave a sticky film.
For the hooks and split rings, a drop of light oil on the swivels and rings prevents future rust. Don’t oil the hook points—that just attracts dirt.
Now is the time to service your reel too. A restored lure deserves a smooth retrieve. The DINGSEN reel oil kit includes a cleaner to flush out old grease and a precision oiler for the bail and handle. It’s a solid kit for keeping your gear in sync with your restored lures.
Pro-Tips for Storing Restored Lures
You did the work. Don’t ruin it by tossing the lures loose in a tackle box where they clank against each other.
- Use individual lure boxes with foam slots or silicone separators. Hard plastic boxes with dividers work if the lures don’t touch.
- Add a couple of silica gel packets to each tackle box. They absorb moisture and stop rust before it starts. Replace them every season.
- Store lures with hooks facing the same direction and preferably in a hook guard. A bare treble will scratch the clear coat of the lure next to it.
- Keep them out of direct sunlight. UV rays fade paint and weaken plastic over time.
- For wooden lures, store them in a dry place, not a damp garage. Moisture causes the wood to swell and crack the clear coat.
- Check the hooks before each trip. A quick pass with a sharpening stone takes ten seconds and prevents lost fish.
Frequently Asked Questions (FAQs)
Can I use WD-40 to clean rust off old fishing lures?
WD-40 is okay for loosening rusted screws, but it’s not a cleaner. It leaves a greasy film that attracts dirt. Use white vinegar to dissolve rust, then wash with dish soap and water. Dry thoroughly and apply a proper reel oil to moving parts.
How do I know if a lure is worth restoring?
Check for three things: the body isn’t split or crumbling, the bill is intact, and the screw eyes are solid. If the paint is ugly but the structure is sound, it’s worth saving. If the wood is waterlogged or the plastic is warped, skip it. Vintage collector lures with original paint may be worth more unrestored, so research before you repaint a rare piece.
What’s the best clear coat for a restored wooden lure?
For durability, use a two-part epoxy like Devcon 2-Ton. It takes 24 hours to cure but it’s tough and water-resistant. For a quick repair, UV resin is faster but less scratch-resistant. Avoid nail polish—it’s too brittle and chips easily.
How do I fix a lure that spins instead of wobbling?
A spin usually means the bill is badly bent or the line tie is off-center. Straighten the bill with pliers and check the line tie alignment. Also verify the belly weight is present. A missing belly weight makes the lure unstable and prone to rolling.
Should I replace old treble hooks or sharpen them?
Sharpen them if they’re clean and not bent. Replace them if they’re rusted, pitted, or have lost their spring. A hook that’s been bent and bent back is weakened at the bend and will snap under pressure. New trebles are cheap insurance.
What You Should Do This Weekend
Grab that old tackle box and pull out the worst-looking lure you have. Not the rare collector piece—the one you actually used.
- Identify the material first. Wood, plastic, or metal changes everything.
- Disassemble carefully. Keep the hardware organized.
- Clean with dish soap and water. Use vinegar for rust, not sandpaper.
- Fill cracks with super glue or epoxy putty before painting.
- Touch up paint with model paint, then seal with epoxy or UV resin.
- Test the action in water. Bend the bill to fix a sideways run.
- Sharpen or replace hooks. Store with silica gel packets.
You’ll end up with a lure that looks good and swims true. And you’ll have saved a piece of fishing history from the trash bin. That’s worth the hour of work.
