You’ve got the right rod, a box full of lures, and a spot that’s loaded with fish. Then you tie on a crankbait with a knot that looks fine, but it fails on the third cast. The lure flies off into the abyss, and you’re left re-spooling line with the sun in your eyes. That’s not bad luck. That’s a knot problem.
Most anglers learn two knots and stick with them forever, regardless of line type, lure weight, or fish species. That approach works until it doesn’t. A Palomar knot that’s perfect for a 1/0 hook with 20-pound braid will fail you on a size 10 trout jig with 4-pound fluorocarbon. The knot isn’t bad; it’s just wrong for the job. This guide breaks down the physics of knot strength, gives you a decision flowchart for any situation, and covers the specific techniques that separate casual anglers from the ones who never lose a fish to a failed knot.

HOOK-EZE
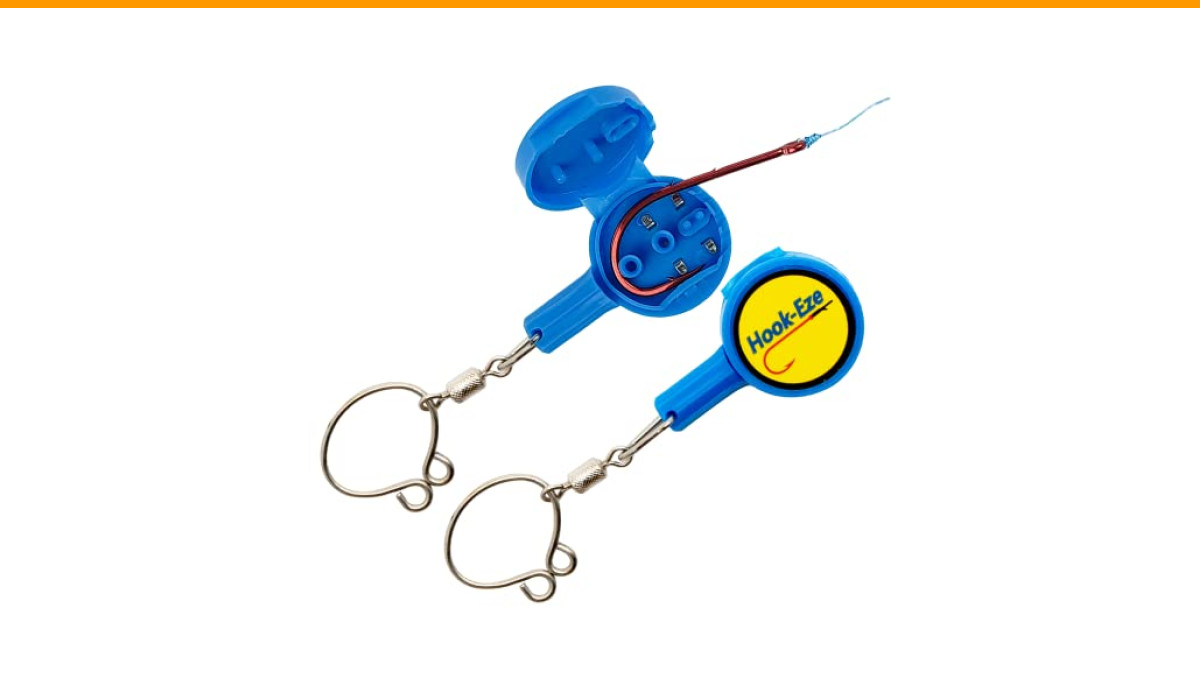
HOOK-EZE 2X Fishing Knot Tying Tool, Standard Size - Safety Device & Line Cutter - Multifunctional Fishing Accessories - Covers Fully Rigged Hooks - Blue
- Everybody Can Tie Their Own Tackle Safely: Prevent fish hook injuries by covering the sharp barb on the fishing hook when tying fi…
- Ideal For Tying A Variety of Fishing Tackle: Suitable for fishing hooks sized from a standard 4/0 down to the smallest hook size #…
- Suitable for Anglers of All Ages and Experience: Perfect for fishermen with dexterity issues such as arthritis as well as young be…
You’ll walk away knowing which knot retains the most line strength, how to test your knots like a tournament angler, and what to do when your hands are numb at 5 AM. No fluff, no recycled basics. Just the mechanics that matter.
One piece of gear that makes all of this easier, especially for beginners or anyone with stiff fingers, is the HOOK-EZE 2X fishing knot tying tool. It covers the hook barb while you tie, so you’re not fighting a sharp point, and it includes a line cutter. It’s a simple safety device that lets you focus on the knot instead of worrying about a hook buried in your thumb.
The Anatomy of a Perfect Knot: Friction, Strength, and Failure
Every knot you tie is a controlled failure point. The line doesn’t break randomly; it breaks where the knot creates stress concentrations. When you pull a knot tight, the line bends around itself, and those bends reduce the line’s ability to handle load. The tighter the bend radius, the weaker the line becomes at that spot.
Knot strength is measured as a percentage of the line’s rated breaking strength. A poor knot might hold 60% of the line’s rating. A great knot holds 90% or more. That difference matters when a big fish makes a sudden run. The line is already at its limit, and the knot is the weak link.
Friction plays a double role. It holds the knot together, but it also damages the line. Braided line has high friction against itself, which can cause the outer fibers to heat up and weaken during a hard pull. Monofilament and fluorocarbon are smoother, but they can slip if the knot isn’t dressed properly. The trick is to cinch every knot slowly and wet it with saliva or water before the final pull. That reduces heat and lets the coils seat evenly.
Most knot failures happen in the first few seconds after you start fighting a fish. That’s when the shock load hits. A knot that was tightened unevenly will have one coil that’s looser than the rest. That loose coil absorbs the shock, and the line snaps. The fix is simple: pull each knot as tight as you can before you even make a cast.
The Ultimate Knot Selection Flowchart (Lure Type + Line = Best Knot)
Stop memorizing knots. Start matching them to the situation. Here’s a practical flowchart that covers 90% of your fishing scenarios.
Step 1: What line are you using?
- Monofilament: Stretchy and forgiving. Works with almost any knot, but needs a knot that won’t slip, like the improved clinch or Palomar.
- Fluorocarbon: Stiff and slick. Slippery knots are a problem. The Palomar knot is your best bet because it doesn’t rely on friction to hold.
- Braid: Slippery when new, especially with PE coatings. The Palomar knot works, but the FG knot is better for connecting to a leader. For direct attachment to a lure, the uni knot with extra wraps is solid.
Step 2: What are you tying on?
- Jig heads and hooks with an open eye: Palomar knot. It’s fast, strong, and nearly impossible to mess up.
- Topwater lures and anything that needs free movement: Non-slip loop knot. This gives the lure a hinged action that a tight knot kills.
- Crankbaits and hard baits: The loop knot again. A tight knot can make a crankbait run sideways.
- Small finesse lures (size 10 or smaller): Micro-knots like the Davy knot or a modified clinch with fewer wraps. Big knots on tiny eyes are a disaster.
Step 3: What fish are you chasing?
- Bass, pike, muskies: Heavy line, strong knots. Palomar or a double-uni knot for leaders.
- Trout and panfish: Light line, small hooks. The Davy knot or a 4-wrap improved clinch is all you need.
- Saltwater species: Abrasion resistance matters. The FG knot for braid-to-leader, and the non-slip loop knot for lures.
This flowchart gets you in the right ballpark every time. You don’t need ten knots. You need five knots used in the right places.
The Big Three: Palomar, Improved Clinch, and Uni Knots (With Pro Variations)
These three knots handle most freshwater and light saltwater situations. Each has a specific strength profile, and each has a variation that improves its performance.
The Palomar Knot: The Reliability King
The Palomar is the strongest knot for braided line and fluorocarbon. It retains about 95% of the line’s breaking strength when tied correctly. The key is to double the line and pass the loop through the eye, then tie a simple overhand knot, then pass the hook through the loop. Pull tight slowly and wet the line.
One mistake anglers make is using the Palomar on hooks with a small eye. The doubled line won’t fit. If you’re tying on a size 6 hook or smaller, skip the Palomar and use a clinch knot instead.
The Improved Clinch Knot: The Versatile Standard
The improved clinch is the most common knot in fishing, and for good reason. It works with monofilament and fluorocarbon, and it’s easy to tie even in low light. The standard version has five wraps around the standing line, then the tag end goes through the loop near the eye, then through the big loop you just created. Pull tight and you’re done.
Here’s the pro variation: use six wraps for line under 8-pound test, and four wraps for line over 15-pound test. More wraps don’t always mean more strength. Too many wraps on thick line create a bulky knot that doesn’t seat properly.
When to swap the Improved Clinch for the Trilene Knot
If you’re using limp monofilament, the improved clinch can slip under heavy load. The Trilene knot is a simple fix. You tie it exactly like the improved clinch, but you pass the tag end through the first loop a second time before pulling tight. That extra pass adds a coil that grips the line better.
Use the Trilene knot when you’re fishing with old monofilament that’s lost some of its stiffness, or when you’re using a very thin diameter line that tends to slip through a standard clinch knot.
The Uni Knot: The All-Arounder
The uni knot is a sliding knot that can be used for attaching lures, tying two lines together, and even creating a loop. It’s not the strongest knot, but it’s the most versatile. For attaching a lure, make a loop, pass the tag end through the eye, then wrap the tag end around the standing line five times, passing it through the loop you made. Pull tight.
For braided line, use seven wraps instead of five. The extra friction prevents the knot from slipping on the slick PE coating.
Specialized Knots for Specific Scenarios
The Non-Slip Loop Knot for Topwater Action
A tight knot kills the action of a topwater lure. A popper or a walking bait needs to swing freely on the line to create that side-to-side glide. The non-slip loop knot creates a fixed loop that lets the lure pivot naturally. It’s also a great choice for suspending jerkbaits, where a tight knot can make the bait hang nose-down.
The knot is a variation of the clinch knot. You tie a loose overhand knot in the line, pass the tag end through the eye, then back through the overhand knot, then wrap the tag end around the standing line four or five times, and finally pass the tag end back through the loop you created. Pull tight, and you have a loop that won’t close.
It takes practice to get the loop size right. Aim for a loop that’s about a quarter-inch long. Too long, and the lure looks unnatural. Too short, and you lose the action.
The FG Knot for Braid-to-Leader (Zero Bulk)
When you’re fishing braid with a fluorocarbon leader, the connection knot is the weakest link. The FG knot is the gold standard because it’s incredibly thin and strong. It slides through the guides without a bump, and it retains over 90% of the line’s strength.
The FG knot is not easy to tie. It involves weaving the braid and leader together in a series of alternating wraps. It takes practice, but it’s worth it. A poorly tied blood knot or double-uni knot creates a lump that catches on the guides and weakens the whole setup.
If you’re new to the FG knot, practice at home with a piece of rope before you try it on the water. It’s the kind of knot that becomes muscle memory after a dozen tries.
Micro-Knots for Finesse and Panfish Lures
Tiny jigs and trout magnets have hook eyes that are barely big enough for the line. A standard clinch knot with five wraps won’t fit through the eye, and if it does, the knot is so bulky that it looks like a ball of thread. The solution is a micro-knot like the Davy knot.
The Davy knot is a simple two-wrap knot that’s small enough for size 20 hooks. It’s not the strongest knot, but it’s strong enough for light line and small fish. The key is to wet the knot and pull it tight slowly so the wraps seat evenly.
For slightly larger finesse lures, use a 4-wrap improved clinch knot. The fewer wraps reduce bulk, and with 4-pound test line, you don’t need the extra friction of a 5-wrap knot.
How to Test Knot Strength Like a Pro (The 100% Pull Method)
You can’t trust a knot until you’ve tested it. The pros don’t just tie a knot and hope it holds. They test it with a method that simulates the shock of a fish strike.
The 100% pull method is simple. Tie your knot to a hook, then attach the hook to a solid object like a fence post or a dock cleat. Hold the rod at a 45-degree angle and pull the line with steady pressure until it breaks. If the line breaks at the knot, the knot is weak. If the line breaks somewhere else, the knot is stronger than the line.
Do this with every new spool of line you buy. Line brands have different stiffness and coating properties, and a knot that works with one brand might slip with another. Testing takes five minutes and saves you from losing a trophy fish.
You can also test knots with a spring scale if you want precise numbers. Tie the knot, attach it to the scale, and pull. Compare the breaking point to the line’s rated strength. A knot that breaks at 80% of the line’s rating is acceptable. Below 70%, you need a different knot.
Common Mistakes That Destroy Knot Strength (And How to Fix Them)
Mistake #1: Not Wetting the Knot
Dry line creates friction and heat when you pull it tight. That heat weakens the line, especially with braid. Always wet the knot with saliva or water before the final pull. It’s a tiny step that makes a huge difference.
Mistake #2: Pulling the Knot Tight Too Fast
Snapping the knot tight with a quick jerk causes the coils to seat unevenly. One coil ends up tighter than the others, and that’s where the line breaks. Pull slowly and steadily until the knot is fully seated.
Mistake #3: Using the Same Knot for Every Line Type
Fluorocarbon is stiff and slick. Braid is slippery when new. Monofilament is stretchy and forgiving. Each line type needs a knot that matches its properties. If you’re using a clinch knot with heavy braid, expect it to slip.
Mistake #4: Trimming the Tag End Too Short
You want the tag end to be about an eighth of an inch long. If you trim it flush with the knot, the knot can loosen and slide. If you leave it too long, it catches on the guides and creates drag. A short stub is perfect.
Mistake #5: Ignoring Line Twist
If your line has twist, it’s weaker than straight line. Twist happens when you tie on a spinnerbait or a spoon that spins the line. Check for twist by letting out a few feet of line and looking for loops and kinks. If you see them, cut off the twisted section and retie.
Mistake #6: Not Checking the Knot After a Big Fish
Every knot is damaged during a fight. The coils shift, and the line gets abraded. After landing a big fish, cut off the lure and retie. It’s a habit that saves you from losing the next big one.
Night Fishing and One-Handed Knot Tying Techniques
Night fishing is a different game. You can’t see the line, your hands are cold, and every knot takes twice as long. The solution is to practice one-handed knot tying until it’s automatic.
The one-handed clinch knot is the easiest to master. Hold the hook in one hand and the line in the other. Wrap the line around your fingers to create the loops, then pass the tag end through the eye and pull. It’s awkward at first, but after a dozen practice sessions, you can tie it in the dark.
Another trick is to pre-tie a bunch of leaders and lures at home. You can attach a snap swivel to your main line and swap out pre-tied leaders in seconds. That way you only need to tie one knot on the water, and you can do it in the light of a headlamp.
For braided line, the one-handed uni knot is your best bet. It’s a knot that doesn’t require perfect precision, and it holds well even when tied sloppily. It’s not the strongest knot, but it’s better than a failed knot in the dark.
Frequently Asked Questions (Knot Strength Myths Debunked)
Does a wet knot really matter?
Yes, and it’s not just about friction. Wetting the knot helps the coils seat evenly against each other. Dry line, especially braid, can have tiny fibers that catch and create weak spots. A quick dip in the water before you pull tight is the cheapest insurance you’ll ever buy.
Is the Palomar knot always the strongest?
No. The Palomar is strongest for braid and fluorocarbon, but it’s bulky. On small hooks, the bulk prevents the knot from seating properly, and it becomes weaker than a simple clinch knot. On heavy mono, the Palomar can also be weaker because the doubled line creates a sharp bend at the eye.
Why does my braid slip on the hook eye?
New braided lines have a slick PE coating that makes them slippery. The coating wears off after a few casts, but until then, the line can slide through the knot. Use a knot with more wraps, like the uni knot with seven wraps, or wet the line and pull extra tight to seat the knot.
Should I use a snap swivel or tie directly to the lure?
Snap swivels are convenient, but they add weight and can affect lure action. For topwater lures and crankbaits, a direct connection with a loop knot gives better action. For quick changes, a snap is fine, but use a quality snap that won’t open under pressure. Avoid cheap snaps that bend and fail on a hard strike.
How often should I retie my knot during a fishing day?
Every time you catch a fish or snag your lure, retie. The knot has been stressed, and the line has been abraded. If you’re fishing a rocky area or around structure, check your line for nicks after every few casts. Retie if you see any damage. It’s a small time investment that prevents a big loss.
What to Practice This Week
- Learn the Palomar knot first. It’s the strongest knot for most situations, and it takes less than 30 seconds to tie.
- Practice the non-slip loop knot until you can tie it without thinking. It’s the key to getting the right action from topwater lures and jerkbaits.
- Buy a spool of cheap monofilament and practice the FG knot at home. It’s hard, but it’s the best connection for braid-to-leader.
- Test every new spool of line with the 100% pull method. Know what your knot is actually capable of before you hit the water.
- Use a safety tool like the HOOK-EZE knot tying tool to cover the hook barb while you tie. It saves your fingers and makes it easier to focus on the knot.
- Retie after every fish. It’s a habit that separates anglers who lose trophies from anglers who land them.