
You’ve just mounted your new fish finder, run the transducer cable, and now you’re staring at two bare wires and a 12V battery. The question hits you: should you just crimp these directly to the terminals? It’s tempting. It’s quick. And it might be the worst thing you do to your electronics all season.
I’ve installed more sonar units than I can count, and I’ve also fixed the damage caused by sloppy wiring. This article walks you through exactly what happens when you wire direct, when it’s actually fine, and when it causes expensive problems. You’ll leave knowing the right way to power your unit, what gauge wire to use, and why a fuse isn’t optional.
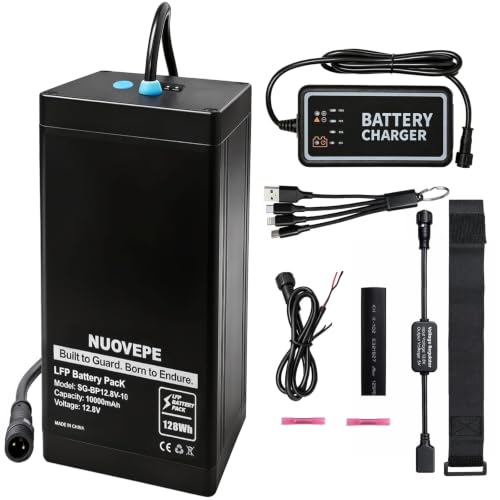
NUOVEPE
12V 10Ah Portable Lithium Fish Finder Battery Kit, 4-in-1 Charging Cable | Waterproof kayak battery with 4-in-1 charging cable for marine fishing; powers GPS, phones, action cameras & outdoor devices
- Say goodbye to the hassle of charging multiple devices: This 12V lithium battery kit includes a 4-in-1 charging cable that support…
- Excellent Waterproof Performance and Efficient Heat Dissipation: This marine battery features an aluminum alloy structure, compare…
- Reliable Power Kit – Essential for Explorers: This lithium battery power kit is compatible with fish finders, GPS, depth sounders,…
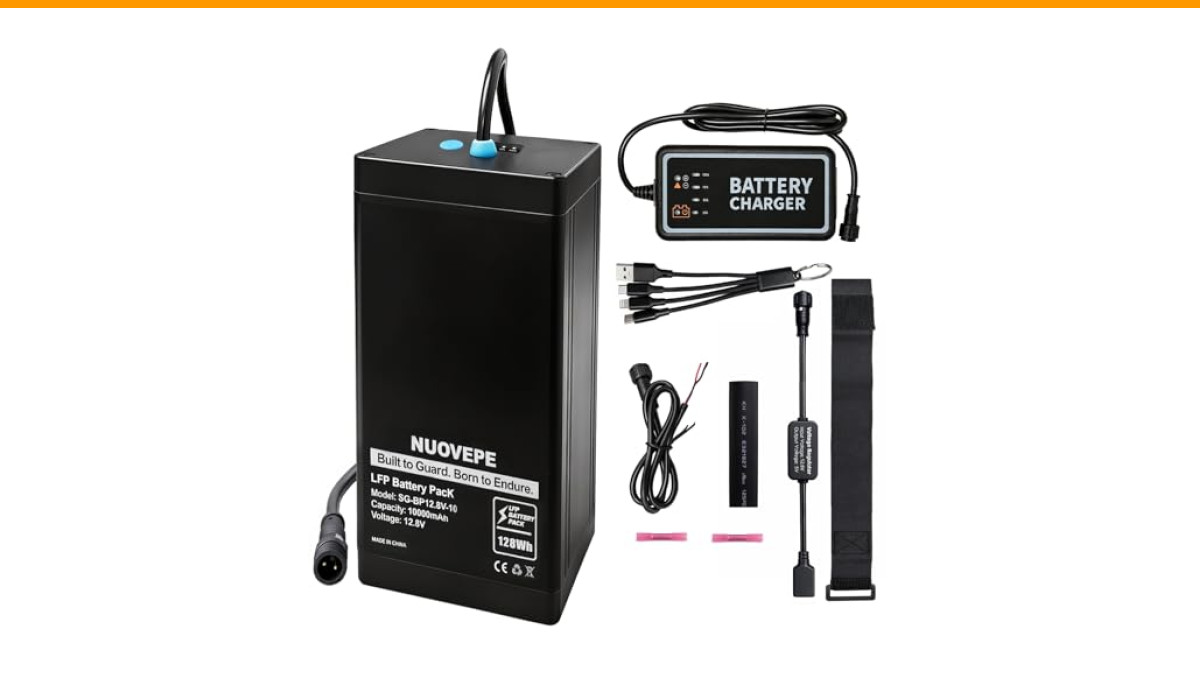
If you’re running a kayak or a small boat and need a clean, portable power source, a compact lithium battery kit like the NUOVEPE 12V 10Ah Portable Lithium Fish Finder Battery Kit eliminates most of the wiring headaches. It comes with a 4-in-1 charging cable and built-in protection, so you can skip the hardwiring debate entirely.
Direct Wiring: The Short Answer and the Long-Term Risks
Yes, you can wire a fish finder directly to the battery. Most units draw between 0.5 and 3 amps, and a standard 12V battery handles that easily. But ‘can’ and ‘should’ are different questions.
The real problem isn’t the connection itself. It’s what happens after you make it. A fish finder sitting on a boat hull vibrates, flexes, and gets bumped. A solid copper wire bolted to a terminal will eventually work itself loose. When that happens, you get intermittent power loss. Your screen flickers, shuts off mid-fish, and you miss the bite.
Worse, a loose connection creates resistance. Resistance generates heat. Heat melts insulation, and melted insulation leads to short circuits. I’ve seen a trolling motor battery terminal literally welded to a wire nut because someone skipped the proper connector.
So direct wiring works, but only if you do it right. That means using a proper ring terminal, a fuse within 6 inches of the battery, and heat shrink tubing over every connection. No electrical tape. No twist-and-tape. No wire nuts on a boat.
Fuses, Wire Gauge, and Voltage Drop: The Numbers That Matter
Let’s talk about the fuse first because it’s the most skipped step. A fish finder’s power cable has a small inline fuse, usually 3 to 5 amps. That fuse protects the unit itself. But the wire from the battery to that fuse is unprotected.
If that wire chafes against a sharp edge in the hull and shorts to ground, you get a dead short. Without a fuse near the battery, that wire becomes a heating element. It will melt, smoke, and potentially start a fire before the fish finder’s internal fuse blows. So install a fuse rated for your wire gauge, not your fish finder. A 10-amp fuse on 16 AWG wire is a good baseline for most units.
Wire gauge matters more than most anglers think. For runs under 10 feet, 16 AWG handles 5 amps with negligible loss. But if your battery sits in the bow and your unit is at the console, you might have 15 or 20 feet of wire. At that length, 16 AWG drops voltage noticeably.
Here’s the rule: for every 10 feet of total circuit length (positive plus negative), step up one gauge. A 20-foot run needs 14 AWG minimum. A 30-foot run needs 12 AWG. This isn’t about safety—it’s about performance. Low voltage makes your screen dim, your GPS slow, and your transducer ping erratically.
I learned this the hard way on a bass boat. My unit would boot up fine at the dock, then randomly reboot on plane. The voltage drop under load was killing it. Re-running with 12 AWG fixed it instantly.
Interference and Ground Loops: Why Your Screen Shows Garbage
Direct wiring to the battery is actually the best way to avoid interference. The alternator and trolling motor create electrical noise that travels through the boat’s wiring harness. Tapping into an accessory circuit feeds that noise straight into your fish finder.
You’ll see it as random dots on the screen, false bottom readings, or erratic depth numbers. It looks like a software bug, but it’s almost always dirty power.
There’s a catch, though. If your fish finder and your trolling motor share the same battery, you’ll get interference every time the trolling motor runs. The motor’s brushes create a massive electromagnetic field. Your transducer picks it up as noise.
The fix is simple: run the fish finder off the cranking battery, not the trolling battery. If you only have one battery, install a noise filter inline. They cost about $15 and solve 90% of interference problems.
Also, never run the fish finder’s power cable alongside the transducer cable. Keep them at least 6 inches apart. Otherwise, the power cable’s magnetic field bleeds into the transducer signal. That’s a different kind of interference, and it’s entirely preventable with smart routing.
Battery Chemistry and Your Fish Finder: Lead-Acid vs. Lithium
The type of battery you use changes the wiring math. A standard lead-acid battery sits around 12.6V when full. A lithium iron phosphate (LiFePO4) battery sits at 13.2V. That’s a 5% difference, and most fish finders handle it fine.
But lithium batteries behave differently under load. They hold voltage steady until they’re nearly empty, then drop off a cliff. A lead-acid battery slowly loses voltage over hours. Your fish finder’s low-voltage alarm might not trigger with a lithium battery until it’s too late.
More importantly, lithium batteries have a battery management system (BMS) that protects against over-discharge. If you drain a lithium battery below its cutoff voltage, the BMS shuts it off completely. Your fish finder just goes dark. No warning, no gradual dimming. That’s why a dedicated battery with a visible charge indicator is worth the money.
The NUOVEPE 12V 10Ah kit solves this with its built-in protection and compact aluminum housing. It’s designed for fish finders and GPS units, so you don’t have to guess about compatibility. The 10Ah capacity runs a typical 2-amp fish finder for about 5 hours of continuous use. That’s a full day of fishing for most people.
One thing to watch with lithium: don’t leave it on the charger overnight routinely. The BMS handles it, but heat is the enemy of lithium cells. Charge it when you get home, unplug it when it’s full, and it’ll last years.
Comparing Your Wiring Options
| Method | Best For | Pros | Cons |
|---|---|---|---|
| Direct to Battery (Fused) | Permanent installations, larger boats | Reliable power, no voltage drop if sized right, clean setup | Requires proper crimping, fuse placement, and wire routing |
| Cigarette Lighter Plug | Small boats, temporary setups | Plug-and-play, easy to remove, no wiring skills needed | Poor connections cause voltage drops, can pop fuses, less weatherproof |
| Portable Lithium Battery Kit | Kayaks, canoes, rental boats | No wiring at all, built-in protection, multi-device charging | Limited capacity (10Ah), needs recharging, adds weight |
| Fuse Block / Power Panel | Multi-device setups (fish finder + lights + radio) | Centralized fuses, clean distribution, easy troubleshooting | More cost, more installation time, needs space |
For a kayak or a small jon boat, the portable lithium kit wins. You avoid drilling holes, running wires, and dealing with corrosion. For a bass boat or a center console, a fused direct connection to a dedicated house battery is the professional standard.
Common Questions About Fish Finder Power
Can I wire my fish finder to the same battery as my trolling motor?
Technically yes, but you’ll likely regret it. The trolling motor draws 20 to 50 amps when running, which causes voltage sag. Your fish finder sees that sag as a power dip. Plus, the motor’s brushes generate electrical noise that corrupts your sonar signal. Use a separate battery if you can. If you can’t, install a noise filter and keep the wires as far apart as possible.
What size fuse do I need for a fish finder?
Match the fuse to the wire gauge, not the device. For 16 AWG wire, use a 10-amp fuse. For 14 AWG, use a 15-amp fuse. Place the fuse within 6 inches of the battery positive terminal. This protects the entire wire run from a short circuit. The fish finder’s own inline fuse (usually 3-5 amps) protects the unit itself.
How long will a 12V 10Ah lithium battery run a fish finder?
Most fish finders draw between 1 and 3 amps. At 2 amps average draw, a 10Ah battery gives you roughly 5 hours of run time. If you’re using GPS and backlight at full brightness, that drops to 3-4 hours. At minimum brightness without GPS, you can stretch it to 7-8 hours. Always carry a spare or a power bank if you fish all day.
Is it safe to use a lithium battery for a fish finder in a kayak?
Yes, and it’s actually safer than a lead-acid battery in that setting. Lithium batteries are sealed, so no acid spills. They’re also lighter, which matters on a kayak. The NUOVEPE kit specifically is built with an aluminum housing that handles heat and water exposure well. Just make sure you keep the connections dry and store the battery in a dry bag when not in use.
Why does my fish finder turn off when my boat starts?
That’s a voltage drop issue. When the starter motor cranks, it pulls hundreds of amps for a split second. The battery voltage sags below 10V momentarily, which resets your fish finder. The fix is to power the fish finder from a separate battery or add a large capacitor (like a car audio power cap) to smooth the sag. A portable lithium kit avoids this entirely because it’s isolated from the cranking circuit.
What I’d Do Differently Next Time
Looking back at my own installs, I’d skip the cigarette lighter adapter on my first boat. It worked, but the connection was always loose, and I blew three fuses before switching to a hardwired setup. On my current boat, I use a fused direct connection with 12 AWG wire and a dedicated 12V battery for electronics. It’s clean, it’s reliable, and I never think about it.
For my kayak, I use a portable lithium kit. I don’t want to drill holes in a plastic hull, and I like being able to move the unit between boats. The trade-off is capacity. A 10Ah battery means I have to manage my power usage on long trips. But the convenience outweighs the limitation.
Here are the rules I now follow on every install:
- Always fuse the positive wire within 6 inches of the battery. No exceptions.
- Use ring terminals crimped with a proper tool, not pliers. A loose crimp is a fire hazard.
- Size your wire for the total run length, not just the device’s amp draw. Go one gauge bigger if you’re unsure.
- Keep power and transducer cables separated by at least 6 inches to avoid interference.
- Use a dedicated battery for electronics if you run a trolling motor. Your sonar will thank you.
- For kayaks and small boats, skip the wiring entirely and use a portable lithium kit with built-in protection.
- Check your connections every month. Corrosion and vibration are the two biggest killers of marine electronics.
Wiring a fish finder isn’t complicated, but it rewards careful work. Take the extra 20 minutes to do it right, and you’ll never have to think about it again. That’s worth more than any fish you’ll catch.
