
You just bought a new fish finder, and the box is sitting on the workbench. If your boat has a fiberglass hull, the install is straightforward. But if you own an aluminum boat — a jon boat, a riveted utility skiff, or a welded deep-V — the job gets tricky fast. The hull is thin, the rivets are unforgiving, and the last thing you want is a leak or a corroded transducer bracket.
This guide covers the structural realities of aluminum hulls. You’ll learn how to choose a mount that won’t crack your hull, where to place the transducer for clean readings at speed, and how to run cables without drilling a single new hole. I’ll also walk through grounding to stop electrical noise and how to keep galvanic corrosion from eating your hardware. By the end, you’ll have a fish finder that works reliably and a boat that stays dry.

WINDFRD
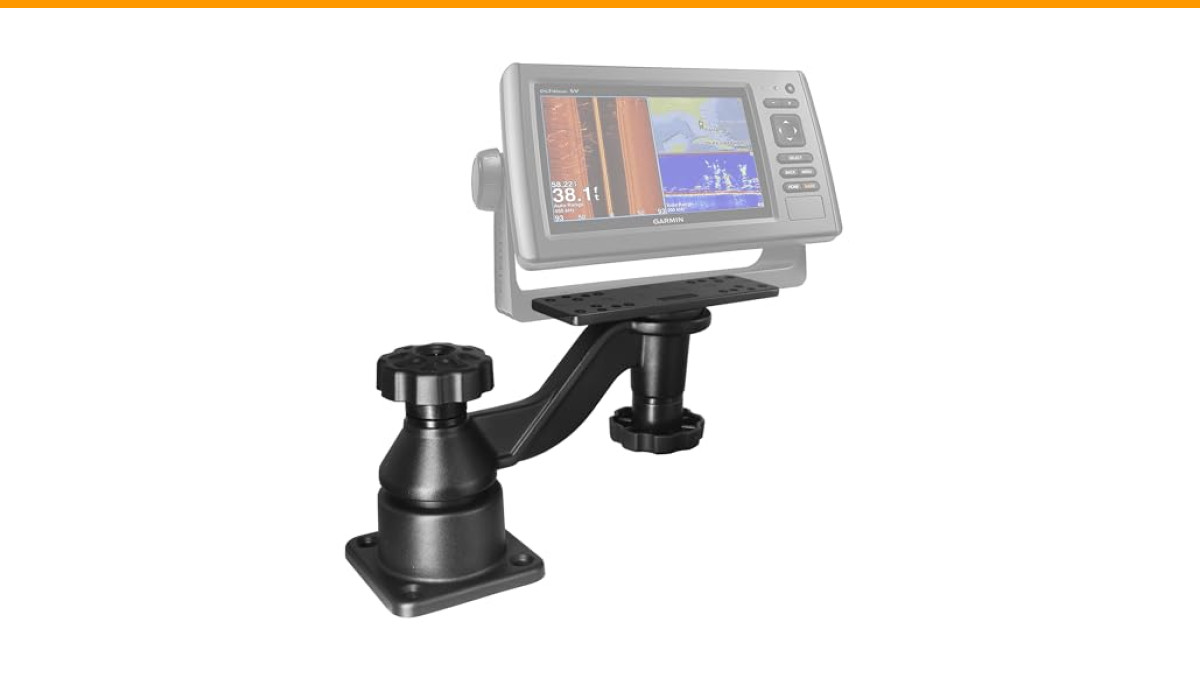
WINDFRD Aluminum Swing Arm Fish Finder Mount for 5"-12" Screens | Horizontal swing arm mount for chartplotters. Fits 5-12" screens. Compatible with Garmin Lowrance Humminbird
- Heavy Duty - Extra strong load-bearing marine electronic mount is made of all aluminium and can hold up to 110 lbs. static and 22…
- Designed for High Salt Marine Environment - Constructed of Powder-Coated Marine-Grade Aluminum and Stainless Steel Hardware. The m…
- Superior Compatibility - Heavy-duty mounting base down-drilled to mount on any flat surface, such as the dashboards, decks of boat…
For most aluminum boats, a quality mounting bracket makes the difference between a solid install and a shaky one. The WINDFRD Aluminum Swing Arm Fish Finder Mount handles screens from 5 to 12 inches and holds up to 110 lbs. static weight. It’s built from powder-coated marine-grade aluminum with stainless steel hardware, so it won’t corrode when you’re running in saltwater. The 360-degree pivot points let you angle the screen toward the driver or the casting deck without loosening bolts.
Tools and Materials Needed for Aluminum Boat Installation
Before you touch the boat, gather these items. Aluminum hulls punish you for improvising with the wrong tools.
- Variable-speed drill with a clutch (avoid stripping thin aluminum)
- Sharp 1/8-inch and 3/16-inch drill bits (cobalt or titanium for hard alloys)
- Marine-grade sealant (3M 5200 or 4200 — pick 4200 if you ever want to remove the mount)
- Stainless steel screws with lock washers (never use plain steel hardware)
- Wire strippers, crimpers, heat-shrink tubing, and a heat gun
- Zip ties with UV protection for cable management
- Multimeter for testing power and grounds
- Rubbing alcohol and a clean rag for surface prep
One thing most tutorials skip: a drill stop. It’s a small collar that fits on the drill bit and prevents you from punching through the hull. Aluminum hulls are often only 0.080 to 0.125 inches thick. A drill stop costs a few dollars and saves you from a leak you’ll fight all season.
Choosing the Best Mount Type for Your Aluminum Hull
The mount you choose depends on your hull construction and how much you care about drilling holes. Riveted hulls and welded hulls behave differently.
Clamp-On Mounts for Jon Boats
If you own a flat-bottom jon boat or a small skiff, a clamp-on mount is the smartest option. These mounts attach to the transom or gunwale without any drilling. They use a C-clamp or a ratcheting mechanism with rubber pads to grip the aluminum. The whole install takes five minutes.
Clamp mounts work best on transoms that are 1 to 2 inches thick. Jon boat transoms are usually plywood or solid aluminum extrusions, so they handle clamping pressure fine. The downside is theft risk — you should take the mount inside when you park the boat on a trailer overnight. Also, clamp mounts can vibrate loose at high speeds. Check the tightness every few outings.
Epoxy and Adhesive Mounts for Riveted Hulls
Riveted hulls have seams that flex. Drilling near a rivet line can crack the thin aluminum skin. If you want a permanent transducer mount without screws, use a marine-grade epoxy adhesive like 3M 5200 or a two-part structural epoxy.
Clean the surface with alcohol, scuff it with 80-grit sandpaper, apply the epoxy, and hold the mount in place with tape or a strap for 24 hours. The bond is strong enough to hold a transducer at 30 mph. The trick is surface prep — any oil or oxidation kills the bond. This method also creates a waterproof seal, so you don’t need to worry about leaks around screw holes.
The trade-off is removal. Epoxy mounts do not come off cleanly. You’ll likely damage the paint or the mount itself if you try to reposition. So get the placement right the first time.
| Mount Type | Best For | Hull Damage Risk | Removal Difficulty | Speed Rating |
|---|---|---|---|---|
| Clamp-On | Jon boats, temporary installs | Low (no drilling) | Easy (unclamp) | Good up to 20 mph |
| Epoxy/Adhesive | Riveted hulls, permanent installs | Very Low | Very Hard (destructive) | Excellent |
| Through-Bolt (Stainless) | Welded hulls, heavy transducers | Medium (requires drilling) | Moderate | Excellent |
| Trolling Motor Mount | Kayaks, small electric boats | None (uses existing motor) | Easy | Limited to trolling speed |
Step-by-Step Transducer Installation on Aluminum
Transducer placement matters more than any other decision. A bad location gives you a screen full of noise or a total loss of bottom reading above 10 mph.
Positioning the Transducer for Accurate Readings
On an aluminum hull, the transducer must sit in clean water flow. That means away from rivets, strakes, and the propeller wash. The ideal spot is on the starboard side of the transom, about 6 to 8 inches from the centerline. That side usually has cleaner water because the prop rotation pulls air to the port side.
Mount the transducer so the bottom edge sits slightly below the hull line — about 1/8 inch. If it sits too high, it will catch air and lose readings at speed. Too low, and it creates drag and risks hitting submerged logs. Use a straightedge across the hull bottom to check alignment.
For a through-bolt install, drill a pilot hole with the 1/8-inch bit, then step up to 3/16-inch. Apply a generous bead of marine sealant to the bolt threads and the hole before inserting. Tighten the nut snug, but don’t crush the aluminum — aluminum deforms easily. Finger-tight plus a quarter turn is usually enough.
Mounting on the Transom vs. Trolling Motor
Transom mounting gives you readings at planing speed. It’s the right choice for bass boats and bay boats. Trolling motor mounting puts the transducer on the motor’s lower unit, which reads well at slow speeds but goes haywire above 3 mph because of turbulence from the prop.
Some anglers run two transducers — one on the transom for running, one on the trolling motor for fishing. If you can’t afford that, pick the transom mount. You can still read bottom while drifting. You just won’t get a clean forward-looking view from the bow.
On riveted hulls, avoid mounting directly over a rivet line. The flex of the hull at those seams will crack the sealant over time. Move the transducer 2 inches left or right to solid aluminum.
Running Cables Without Drilling New Holes
Drilling holes for cables is the fastest way to create a leak. Aluminum boats have existing pathways you can use.
Routing Through Existing Conduits and Gunwales
Most aluminum boats have a hollow gunwale or a wiring chase under the gunnel. Pop off the plastic access covers and look inside. You’ll usually find a bundled set of wires running from the console to the stern. Fish your transducer cable alongside them using a wire snake or a stiff piece of wire.
If there’s no conduit, run the cable along the inside of the gunwale and secure it with zip ties every 12 inches. Use a rubber grommet where the cable passes through any bulkhead or metal edge. Aluminum edges are sharp and will chafe through the cable insulation within a season.
At the transom, route the cable through the existing motor well drain or a pre-drilled access hole. If you must drill a new hole, make it at least 3/4 inch in diameter and fill it with a cord grip or a rubber grommet filled with marine sealant. A cable that rubs against raw aluminum will eventually short out.
Wiring and Power Connection Best Practices
Aluminum boats have a unique electrical problem: the hull itself can act as a ground path, which causes interference on your fish finder screen. The fix is a dedicated ground wire.
Run a separate black ground wire from the fish finder directly to the negative terminal of your battery. Do not rely on the aluminum hull as a ground. The aluminum creates a galvanic cell with the stainless steel bolts and the transducer, producing a small voltage that shows up as random noise or a false bottom on your display.
Connect the power wire to the fuse panel or directly to the battery with an inline fuse rated for the fish finder’s amperage — usually 2 to 5 amps. Use heat-shrink butt connectors for all splices. Crimp them properly, then shrink the tubing. Do not use twist-on wire nuts; they vibrate loose on boats.
One extra step: add a ferrite bead or a noise filter on the power cable near the fish finder. Aluminum hulls pick up ignition noise from the outboard motor. A $10 noise filter clears up 90 percent of interference issues on aluminum boats.
Preventing Galvanic Corrosion and Water Leaks
Stainless steel hardware on an aluminum hull creates a galvanic reaction. The stainless is more noble, so the aluminum corrodes around the fastener. You’ll see white powder and pitting around the screw heads within a few months in saltwater.
Prevent this by isolating the metals. Use nylon washers between the stainless steel bracket and the aluminum hull. Apply a liberal coat of Tef-gel or Lanocote to the threads and the underside of the screw heads. These products act as a barrier and stop the electrolytic reaction.
For the transducer bracket, use the included 316 marine-grade stainless steel hardware if your mount provides it — the WINDFRD mount ships with those. But still apply sealant to the bolt holes. The sealant does double duty: it stops water from entering the hull and it insulates the fastener from the aluminum.
Check the sealant annually. Aluminum expands and contracts with temperature changes more than fiberglass, so the sealant can crack over time. Reapply a thin bead around the bracket base if you see any separation.
Testing Your Fish Finder and Troubleshooting Common Aluminum Boat Issues
After everything is mounted and wired, launch the boat and run a test. Start at idle speed and watch the display. You should see a solid bottom reading with a clean return. Then throttle up gradually.
If you lose the bottom at 15 mph, the transducer is in turbulent water. The fix is usually to lower the transducer slightly or move it farther from the centerline. If you see random dots or streaks on the screen, that’s electrical interference. Recheck your ground wire and consider adding a noise filter.
False bottom readings — where the display shows a second bottom at twice the actual depth — happen when the transducer is picking up the reflection from the aluminum hull itself. This occurs when the transducer is mounted too close to a rivet line or a hull strake. Move the transducer to a flat, smooth section of the hull.
One more thing to check: the transducer must be level side-to-side. If it tilts even 2 degrees, the beam will skew and you’ll get weak returns on one side. Use a bubble level on the top of the transducer during installation.
Frequently Asked Questions
Can I use a suction cup mount on an aluminum boat?
Yes, but only for temporary use at slow speeds. Suction cups fail at planing speed because the hull flexes and the cup loses suction. They’re fine for kayaks or drift fishing. For a permanent install, use a clamp or epoxy mount.
How do I stop my fish finder from losing signal at high speed?
Lower the transducer so the bottom edge sits 1/8 inch below the hull line. If it’s already there, move it 1 inch toward the starboard edge. High-speed signal loss is almost always a turbulence problem, not an electronics problem.
Will drilling holes in my aluminum boat void the warranty?
Most manufacturers allow drilling for accessories, but they won’t cover leaks caused by improper sealing. Check your owner’s manual. If you’re worried, use a no-drill clamp mount or an epoxy mount to keep the hull intact.
What’s the best sealant for aluminum boat transducer mounts?
3M 4200 is the right choice. It seals watertight but stays removable with moderate effort. 3M 5200 is stronger but nearly permanent — you’ll tear the hull paint if you try to remove it. For a transducer you might upgrade in a few years, use 4200.
Why does my fish finder show a second bottom on my aluminum boat?
That’s a reflection off the hull’s interior surface. The transducer beam bounces off the bottom, comes back up, and reflects off the aluminum hull before hitting the transducer again. Move the transducer to a flat area away from rivets and strakes. Re-aim it so the beam points straight down.
Final Checklist for a Reliable Aluminum Boat Install
- Choose a clamp mount for temporary use or an epoxy mount for a permanent, no-drill install.
- Place the transducer on the starboard side, 1/8 inch below the hull line, away from rivets.
- Run cables through existing gunwale conduits; use grommets on any metal edges.
- Connect a dedicated ground wire to the battery negative terminal — never ground to the hull.
- Isolate stainless steel hardware from aluminum with nylon washers and Tef-gel.
- Use 3M 4200 sealant on every bolt hole and check it annually for cracks.
- Test at speed and adjust transducer height if you lose the bottom above 15 mph.
