
Why Make Your Own Metal Lures?
You’ve lost another $8 jig to a snag on a rocky bottom. You tie on a new one, and it swims with a wobble that doesn’t look right. After a dozen casts, you’re convinced the fish are laughing at you.
Making your own metal lures solves that. You control the shape, the weight, the action, and the finish. You can replicate a lure that worked last season, or experiment with something new without dropping $15 each time. And when you lose one, it stings less.

Gtziqa
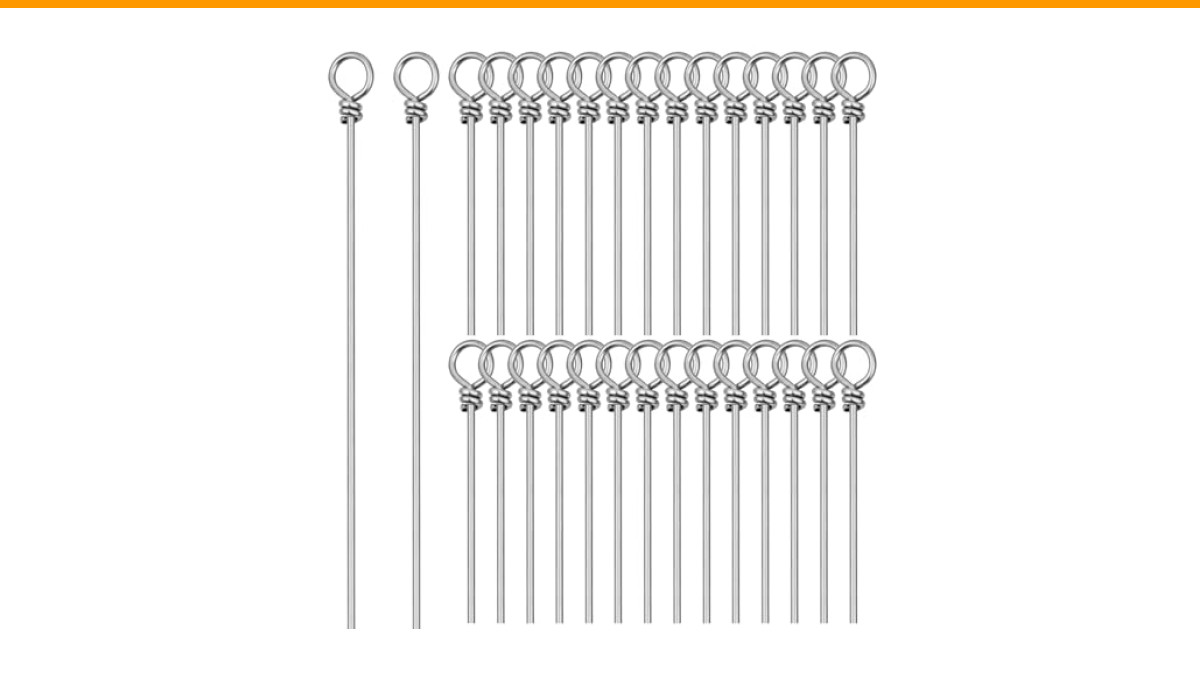
100PCS Fishing Wire Spinner, Stainless Steel Wire for Lure Making | Fishing Looped Spin(ner Shaft Sliver Metal Fishings Lure Making Supplies for Hanging Fishings Rigs Freshwater Bass Trout
- Value Pack: You'll receive 100 wire spools, enough to meet your needs for making a variety of lures. This essential accessory ensu…
- Reliable Materials: This silver Spinner Bait Wire is forged from robust stainless steel, making it rust-resistant. Whether fishing…
- Convenient pre-drilled loop design: These wire spinner baits feature a pre-drilled loop at one end for easy connection and a secur…
This guide walks you through the entire process: safety, tools, mold-making, casting, finishing, rigging, and tuning. You’ll also learn how to fix common defects and test lures in the field. By the end, you’ll have the skills to produce lures that catch fish—and the confidence to keep improving.
If you’re just starting out, a pack of Gtziqa stainless steel spinner wire (100 pieces) gives you pre-looped shafts for spinners and rigs. That saves time on bending and lets you focus on the casting and finishing side.
Safety First: Handling and Melting Metal
Melting metal is dangerous. Lead melts at 621°F, but the fumes are toxic. You need proper ventilation, a respirator rated for metal fumes, and gloves that can handle heat. Never melt metal indoors or near children or pets.
Choosing Non-Toxic Metals (Bismuth, Tin, Lead-Free Alloys)
Lead is cheap and easy to cast, but it’s harmful to you and the environment. Many states restrict lead tackle. Instead, look at bismuth or tin alloys. They melt at lower temperatures (bismuth at 520°F, tin at 450°F) and are safe to handle. They cost more, but you won’t poison yourself or the water.
If you do use lead, wear a NIOSH-approved respirator with organic vapor cartridges, and work outside or under a fume extractor. Wash your hands thoroughly after handling. Lead dust settles on surfaces, so keep your work area separate from living spaces.
Essential Tools and Materials
You don’t need a full machine shop. Here’s the core list:
- A melting pot (electric or propane) with a pouring spout
- A ladle for skimming dross
- Mold release agent (or a light oil like WD-40)
- Mold material: plaster of Paris, RTV silicone, or a metal mold
- Safety gear: heat-resistant gloves, safety glasses, respirator
- Files, sandpaper, and a rotary tool for cleanup
- Split rings, treble hooks, and swivels for rigging
- Clear coat or epoxy resin for sealing
You’ll also need a heat source. A propane torch works for small melts, but a dedicated electric melting furnace keeps temperature steady. I use a Lee Production Pot—it holds about 10 pounds and has a bottom pour spout, which makes filling molds much cleaner.
Designing Your Lure: Shape, Weight, and Action
The shape determines how the lure moves through water. A flat-sided jig darts erratically. A cylindrical casting spoon wobbles on the fall. A keeled shape swims straight and resists spinning. Think about the retrieve speed you plan to use.
Weight matters for casting distance and depth. A 1/4-ounce lure casts well in light wind, but a 1/2-ounce gets you deeper and farther. Balance is just as important. If the hook eye sits off-center, the lure will track sideways. Place the eye so the lure hangs horizontally when suspended.
For action, add a slight curve or a flat face to create vibration. A lure that wobbles aggressively triggers reaction strikes, while a subtle shimmy works better for finicky fish. Test different shapes in a bucket of water before you finalize the design.
Creating a Custom Mold (Plaster or Silicone)
Buying pre-made molds limits you to standard shapes. Making your own lets you copy a favorite lure or invent something new. Plaster of Paris is cheap and easy, but it degrades after a few pours. RTV silicone lasts longer and captures fine detail, but it costs more.
For plaster: mix according to the package, pour over your master lure (coated with mold release), and let it set. Cut a sprue hole and a vent hole. The downside is that plaster holds heat, so you must wait for each cast to cool before removing it.
Silicone is more forgiving. Use a two-part RTV silicone, degas it in a vacuum chamber if possible, and pour over the master. Once cured, cut the mold open with a razor. Silicone flexes, so removing the lure is easy, and it withstands hundreds of pours.
Whichever you choose, make sure the mold has a sprue (the channel where metal enters) and at least one vent (so air escapes). Without vents, you’ll get air pockets and incomplete fills.
The Casting Process: Step-by-Step
Heat the metal to the recommended temperature—don’t overheat, or it oxidizes and creates dross. Skim off any impurities with the ladle. Apply mold release to the mold cavity, then close it tightly.
Pour the metal slowly and steadily into the sprue. Fill until the sprue is full—that ensures the cavity is complete. Let it cool for the recommended time (usually 30 seconds to a minute for small lures). Open the mold and remove the lure. It will be hot, so use pliers.
Trim the sprue with cutters, then file down any rough edges. If you see air bubbles, you’re pouring too fast or the mold isn’t vented properly.
Avoiding Air Bubbles and Defects
Air bubbles happen when the mold traps air. Tilt the mold slightly as you pour, so the metal flows from one side and pushes air out the vents. You can also tap the mold gently after pouring to release trapped bubbles.
Incomplete fills usually mean the metal cooled before reaching the far end. Preheat the mold slightly (but not too hot, or the metal won’t solidify), or pour faster.
Cleaning and Finishing: From Rough to Ready
Once the lure is out of the mold, it’s rough. Use a file to remove the sprue and any flashing. Sand with 220-grit, then 400-grit, to smooth the surface. A rotary tool with a sanding drum speeds this up, but be careful not to remove too much metal.
For a polished finish, use a wire brush or a tumbler. Tumbling with ceramic media for an hour gives a uniform matte finish that holds paint well. If you want a bright flash, polish with a buffing wheel and jeweler’s rouge.
Check the weight. If it’s heavier than intended, drill out a small hole (you can fill it later with epoxy). If it’s light, add a split shot or a heavier hook.
Painting and Sealing for Durability
Paint isn’t just for looks—it adds flash and color that trigger strikes. Start with a primer made for metal. Then apply your base coat, followed by stripes or spots using a stencil or a fine brush. Use solvent-based paints or powder coating for durability; water-based acrylics chip easily.
Seal everything with a clear coat. Epoxy resin gives a thick, glossy finish that resists teeth and rocks. Apply it in a thin layer and rotate the lure until it cures to avoid drips. I use two coats of Devcon 2-Ton epoxy—it’s cheap and tough.
If you skip the seal, the paint will flake off after a few fish. Trust me, a sealed lure lasts ten times longer.
Rigging: Hooks, Split Rings, and Hardware
Attach split rings to the eye and the hook. Use a split ring pliers to open the ring—don’t pry it with a screwdriver, or you’ll weaken it. For treble hooks, choose a size that matches the lure weight. A 1/4-ounce lure takes a #6 or #4 treble; a 1/2-ounce takes a #2 or #1.
Add a swivel between the line and the lure to prevent line twist, especially with spinners. If you’re using the Gtziqa spinner wire, the pre-drilled loop makes it easy to attach a clevis and blade. You can also add a bead or two for extra flash.
Make sure all hardware is rust-resistant. Stainless steel is best for saltwater; bronze or nickel-plated works for freshwater.
Tuning Your Lure for Perfect Action
Even a well-made lure can swim wrong. The most common fix is bending the eye. If the lure dives too deep or too shallow, bend the eye up or down slightly. If it rolls to one side, bend the eye sideways to correct the rolling.
Adjust the weight placement too. A lure that’s nose-heavy will dive steeply; a tail-heavy lure will rise. You can add weight to the opposite end by drilling a small hole and inserting a lead or bismuth shot, then seal it.
Test in a pool or a large bucket. Retrieve at different speeds and watch the action. A good lure should wobble steadily without spinning. If it spins, the eye is off-center or the shape is too asymmetrical.
Troubleshooting Common Casting Problems
You’ll hit snags. Here’s how to fix them:
- Rough edges: File and sand more. Use a finer grit.
- Air bubbles: Pour slower, tilt the mold, or add vents.
- Incomplete fill: Preheat the mold or pour faster.
- Lure sticks in mold: Apply more mold release, or the mold is worn out.
- Metal doesn’t melt evenly: Stir it more, and check the temperature.
If you get a defective lure, you can melt it down and recast it. That’s the beauty of making your own—no waste.
Testing Your Lures in the Field
Take a few prototypes to the water. Cast them side-by-side with a store-bought lure of similar weight. Notice the casting distance, the action on the retrieve, and how they behave on the pause. Fish will tell you what works—keep notes on what caught fish and what didn’t.
Don’t be afraid to tweak a lure after a bad day. Bend the eye, add weight, or repaint it. The process is iterative, and every trip teaches you something.
Frequently Asked Questions
Is it cheaper to make metal lures than to buy them?
Yes, in the long run. A single mold costs $20–$50, and a pound of metal costs $10–$20. That makes dozens of lures. But you need to factor in the initial tool investment (pot, safety gear, etc.) and your time. Break-even is usually after 20–30 lures, depending on the cost of store-bought lures you’d otherwise buy.
Can I use lead-free metals for casting?
Absolutely. Bismuth and tin alloys are safe and cast well. They’re a bit more expensive, but they’re non-toxic and legal in waters where lead is banned. Look for bismuth-tin or pewter alloys designed for fishing.
How do I make a mold of an existing lure without damaging it?
Coat the lure with a release agent (like petroleum jelly or a commercial mold release) and embed it in the mold material. For silicone, you can cut the mold open carefully. The lure will come out clean if you use enough release.
What’s the best way to paint and seal lures?
Powder coating is the most durable—it’s baked on and won’t chip. But it requires an oven. Epoxy resin is the next best and easy to apply with a brush. Always prime the metal first for adhesion.
Why does my lure spin in the water?
Spinning happens when the eye is off-center or the shape is too asymmetrical. Bend the eye to the opposite side to counteract the spin. Also check that the hook hanger is centered.
Final Thoughts: Get Casting
- Start with a simple shape—a flat jig or a casting spoon—before trying complex designs.
- Invest in good safety gear; it’s non-negotiable.
- Use non-toxic metals if you fish in sensitive waters or just want peace of mind.
- Make your own molds to copy or invent lures—plaster for one-offs, silicone for durability.
- Test every lure in water before you trust it on a fishing trip.
- Keep a notebook of your designs, weights, and field results.
- Recycle defective lures—just melt them down and pour again.
Making metal lures is a skill that pays off in savings, customization, and the satisfaction of catching fish on something you built. Start small, stay safe, and keep experimenting.
