
You’ve been staring at the screen for twenty minutes. There’s a mess of squiggly lines, a few blobs, and one shape that might be a fish or might be a floating log. The guy in the next boat is pulling up walleye one after another. You’re not even sure if your fish finder is lying to you or if you just can’t read it.
That frustration is common. Most anglers never touch half the settings on their Eagle unit because the manual reads like a legal document. But the truth is, an Eagle fish finder is a serious tool once you understand what it’s actually showing you. This guide walks through the real-world settings, the reading mistakes, and the field tricks that turn a confusing screen into a reliable fish-catching partner.

Garmin
In this article
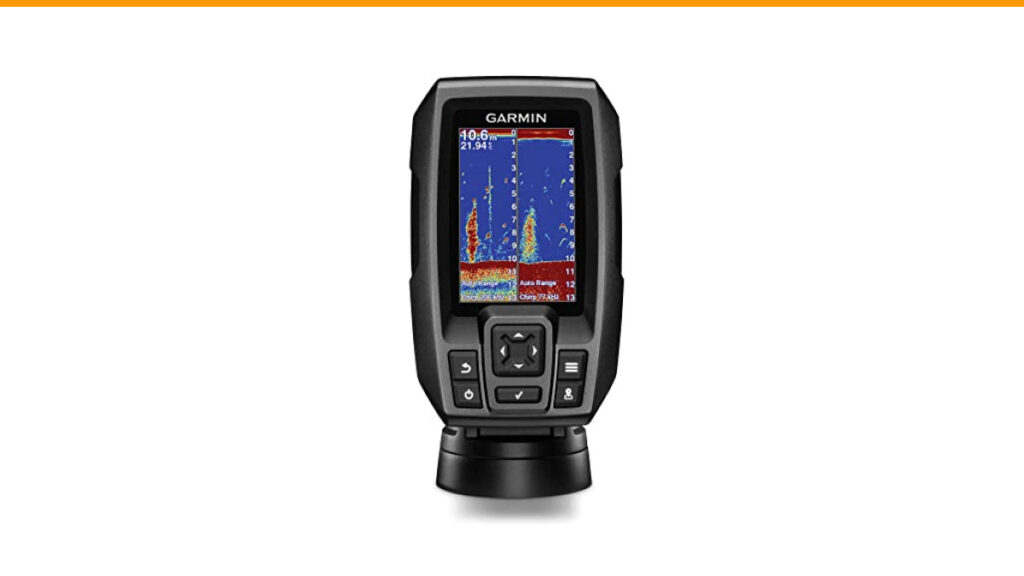
- Garmin 010-01550-00 Striker 4 with Transducer, 3.5" GPS Fishfinder with Chirp
- Setting Up the Transducer: Where You Mount It Changes Everything
- Basic Interface and Buttons: What Each One Actually Does
- Sonar Basics: Frequency, Cone Angle, and Ping Speed
- Reading the Screen: Fish Arches, Structure, and Bottom Hardness
- Adjusting Sensitivity and Chart Speed for Clearer Images
- Flasher Mode for Ice Fishing and Vertical Jigging
- Advanced Tips: Thermoclines, Drop-offs, and Baitfish Patterns
- Troubleshooting Common Issues: Noise, False Returns, and GPS Errors
- Maintenance and Software Updates to Extend Device Life
- Final Verdict: Pro Tips for Maximizing Your Catch Rate
Garmin 010-01550-00 Striker 4 with Transducer, 3.5" GPS Fishfinder with Chirp
- Clear Vu scanning Sonar shows you more of what is in the water around your boat; This high frequency sonar gives near photographic…
- The power of simple offers a keyed interface with dedicated buttons; The device is easy to use and easy to install; Available in 3…
- Waypoint map: Use the way point map to easily view, mark and navigate to locations such as brush piles, stumps and docks; Maximum…
You’ll learn how to mount the transducer so it doesn’t cavitate, how to dial in sensitivity without chasing ghosts, and how to tell a bass from a bluegill on the display. No fluff, just the stuff that works.
If you’re shopping for a new unit or want a compact backup, the Garmin Striker 4 with transducer is a solid choice. It uses CHIRP sonar for crisper fish arches and includes a waypoint map for marking brush piles and stumps. It’s a different brand, but the sonar principles you’ll learn here apply directly to it.

Setting Up the Transducer: Where You Mount It Changes Everything
The transducer is the eyes of the unit. Mount it wrong, and no amount of menu tweaking will fix the picture. The most common mistake is mounting it too close to the hull’s strakes or the propeller wash. That causes turbulence, which shows up as constant noise on the screen.
Mount the transducer on the transom, slightly lower than the bottom of the hull. You want it to sit in clean water, not in the bubble trail from the boat’s movement. A good rule of thumb: the transducer face should be parallel to the waterline when the boat is on plane. If it tilts up, you lose depth readings at speed. If it tilts down, you’ll get spray and false bottom readings.
For a trolling motor mount, keep the transducer pointed straight down. Anglers who angle it forward to “see” ahead of the boat end up with distorted arches and a lot of frustration. The sonar cone is a cone, not a flashlight beam. Tilting it just skews the return.
One more thing: apply a thin layer of marine grease or petroleum jelly to the transducer’s mounting screws. It prevents corrosion and makes removal a lot easier at the end of the season.
Basic Interface and Buttons: What Each One Actually Does
Eagle units vary by model, but the button layout is similar across the line. You’ll typically see a power key, a menu key, and arrow keys for navigation. The menu key is your friend. Press it once to bring up the shortcut menu, press it again for the full settings list. That double-press trick trips up a lot of first-time users.
The zoom button is not just for looking closer. In split-screen mode, it lets you enlarge a specific depth range while keeping the full water column visible on the other side. That’s useful when you’re marking fish at 30 feet but want to watch the bottom 10 feet for suspended bass.
The pages key cycles through the different display modes: sonar, flasher, GPS, and split-screen. You can customize which pages appear in that cycle. Remove the ones you never use. It takes ten seconds and saves you from pressing the button five times to get back to sonar.
Don’t ignore the backlight button. On sunny days, crank it to 100% or you’ll miss weak returns. At dusk, turn it down to save battery. The automatic dimming setting is decent, but it tends to be too bright at night. Set it manually.
Sonar Basics: Frequency, Cone Angle, and Ping Speed
Frequency determines how deep and how detailed your readings are. Lower frequencies (50 kHz) have a wider cone angle and penetrate deeper. Higher frequencies (200 kHz) give better target separation but cover less area. Most Eagle units default to 200 kHz, which is fine for most freshwater fishing down to about 300 feet.
For shallow water under 20 feet, switch to 200 kHz and crank the ping speed to maximum. Fast ping speed means more sonar pulses per second, which means better resolution of fish that are moving quickly. Slow ping speed makes a fast-moving fish look like a blur.
In deep water over 100 feet, drop to 50 kHz. The wider cone covers more bottom, so you’ll see more structure and baitfish. The trade-off is that individual fish arches get fatter and less defined. That’s acceptable when you’re just trying to find the school.
Cone angle matters more than most people think. A 20-degree cone at 50 feet covers a circle about 18 feet wide. At 100 feet, that same cone covers 36 feet. If you’re marking fish on the edge of the screen, they’re actually outside the cone. You need to move the boat to get them dead center.
| Depth | Frequency | Cone Width (approx.) | Best Use |
|---|---|---|---|
| 0-20 ft | 200 kHz | 7-10 ft | Shallow cover, fast-moving fish |
| 20-60 ft | 200 kHz | 10-25 ft | General fishing, jigging |
| 60-120 ft | 83 kHz | 25-45 ft | Drop-offs, suspended fish |
| 120+ ft | 50 kHz | 45-80 ft | Deep structure, thermoclines |
Reading the Screen: Fish Arches, Structure, and Bottom Hardness
A classic fish arch appears when a fish swims through the sonar cone. The leading edge of the cone hits the fish first, showing it as a faint mark. As the fish moves toward the center, the return gets stronger and the mark gets taller. When it exits the cone, the mark fades. That’s the arch shape.
If the fish is directly under the boat and stays there, you’ll see a straight horizontal line instead of an arch. That’s not a malfunction. It’s just a fish holding still in the cone’s center. Same thing happens when you’re drifting directly over a school.
Baitfish show up as a cloud of small, scattered marks. Usually they’re suspended at a specific depth. Predator fish will often be just below that cloud, sometimes as distinct arches, sometimes as a solid line. When you see a bait ball, drop your presentation to the bottom edge of it, not the middle.
Bottom hardness is easier to read than you’d think. A hard bottom (rock, gravel) produces a bright, thick bottom line with a second, fainter echo directly below it. A soft bottom (mud, silt) shows a thin, dim line with no second echo. If you’re marking a hard bottom with a drop-off, that’s prime catfish territory.
Don’t trust the fish ID feature. It turns sonar returns into fish icons, but it also labels stumps and weeds as fish. Turn it off and learn to read raw arches. You’ll catch more fish and stop chasing rocks.
Adjusting Sensitivity and Chart Speed for Clearer Images
Sensitivity controls how much of the returned signal the unit displays. Too low, and you miss fish and structure. Too high, and the screen fills with noise and clutter. Most units have an auto setting, but it tends to run hot, showing every tiny particle in the water.
Start with manual sensitivity at 70% in clear water. In stained or muddy water, drop it to 60%. If you see a lot of speckled noise across the screen, lower it in 5% increments until the clutter disappears but you still see bottom detail. That’s your sweet spot.
Chart speed controls how fast the sonar scrolls across the screen. Slow chart speed (around 50%) compresses the history, making it easier to spot large structure but harder to see individual fish. Fast chart speed (100%) spreads out the returns, which gives you a better look at fish arches and their behavior. For jigging, use 100%. For trolling, 75% is a good compromise.
One real-world scenario: you’re fishing a weed line at 15 feet. The auto sensitivity is showing a solid mess of green. Drop it to 65% and suddenly you see the weed tops as a thin line, with a few distinct arches hovering just above them. Those arches are pike waiting to ambush. The auto setting was hiding them.
Flasher Mode for Ice Fishing and Vertical Jigging
Flasher mode is not just for ice fishing. It’s also deadly for vertical jigging in summer. The flasher shows a real-time column of water on a circular dial. Your jig shows up as a solid mark, and fish show up as separate marks. When the fish mark closes the gap to your jig, set the hook.
The key difference from regular sonar is that the flasher updates instantly. There’s no scroll delay. That’s why it’s preferred for jigging—you see the fish react to your lure in real time. If you’re jigging in 40 feet of water, set the range to 0-60 feet so you have some room above and below.
Adjust the flasher’s color gain (if your unit has it) to differentiate between bottom and fish. A common mistake is leaving the gain too high, which makes the entire bottom half of the dial light up. Turn it down until the bottom is a solid band and fish are distinct marks.
For ice fishing, the flasher is your primary tool. Set the transducer to hang just below the ice, usually 2-3 feet down. Make sure it’s level. A tilted transducer on the ice gives you false depth readings and a lot of frustration.
Advanced Tips: Thermoclines, Drop-offs, and Baitfish Patterns
A thermocline shows up as a faint, horizontal line on the screen, often with a slight shimmer or fuzziness. It’s the boundary between warmer surface water and colder deep water. Fish often suspend right above or below this line because oxygen levels change there.
To find the thermocline, look for that fuzzy band on your screen. In summer, it’s usually between 15 and 25 feet in most lakes. When you find it, fish the edges. That’s where the baitfish will be, and where the bigger predators patrol.
Drop-offs are easier to spot. Look for a sudden change in bottom depth as you troll along a contour. The key is to idle parallel to the drop-off, not perpendicular to it. Keep the boat on the shallow side and cast toward the deep edge. You’ll cover more water and keep your lure in the strike zone longer.
Baitfish patterns tell you a lot about the day’s bite. If the bait is scattered and high in the water column, the predators are likely feeding aggressively. If the bait is balled up tight near the bottom, the bite is probably slow and you’ll need to work your lure slowly through the middle of the ball.
One more trick: when you mark a school of fish on a drop-off, drop a waypoint on your GPS, then circle back and approach from the deep side. Fish facing into the current will see your lure before they see your boat.
Troubleshooting Common Issues: Noise, False Returns, and GPS Errors
Noise on the screen looks like random speckles or vertical streaks. The most common cause is electrical interference from the boat’s engine. Check your transducer cable routing. It should run away from the engine’s spark plug wires and the battery cables. If the noise persists, install a ferrite choke on the power cable near the unit.
False returns are usually caused by the transducer picking up its own signal bouncing off the hull or a nearby object. Make sure the transducer is not mounted too close to the bottom of the hull, and that it’s not sharing a mounting bracket with another transducer. Also, check for air bubbles trapped under the transducer face. A thin layer of water or coupling gel fixes that.
GPS errors are less common but annoying. If the unit takes forever to acquire satellites, make sure the antenna has a clear view of the sky. Don’t mount the unit under a metal canopy or in a dash pod with a metal lid. Sometimes a simple reboot fixes it. Power the unit off, wait ten seconds, and power it back on.
If the depth reading is erratic, check the transducer’s angle again. A slight tilt can cause the bottom to disappear at high speed. Also, check the water temperature reading. If it seems off, the thermistor inside the transducer may be reading the hull temperature instead of the water. That usually means the transducer is mounted too close to the hull.
Maintenance and Software Updates to Extend Device Life
Your fish finder is a computer. It needs updates, just like your phone. Check the manufacturer’s website for firmware updates. These updates fix bugs and sometimes add new features. The process is simple: download the file to a microSD card, insert it into the unit, and follow the on-screen prompts.
Clean the screen with a microfiber cloth and a mild glass cleaner. Don’t use paper towels—they scratch the coating. For the transducer, wipe off any algae or grime with a soft cloth and warm soapy water. A dirty transducer face reduces sensitivity noticeably.
Check the transducer cable for nicks or cuts before each trip. A damaged cable can cause intermittent signal loss that’s hard to diagnose. If you find a cut, splice it and waterproof the connection with heat-shrink tubing and silicone.
When storing the unit for winter, remove it from the boat and keep it in a dry, temperature-controlled place. The LCD screen can crack in freezing temperatures. If you leave it mounted, cover it with a padded bag to protect it from bumps and UV damage.
Battery care matters too. A fully discharged battery can lose capacity permanently. Keep your boat battery on a trickle charger during the off-season, and check the voltage before each trip. A low battery causes the unit to shut down randomly and can corrupt your waypoint data.
Final Verdict: Pro Tips for Maximizing Your Catch Rate
You now have the fundamentals. The rest is practice and a few field habits that separate consistent anglers from the rest.
- Turn off fish ID and learn to read raw arches. It takes one trip to get used to it, and you’ll never go back.
- Run sensitivity manually. Auto mode is a crutch that hides more than it shows, especially around weeds and thermoclines.
- Use flasher mode for any vertical presentation. It’s not just for ice. Jigging, drop-shotting, and even slow trolling benefit from real-time returns.
- Mark waypoints on every piece of structure you find. A brush pile that holds fish today will hold fish in three weeks.
- Match frequency to depth. Don’t run 200 kHz in 150 feet of water and wonder why the bottom looks mushy.
- Check your transducer angle before every trip. A 5-degree tilt costs you fish and wastes time.
- Update the firmware when a new version drops. It’s free, it takes ten minutes, and it can fix a nagging issue you’ve been living with.
An Eagle fish finder is a tool, not a magic box. It shows you what’s under the boat, but you still have to make the right cast and present the right lure. Use these settings and reading techniques, and you’ll spend less time staring at the screen and more time pulling fish over the side.
Why does my Eagle fish finder show fish but I can’t catch them?
You’re probably seeing fish that are suspended or neutral. They see your lure, but they’re not in a feeding mood. Try changing your presentation speed or dropping a smaller bait. Also, check your sensitivity—if you’re marking fish at 40 feet but your lure is at 20 feet, you’re fishing the wrong depth.
What does the color of the fish arch mean on my Eagle unit?
Color indicates signal strength. A red or orange arch is a strong return, usually a bigger fish or one directly in the cone’s center. A blue or green arch is a weaker return, often a smaller fish or one on the edge of the cone. Don’t obsess over color—use it to gauge size and position, not species.
Can I use my Eagle fish finder in saltwater?
Yes, but you need to rinse the transducer and cable with fresh water after every trip. Saltwater corrodes the connections quickly. Also, the depth readings will be slightly different because saltwater conducts sonar differently. Set the unit to saltwater mode if it has one, or adjust the depth offset manually.
How do I stop my fish finder from losing the bottom at high speed?
That’s almost always a transducer mounting issue. The transducer is lifting out of the water or tilting up at speed. Adjust the mounting bracket so the transducer sits slightly lower in the water and stays parallel to the hull. Also, increase the ping speed to maximum—it helps the unit lock onto the bottom faster.
Is it worth updating the software on an old Eagle unit?
Usually, yes. Manufacturers release updates to fix bugs and improve GPS accuracy. Even a unit from ten years ago might have a firmware update that stabilizes the sonar. Check the official manual page for your model to see the latest version. If there’s no update available, at least do a factory reset once a year to clear out corrupted settings.