
You’ve spent another Saturday morning casting the same crankbait that’s caught everything in your box, and the bass are just not interested. You know they’re holding tight to that weed line, but every presentation looks like a cartoon. That’s when the thought hits: what if you could build something they haven’t seen a hundred times?
Making your own bass lures isn’t just a money-saving hobby. It’s a way to match exactly what the fish are eating on your home lake, tune the action to your rod and retrieve speed, and feel a different kind of pride when a 5-pounder slams something you poured, painted, and tied yourself. This guide walks you through the real costs, the safety gear you need, and step-by-step builds for three proven lure types—plus the troubleshooting that keeps beginners from quitting.

HALF CRESCEN
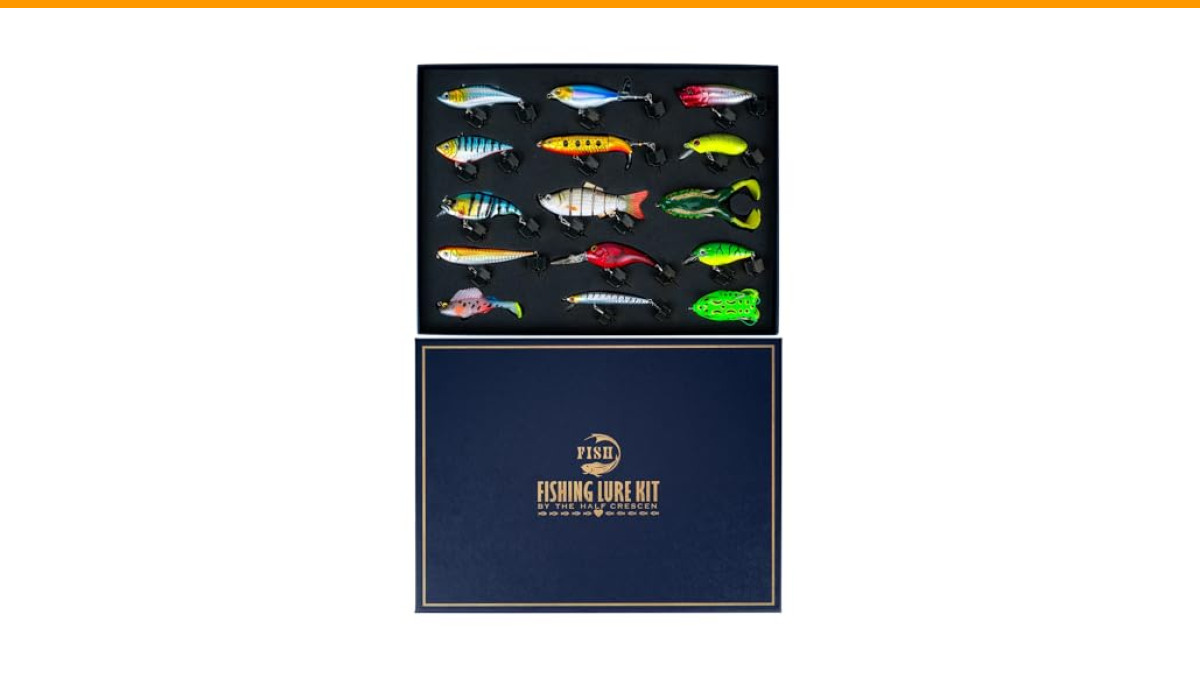
HALF CRESCEN Fishing Lures Gift Box, 15PCS Bass Swimbait Tackle Set | Swimbaits, Crankbaits, Hard & Soft Baits, Freshwater & Saltwater, Gift for Men Dad Husband Fisherman
- 【Catch More Bass with Realistic Action】Designed with lifelike swimming motion and detailed fish patterns, these fishing lures trig…
- 【15PCS Complete Fishing Lure Kit】Includes hard baits, soft plastic swimbaits and multi-style fishing lures to match different fish…
- 【Freshwater & Saltwater Ready】Built for lakes, rivers, ponds and coastal waters. Effective for bass fishing, trout fishing and pik…
You’ll learn what most online tutorials skip: how to fix bubbles in soft plastic, why your paint chips, how to balance a jig head, and what colors actually work in spring versus fall. No fluff, just the stuff that catches fish.
If you’re just starting out and want a solid foundation without hunting down every component separately, a pre-assembled kit like the HALF CRESCEN Fishing Lures Kit for Bass gives you 15 swimbaits and crankbaits to study and fish while you learn to build your own. It’s a handy reference for hook sizes, body shapes, and color patterns—not a replacement for making your own, but a good baseline.
Why Make Your Own Bass Lures? (The Real Cost & Catch Benefits)
Let’s talk money first, because that’s what most people ask. A decent store-bought crankbait runs $8 to $15. A jig is $4 to $7. Soft plastic packs are $5 to $8 for five or six worms. Over a season, you can drop $200 to $400 on tackle that gets snagged, bitten off, or lost in a tree branch.
Making your own flips that math. A lead jig head costs about 15 cents in lead and a hook. A soft plastic worm costs about 20 cents in plastisol and colorant. A spinnerbait runs about $1.50 in wire, blades, and skirt material. Even after buying molds, a heat source, and tools, your break-even point comes fast—usually within the first 50 to 80 lures.
But the real advantage isn’t just price. It’s control. You can pour a jig head that’s 1/16 ounce heavier than anything in the store, perfect for that deep ledge. You can inject a worm with a curly tail that wiggles at the exact speed you like to retrieve. You can paint a crankbait to match the local shad’s olive back and silver belly—something no mass-produced lure gets right.
There’s also a conservation angle. You can recycle old sinkers, damaged jigs, and scrap lead from tire weights, keeping it out of landfills. And when you catch a bass on a lure you built, that fish tastes better. I don’t care what anyone says—it does.
Essential Safety Gear and Workspace Setup
Before you melt anything, get this straight: lead and plastisol are not toys. Lead fumes can cause serious neurological damage, and hot plastic sticks to skin like napalm. You need three things before your first pour.
Ventilation. Work outdoors or under a fume extractor. A fan blowing across your workbench toward an open window is the minimum. For indoor work, a respirator with organic vapor cartridges—not a dust mask—is non-negotiable. Lead melts at 621°F, and the fumes are invisible.
Gloves and eye protection. Heavy leather or heat-resistant gloves protect your hands when handling hot molds and pouring lead. Safety glasses keep splashes out of your eyes. A splash of molten lead or plastisol in the eye is a trip to the ER you won’t forget.
Workspace. Use a metal or heat-resistant table. Keep a fire extinguisher within reach. Have a bucket of sand or kitty litter nearby for spills—never water on a lead or plastic fire. And keep kids and pets out of the area.
For plastisol, you’ll need a microwave or a dedicated hot plate. Use a Pyrex measuring cup or a specialized plastic melting pot. Don’t use your kitchen microwave—the fumes and spills will ruin it and your food.
One more thing: mold release. You’ll need a silicone spray or a brush-on release agent for both lead and plastic molds. It’s cheap, and it saves you from prying out stuck lures with a screwdriver.
The 3 Best Lure Types for Beginners (Jigs, Spinnerbaits, Soft Plastics)
Not all lures are created equal when you’re starting out. You want projects that are forgiving, cheap to mess up, and effective on bass.
Jigs
Jigs are the easiest entry point. You pour a lead head, paint it, tie a skirt, and add a weedguard. Total time per jig is about 15 minutes once your mold is ready. They catch bass year-round, and you can fish them in heavy cover without snagging every cast.
Spinnerbaits
Spinnerbaits require wire forming, but the skills transfer to other wire baits like buzzbaits and inline spinners. You’ll bend a wire, add a blade, a skirt, and a hook. The action comes from the blade thumping against the water, so you don’t need perfect casting technique. They’re also forgiving—if you bend the wire wrong, you just bend it back.
Soft Plastics
Soft plastics are the most versatile and the most frustrating. You’re working with hot plastisol, injecting it into molds, and dealing with bubbles, tearing, and color mixing. But once you get the hang of it, you can make worms, craws, creature baits, and swimbaits that outfish anything in a store. Start with a simple worm mold and work up.
Tool and Material Checklist for Each Type
Here’s what you need for each, with rough costs:
| Lure Type | Essential Tools | Materials | Approx. Start-Up Cost |
|---|---|---|---|
| Jigs | Lead melting pot, ladle, jig mold, heat source, paint brush, hobby knife | Lead, hooks, skirt material, weedguard, paint, clear coat | $60–$100 |
| Spinnerbaits | Wire cutters, round-nose pliers, wire former, blade spinner, clear coat | Wire, blades, clevises, skirts, hooks, beads | $40–$70 |
| Soft Plastics | Microwave or hot plate, Pyrex cup, injection mold, syringe or injector | Plastisol, colorant, glitter, scent, mold release | $80–$120 |
You can save money by buying used molds or borrowing tools from a friend. But don’t skimp on the lead pot—a cheap one can overheat and create dangerous fumes.
Step-by-Step: Pouring and Painting a Lead Jig Head
Let’s walk through making a classic round-head jig, the workhorse of bass fishing.
- Melt the lead. Put scrap lead in your pot and heat it to about 700°F. Skim off any dross (the gray film) with a ladle.
- Preheat the mold. Place the mold on the edge of the pot or use a heat gun. A cold mold causes incomplete pours and voids.
- Pour the lead. Ladle the molten lead into the mold’s sprue hole, filling it completely. Don’t overfill—excess lead creates fins.
- Let it cool. Wait 30 to 60 seconds until the lead solidifies. Open the mold and pop out the jig head. Trim any flash with a knife.
- Paint the head. Use a powder paint that you dip the hot jig head into—it melts and coats evenly. Or use a brush-on enamel paint for a more detailed look. Bake the jig head in a toaster oven at 250°F for 20 minutes to set the paint.
- Clear coat. A thin layer of epoxy or clear nail polish protects the paint from chipping.
Attaching the Weedguard and Skirt
Weedguards are stiff nylon bristles that prevent snags. Cut a small piece (about 1 inch) and insert it into the slot behind the hook eye. Glue it in place with a drop of super glue.
For the skirt, take a silicone skirt material, cut a bundle of strands about 4 inches long, and tie them around the hook collar with thread. Pull the strands down over the hook. Trim the ends to your desired length—shorter skirts give a more compact profile.
A common mistake is making the skirt too long. Bass see that as a bulky, unnatural meal. Trim it to just past the hook point.
Step-by-Step: Injecting Soft Plastic Worms and Craws
Soft plastics are where you can really dial in your bait. Here’s the process for a simple worm mold.
- Heat the plastisol. Pour your plastisol into a Pyrex cup. Heat in the microwave in 30-second bursts, stirring between each, until it reaches 350°F. Use a thermometer—overheating causes bubbles and weak baits.
- Add color and glitter. Stir in a few drops of colorant and a pinch of glitter. Mix thoroughly.
- Inject the mold. Fill your injector with the hot plastic, lock the mold shut, and inject slowly. Too fast and you’ll trap air. Fill until plastic comes out the vents—that means the mold is full.
- Let it cool. Wait 3 to 5 minutes. Open the mold and pull out the worm. Trim any flash.
- Add scent (optional). You can mix scent attractant into the plastisol before injecting, or dip the finished worm in scent.
Fixing Bubbles and Tearing Issues
Bubbles are the #1 frustration. They happen when the plastic is too hot or you inject too fast. Let the plastic cool to 330–340°F and inject slowly. If you still get bubbles, try injecting at an angle so the plastic flows up the cavity, pushing air out.
Tearing happens when the plastic is too cool or the mold is cold. Warm the mold with a heat gun, and don’t let the plastic drop below 320°F. Also, using a mold release helps the bait slide out without sticking.
If you tear a bait, don’t throw it away. Melt it down and reuse it. That’s the beauty of plastisol—it’s infinitely recyclable.
Step-by-Step: Assembling a Spinnerbait from Wire Forms
Spinnerbaits are all about the wire. You can buy pre-formed wire frames, or bend your own from stainless steel wire.
- Bend the wire. If making your own, use a wire former to create the classic safety-pin shape. One arm is longer (the blade arm), the other shorter (the hook arm).
- Add the blade. Slide a clevis onto the blade arm, then the blade. The clevis holds the blade so it spins freely.
- Attach the skirt. Slide a skirt over the hook arm, up to the bend. Secure it with a piece of thread or a small rubber band.
- Add the hook. Tie a trailer hook to the main hook’s shank with a short piece of line, or use a split ring.
- Finish with a bead. Add a colored bead above the blade for extra flash and clack.
The key to a good spinnerbait is blade size and shape. Willow blades give a tight, flashy vibration; Colorado blades produce a strong thump. Match the blade to water clarity: clear water calls for smaller, subtler blades; murky water calls for bigger, louder ones.
Matching Lure Colors and Profiles to Seasonal Bass Behavior
Bass change their feeding habits with the seasons, and your lures should change too.
Spring: Bass move shallow to spawn. They’re aggressive and protective. Use darker colors like black/blue or black/red in jigs and soft plastics, and crawfish profiles. Crankbaits in shad or chartreuse work well as bass chase baitfish.
Summer: Bass go deep and hold to structure. Use larger profiles like big swimbaits and deep-diving crankbaits in natural shad or bluegill patterns. Slow-rolling a spinnerbait with a Colorado blade along deep weed lines is deadly.
Fall: Bass feed heavily to fatten up for winter. They’re chasing schools of shad. Use bright, flashy colors—white, chartreuse, or firetiger—in spinnerbaits and crankbaits. Match the size of the local baitfish.
Winter: Bass are sluggish. Use small, slow presentations. Finesse worms in natural colors like green pumpkin or watermelon, fished on a shaky head, are your best bet.
If you’re fishing heavily pressured waters, downsize. A 4-inch finesse worm catches fish that ignore a 6-inch magnum. Don’t be afraid to go micro.
Field Testing: How to Tune Action and Sharpen Hooks
You’ve built your lure. Now you need to make sure it swims right.
Test your crankbait in a clear, shallow area. Reel it at a steady speed and watch the action. A good crankbait should wobble side-to-side, not roll. If it rolls, adjust the line tie—bend it slightly toward the direction of the roll. If it dives too deep or too shallow, change the bill angle.
For jigs and soft plastics, test the fall rate. A jig that falls too fast might not get bit in cold water. Add a trailer to slow the fall. A soft plastic worm should sink slowly with a quivering tail—if it sinks like a rock, add more salt or use a lighter hook.
Hook sharpness is critical. A dull hook won’t penetrate a bass’s bony mouth. Test your hooks by lightly dragging the point across your thumbnail. If it catches, it’s sharp. If it slides, sharpen it with a file or hook hone. Do this after every few casts—rocks and weeds dull hooks fast.
Troubleshooting Common DIY Lure Failures
Here are the problems that make beginners give up, and the fixes that keep you going.
- Bubbles in soft plastic: Lower your plastic temperature and inject slower. Also, make sure your mold is warm.
- Paint chipping on jig heads: Use a powder paint that’s baked on, or apply a clear coat. Let the paint cure fully before fishing.
- Hook balance issues: If your jig head leans to one side, the hook eye isn’t centered. Re-pour with a mold that has a centered eye, or add a small split shot to the hook shank to balance it.
- Spinnerbait blades don’t spin: The clevis is too tight or the blade is bent. Loosen the clevis or straighten the blade.
- Soft plastics tear when removing from mold: Use more mold release and let the plastic cool longer.
If you’re struggling with a specific issue, check online forums or YouTube videos. Someone has already solved your problem.
FAQ: Quick Answers for New Lure Makers
What’s the cheapest way to start making lures?
Start with jigs. You need a mold, a lead pot, and some hooks. You can often find used molds at garage sales or online. A basic setup costs under $50, and you’ll make your money back after a dozen jigs.
Can I use old fishing lures for parts?
Absolutely. Old spoons can be cut and shaped into new blades. Damaged crankbaits can be stripped and repainted. Used hooks can be sharpened and reused. It’s a great way to recycle and save money.
How do I know what size hook to use?
For jigs, use a 2/0 to 5/0 hook depending on the jig size. For soft plastics, use a worm hook that matches the bait length—a 3/0 for a 6-inch worm, a 4/0 for an 8-inch. For spinnerbaits, a 3/0 to 5/0 works for most bass.
Is it safe to melt lead in my garage?
Only if you have proper ventilation and a respirator. Lead fumes are dangerous, and you can’t see them. Work outdoors or under a fume hood. Never melt lead indoors without extraction.
How long do homemade lures last?
With proper care, a painted and clear-coated jig head can last years. Soft plastics will eventually crack or tear, but you can melt them down and re-pour. Spinnerbaits last until the wire bends or the skirt wears out—both are replaceable.
Final Thoughts: From Hobby to Trophy Bass
Making your own lures is a journey. You’ll start with a few ugly jigs and a pile of torn worms, but every mistake teaches you something. The first time you catch a bass on a lure you built, you’ll understand why this hobby hooks people.
- Start with jigs—they’re cheap, simple, and effective.
- Invest in safety gear before anything else.
- Use a kit like the HALF CRESCEN Fishing Lures Kit for Bass to study commercial lures.
- Match colors and profiles to the season and water clarity.
- Test and tune every lure before you fish it.
- Troubleshoot problems—bubbles, chipping, balance—with the fixes above.
- Recycle old lures and materials to save money and reduce waste.
Now go melt some lead, pour some plastic, and bend some wire. Your next trophy bass is waiting.
