
You know that old tackle box in the garage, the one with the rusty spoons and the chipped crankbaits nobody has touched in years? That box is a jewelry box waiting to happen. Fishing lures have the color, the flash, and the movement that regular beads just can’t match. But turning a chunk of metal and plastic into something you can actually wear takes more than a hot glue gun and a prayer.
This guide walks through the whole process like an engineering project, because that is what it is. You will learn how to pick lures that will not fall apart, remove the dangerous hardware without wrecking the body, seal the paint so it does not flake onto your neck, and attach findings that will not make your earlobes bleed. By the end, you will have a pair of earrings that swing properly, hang straight, and survive a night out.
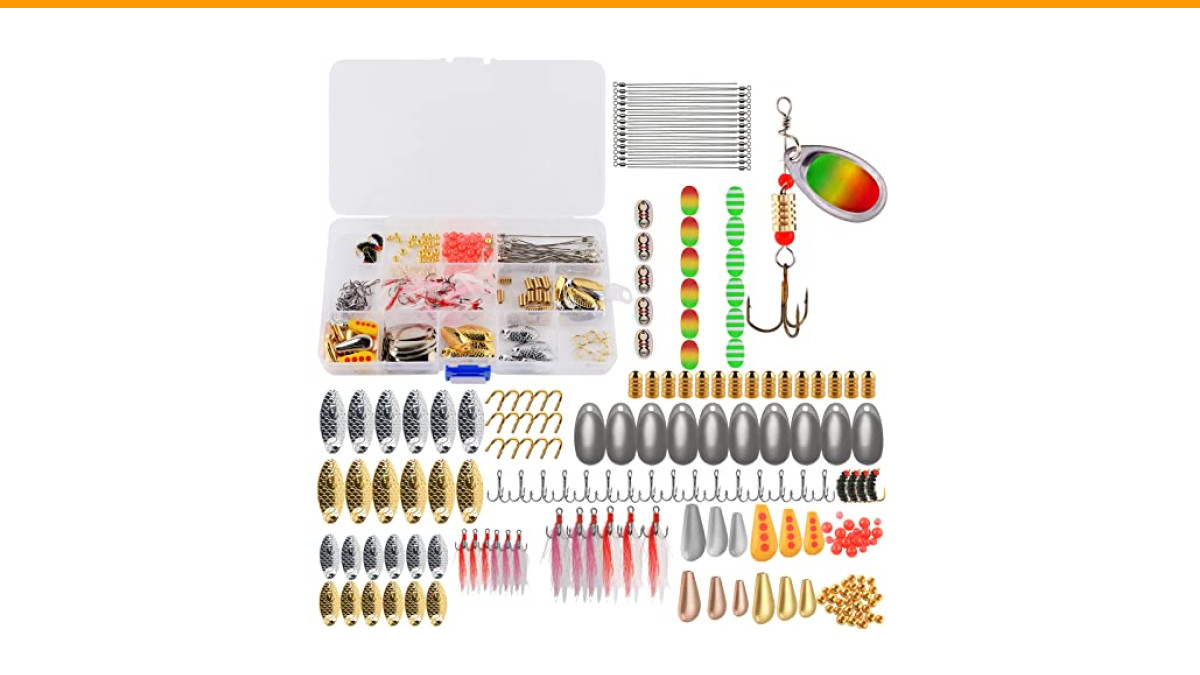
If you are starting from zero, a spinner making kit on Amazon can shortcut the scavenger hunt. The mouhike kit packs 228 pieces of blades, clevises, wire shafts, and beads into a divided case. It is handy for practicing the techniques here before you sacrifice your grandfather’s vintage collection.
Why Fishing Lures Make Unique Jewelry
Lures are mini sculptures. They have a three-dimensional shape, a weight distribution, and a reflective surface that catches light from any angle. A spoon lure swings side to side. A spinner blade flutters. A crankbait has a lip that makes it dive, which translates to a nice wobble when it hangs from your ear.
There is also the story factor. People will ask where you got them. Saying you made them from a lure your dad used on Lake Michigan gets a better reaction than saying you bought them at a mall kiosk.
What You’ll Need: The Complete Supply List
Gather these tools before you start. Running to the hardware store mid-project gets old fast.
- Needle-nose pliers (two pairs work best for twisting wire)
- Wire cutters that can handle thin steel wire
- Jewelry pliers for opening jump rings without scratching them
- Earring hooks (hypoallergenic ear wires are worth the extra dollar)
- Jump rings in 4mm and 6mm sizes
- Epoxy resin or a clear coat sealant
- Small paintbrush for applying sealant
- Fine-grit sandpaper (400 grit works well)
- Rubbing alcohol for degreasing
You can skip the resin if you are using plastic lures with intact paint. But for metal spoons or any lure with chipped paint, you need a sealant. More on that later.
Sourcing and Selecting the Best Lures
Not every lure is worth your time. Some are too corroded to save. Others have split rings that are welded shut with rust. Learn to spot the good ones.
Where to Find Cheap Lures
Garage sales are the best source. Old anglers sell tackle boxes for a few dollars. Thrift stores often have bags of mixed lures for under five bucks. Estate sales can yield vintage wooden lures that look incredible as earrings.
Online marketplaces work too, but you pay shipping for a single lure. Buy a lot of random tackle instead. You will get ten to twenty lures for the price of one new one. Sort through them and keep the best five or six. The rest can go back in the box for future projects.
Ask around. Your neighbor, your uncle, the guy at the bait shop — someone has a drawer of lures they will never use. Offer to take them off their hands. Most people are happy to clear the clutter.
Which Lures to Avoid
Stay away from lures with deep rust pits. Surface rust wipes off, but pitting means the metal is compromised. It will break eventually, and you do not want a broken hook near your face.
Avoid lures with cracked or peeling plastic. The paint will continue to flake off when worn. Avoid lures with soft, rubbery bodies. They do not hold earring findings well and tend to look droopy.
Skip anything with a strong chemical smell. That is old plasticizer leaching out, and it will irritate your skin.
Step 1: Removing Hooks and Hardware Safely
This is the most dangerous part of the project. Treble hooks are sharp and they will find your fingers. Work slowly.
Put on a pair of thick gloves if you have them. Hold the lure body with one hand. Use your needle-nose pliers to grip the split ring, not the hook. Twist the split ring open with a second pair of pliers. Slide the hook out and set it aside.
Do not throw the hooks in the trash loose. Wrap them in cardboard or put them in a small jar. They can puncture a trash bag and hurt someone later.
Step 2: Cleaning and Prepping the Lure Body
Dirt and old fish slime will ruin your sealant. Clean the lure body with rubbing alcohol and a cotton swab. Pay attention to the crevices around the eyes and the hook hangers.
If the lure has a rough surface, sand it lightly with fine-grit sandpaper. This gives the sealant something to grip. Wipe off the dust with a dry cloth.
For metal spoons, you can polish them first. A little metal polish on a soft cloth brings back the shine. Just make sure to wipe off all the polish residue before sealing.
Step 3: Sealing and Customizing (Paint, Glitter, Epoxy)
Raw metal and old paint need protection. Your skin is slightly acidic, and it will corrode the metal over time. A clear coat solves that.
For a quick fix, use a clear nail polish. It works, but it is thin and chips easily. For a durable finish, use a two-part epoxy resin. It dries hard and clear. You can even dip the whole lure body in it for an even coat.
Here is a comparison of sealants:
| Sealant | Durability | Drying Time | Best For |
|---|---|---|---|
| Clear nail polish | Low | 10 minutes | Quick projects, indoor wear |
| Acrylic clear coat (spray) | Medium | 30 minutes per coat | Plastic lures, even coverage |
| Two-part epoxy resin | High | 24 hours | Metal lures, everyday wear |
If you want to customize, now is the time. Add a drop of glitter to the epoxy before it cures. Paint a stripe on the lure body with model paint. Let everything dry fully before moving on.
Step 4: Attaching the Earring Findings
You have two options: glue the earring post directly to the lure, or use a jump ring to connect the earring hook to the lure’s existing hardware.
Direct Attachment vs. Jump Rings
Direct attachment means you glue a flat-backed earring post to the back of the lure. This works for flat lures like spoons. It looks clean and the earring sits close to the earlobe.
The problem is durability. Glue fails eventually, especially with heavier lures. If you go this route, use a strong jewelry adhesive and rough up the surface first.
Jump rings are more secure. Open a 4mm jump ring with your jewelry pliers. Thread it through the lure’s front hook hanger. Close the ring. Then attach your earring hook to the jump ring.
For lures with a split ring still attached, you can skip the jump ring and hook the earring wire directly onto the split ring. That is the easiest method and it allows the lure to dangle naturally.
Step 5: Balancing and Testing the Drop
Here is where most DIY tutorials fail. A lure that hangs sideways looks broken. A lure that is too heavy pulls your earlobe down.
Test the balance by holding the earring hook between your fingers. Let the lure hang. It should point straight down. If it tilts, the weight is uneven.
Fix the balance by adding a small bead to the hook or by repositioning the jump ring. You can also add a tiny bit of epoxy to the lighter side to add weight, but that is a last resort.
Weight matters more than you think. A standard earring weighs less than 2 grams. A small spoon lure weighs 3 to 5 grams. A large crankbait can weigh 10 grams or more. That is too heavy for daily wear.
Stick to lures under 5 grams for regular use. Save the heavy lures for special occasions or for clip-on earrings that do not put pressure on the lobe.
Troubleshooting Common Problems
Things go wrong. Here is how to fix the common issues.
The lure spins upside down. The hook hanger is probably off-center. Move the jump ring to the other end of the lure, or add a small weight to the bottom.
The hook hole is too small for a jump ring. Use a thinner jump ring, or file the hole slightly larger with a round file. Do not force it — you will bend the lure.
The earring falls forward. The lure is too heavy for the earring hook. Switch to a heavier gauge earring wire, or use a French wire style hook that has a better counterbalance.
The paint chips after a week. You skipped the sealant step. Strip the lure, clean it, and apply epoxy resin. Wait the full 24 hours before wearing.
Safety and Skin Sensitivity Tips
Nickel is the enemy. Most cheap earring hooks contain nickel, and it causes allergic reactions in a lot of people. Use hypoallergenic ear wires made from surgical steel, titanium, or 14k gold-filled wire. They cost a bit more but your ears will thank you.
The lure itself can also cause irritation. Old paint may contain lead or other heavy metals. Sealing the lure completely prevents the metal from touching your skin. Do not skip that step, even if the lure looks fine.
Clean your earrings after wearing them. Wipe them with a soft cloth to remove sweat and oils. Sweat accelerates corrosion, so a quick wipe adds months to their life.
Frequently Asked Questions
Can I use real fishing hooks on earrings?
Yes, but you must blunt the barbs first. A sharp treble hook near your ear is an accident waiting to happen. Crimp the barbs flat with pliers. You keep the look without the danger.
How do I make the earrings not hurt my ears?
Keep the total weight under 5 grams and use hypoallergenic ear wires. Heavy earrings stretch the piercing over time. Light lures like small spoons or tiny spinners work best. Test the weight before you commit to a design.
What is the best glue for metal lures?
Two-part epoxy is the most reliable. It fills gaps and bonds metal to metal. Super glue works in a pinch but it is brittle and snaps under stress. For a permanent fix, use epoxy and let it cure fully.
Can I make earrings from plastic lures?
Absolutely. Plastic lures are lighter than metal ones, which makes them more comfortable to wear. The challenge is that plastic can be slippery. Rough the surface with sandpaper before gluing or sealing. Plastic lures also scratch easily, so a clear coat is essential.
Where can I find inspiration for designs?
Look at this Instructables guide for a detailed photo walkthrough. Another good resource is this painter’s blog with creative lure jewelry ideas. Both show different techniques and styles you can adapt.
Final Thoughts: Wear Your Catch with Pride
Making fishing lure earrings is a precision craft, not a quick craft. The difference between a pair that looks like a garage sale reject and a pair that looks like boutique jewelry is in the prep work.
- Start with small, light lures under 5 grams for comfortable everyday wear.
- Always remove or blunt the barbs before doing anything else.
- Clean every lure with rubbing alcohol before sealing or painting.
- Seal metal lures with epoxy resin to prevent skin irritation and chipping.
- Use jump rings instead of glue for a stronger, more durable connection.
- Test the balance by letting the lure hang from your fingers before attaching the hook.
- Invest in hypoallergenic ear wires to avoid nickel reactions.
The first pair you make will probably have a flaw. That is fine. Wear them anyway, or give them to a friend who will appreciate the effort. The second pair will be better. The third pair will be the ones people ask about at parties. That is the fun of it.
