You’ve spent another Saturday morning watching bass follow your store-bought crankbait to the boat, then turn away at the last second. Or maybe you’ve lost your favorite lucky lure to a submerged log, and the replacement costs more than the fish you’d catch with it. That frustration is exactly where DIY lure making starts.
This guide walks you through the real process of building your own bass lures, from the tools you need to the specific fixes for common problems like a lure running sideways or rolling over. You’ll learn four beginner projects, how to paint and balance them, and how to troubleshoot action issues before they cost you fish. No fluff, just the stuff that works.

HALF CRESCEN
Fishing Lures Kit for Bass, 15PCS Swimbaits Crankbaits Fishing Tackle Set
- 【Catch More Bass with Realistic Action】Designed with lifelike swimming motion and detailed fish patterns, these fishing lures trig…
- 【15PCS Complete Fishing Lure Kit】Includes hard baits, soft plastic swimbaits and multi-style fishing lures to match different fish…
- 【Freshwater & Saltwater Ready】Built for lakes, rivers, ponds and coastal waters. Effective for bass fishing, trout fishing and pik…
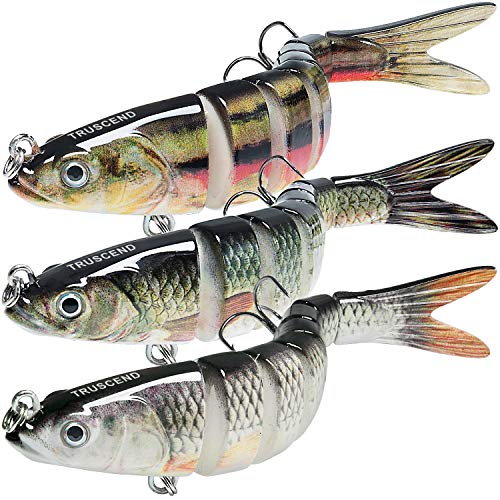
If you want to skip straight to fishing while you build your skills, a complete bass lure kit like this one from HALF CRESCEN gives you 15 different hard baits and soft plastics to study. Take one apart to see how the line tie sits, how the lip angles, and how the hooks hang. That hands-on examination teaches you more than any diagram.

Why DIY Bass Lures Beat Store-Bought Options
Let’s talk money first. A decent crankbait runs $8 to $15 at retail. A jig with a skirt costs $4 to $7. When you buy components in bulk, you can build a jig for under $1.50 and a wooden popper for about $3, assuming you already own basic tools. The savings add up fast, especially when you lose lures to snags, which happens to everyone.
But cost isn’t the only reason. Store-bought lures are designed for the average angler in average conditions. Your local lake might have muddy water, heavy grass, or a specific shad population that swims a certain way. When you make your own lures, you can match those conditions exactly. You control the weight, the buoyancy, the rattle, and the color pattern.
There’s also the satisfaction factor. Catching a 5-pound bass on a lure you carved and painted yourself feels different. It’s not arrogance; it’s ownership. You understand why the lure works, which makes you a better angler overall.
Essential Tools and Materials for the DIY Angler
Start with a basic workspace. A sturdy table, good lighting, and a vise are your foundation. You don’t need a full workshop, but you do need a few specific tools that make the job easier and safer.
- Balsa wood or basswood: Balsa is light and easy to carve, perfect for topwater poppers. Basswood is denser and better for crankbaits that need more weight.
- Exacto knife and sandpaper: A sharp blade and 80 to 220 grit sandpaper shape your lure. Take your time here; a smooth body gives a better paint finish.
- Wire for line ties and hook hangers: Stainless steel wire, 0.035 to 0.045 inches thick, works for most freshwater lures. You’ll bend it into U-shapes and twist eyes.
- Split rings and treble hooks: Use quality split rings; cheap ones open up under pressure. Size 6 or 4 treble hooks are standard for bass crankbaits.
- Epoxy or UV resin: This seals the wood and protects your paint job. Devcon Two-Ton epoxy is a classic choice that cures clear and hard.
- Airbrush or spray cans: An airbrush gives you control and fine detail. Spray cans work fine for solid colors and basic patterns.
- Lead or bismuth shot for weighting: You’ll add these to the belly to get the lure to dive or float correctly. Bismuth is safer to handle than lead.
Sourcing Components on a Budget
You don’t need to buy everything new. Old lures with cracked paint or broken hooks are gold mines for split rings, swivels, and treble hooks. Ask around at local fishing clubs; most anglers have a box of junk lures they’ll give away.
Online bulk sellers offer hooks, skirts, and eyes at a fraction of retail prices. Look for packs of 50 or 100 jig heads, or spools of wire. The upfront cost is higher, but the per-lure cost drops dramatically. One spool of wire makes dozens of line ties.
The 4 Best Beginner Lure Projects
Start with these four projects. They cover different techniques and teach you the core skills of carving, pouring, and assembling. Master these before moving to complex lures like deep-diving crankbaits with metal lips.
The Classic Hand-Carved Popper
A popper is the perfect first project. It’s a single piece of wood, a couple of hooks, and a concave face. You carve the body, sand it smooth, then cut a cup shape into the front at about a 45-degree angle. That cup catches water and makes the popping sound.
Drill a hole through the center for a wire harness, or use screw eyes for the line tie and rear hook hanger. Add weight to the belly near the front to keep the popper upright. Finish with epoxy and paint. The whole project takes a few hours, and you’ll learn how wood density affects buoyancy.
The Versatile Jig and Skirt
Jigs are the easiest lure to make because there’s no carving or painting. You need a jig head mold, a hook, some lead or bismuth, and a silicone skirt. Pour the head, let it cool, then attach the skirt with a rubber band or thread.
The key is matching the skirt color to the local forage. In spring, use brown and orange for crawfish. In summer, switch to white and chartreuse for shad. Jigs are also the most forgiving project; if you mess up a pour, just melt it down and try again.
The Recycled Soft Plastic Swimbait
You’ve got a bag of torn soft plastics that you’ll never fish again. Don’t throw them out. Instead, melt them down in a dedicated pot and pour them into a new mold. This is called recycling, and it’s both economical and environmentally friendly.
You’ll need a soft plastic mold, a melting pot, and some colorant. Heat the plastic to about 350°F, stir in the color, and pour. Let it cool, then add a weighted jig head or an internal harness. The action comes from the tail design, so choose a mold with a paddle tail or a curly tail.
The Inline Spinner
An inline spinner is all about the blade. You need a wire shaft, a clevis, a blade, a few beads, and a treble hook. Bend the wire into a loop at one end for the line tie, slide on the beads and clevis with the blade, then bend the other end for the hook.
The blade size and shape determine the action. A Colorado blade gives a thumping vibration at slow speeds; a willow leaf blade spins faster and works better for covering water. Start with a size 3 or 4 blade for bass. This project teaches you wire bending, which you’ll use in every other lure type.
Step-by-Step: Assembling and Painting Your Lure
Assembly is where most beginners make mistakes. The line tie, the hook hangers, and the weight placement all affect how the lure swims. Get these wrong, and you’ll spend hours tuning a lure that should have worked.
Adding Weight and Balancing for Action
Weight placement controls the center of gravity. For a crankbait, you want the weight low and slightly forward. This keeps the nose down and helps the lure dive. For a popper, weight goes in the rear to keep the tail down and the head up.
Start with a small amount of weight, like a single BB shot, and test the lure in a bucket or bathtub. Add more weight in small increments until the lure sits at the angle you want. A lure that floats flat on its side needs more weight. A lure that sinks too fast needs less.
Applying Durable Finishes and 3D Eyes
Paint is the last step, but it’s not just for looks. A good paint job protects the wood and adds realism. Start with a white primer, then airbrush your base color. Add stripes or spots with a stencil or a fine brush.
Seal everything with two coats of epoxy. This gives a glossy finish and prevents water from soaking into the wood. Add 3D eyes after the first coat of epoxy dries. They sell adhesive eyes in any tackle shop, and they make a huge difference in triggering strikes. The eyes are often the first thing a bass targets.
Tuning and Troubleshooting: Fixing Lure Action
You’ve built your lure, painted it, and now it swims like a wounded duck. Don’t panic. Most action problems have simple fixes, and you can diagnose them in a bucket of water or a swimming pool.
Running sideways: This means the line tie is bent to one side. The fix is simple. Bend the line tie slightly in the opposite direction of the run. Test again. Keep adjusting until the lure runs straight.
Rolling over: This happens when the line tie is positioned too low or the weight is too high. The lure’s center of gravity is off. Add weight to the bottom of the lure, or bend the line tie up slightly. For crankbaits, check that the lip is perfectly straight.
Spinning instead of wobbling: Your lure is spinning on its axis, which means the line tie and the hook hangers are not aligned. They need to be on the same vertical plane. If they’re off by even a few degrees, the lure will spin.
Not diving deep enough: The lip angle or the weight is wrong. A steeper lip angle makes the lure dive deeper. More weight in the front also helps. If you’re still not getting depth, switch to a longer lip.
Testing Your Lures: Field Trials and Adjustments
Bucket testing tells you if the lure runs straight, but it doesn’t tell you how it behaves at speed or in current. You need field trials. Take your homemade lures to a pond or a calm section of river, and fish them alongside a store-bought lure that you trust.
Cast them both out and retrieve them at the same speed. Compare the action. Does your lure vibrate more? Less? Does it come through grass cleanly? Make notes on what you see, then go home and adjust.
Bring a small toolkit to the water. A pair of needle-nose pliers and a small screwdriver let you bend line ties or swap hooks on the spot. This is the fastest way to learn. You’ll find that some lures need a few trips to get right, and that’s okay.
Safety, Storage, and Maintenance of DIY Tackle
Working with lead, epoxy, and solvents has real risks. Ventilation is non-negotiable. If you’re pouring lead or bismuth, do it outside or in a garage with the door open. Melt the metal in a dedicated pot, never one you cook with. Wear a respirator rated for fumes, not just a dust mask.
Epoxy and paint solvents also put off fumes. Work in a well-ventilated area and wear nitrile gloves. Wash your hands before eating. These materials are safe if you respect them.
Storage matters. Homemade lures with treble hooks rust faster than you think, especially if you fish saltwater. After every trip, rinse your lures in fresh water and dry them completely. Store them in a tackle box with silica gel packets to absorb moisture.
Sharpen your hooks before each outing. A dull hook loses fish, no matter how good your lure looks. Use a hook file or a sharpening stone, and check the point with your thumbnail. If it slides, it’s dull.
Frequently Asked Questions (FAQs)
What is the best wood for making bass lures?
Balsa is the best for topwater lures because it’s light and floats high. Basswood is better for crankbaits because it’s denser and casts farther. Cedar is a good middle ground, but it’s harder to carve. Start with balsa for poppers and basswood for diving lures.
How do I make my homemade crankbait dive deeper?
Three things control dive depth: lip angle, lip size, and weight. A longer lip that angles downward at about 45 degrees will dive deeper. Adding weight to the front of the belly also helps. Test in a pool or deep bucket to see the difference.
Do I need an airbrush to paint lures?
No. You can get great results with rattle cans and stencils. An airbrush gives you finer control for shading and patterns, but it’s an investment. Start with spray cans and a steady hand. You can always upgrade later.
What kind of hooks should I use for bass lures?
Use sharp treble hooks in size 4 or 6 for crankbaits and poppers. For jigs, use a single heavy-gauge hook in size 3/0 to 5/0. Match the hook size to the lure size. A hook that’s too big will ruin the action.
How do I keep my homemade lures from rusting?
Rinse them in fresh water after every use and dry them completely. Store them in a dry tackle box. Add a light coat of reel oil to the hook points and split rings before long-term storage. Replace any hooks that show rust spots.
What to Do With Everything You Just Learned
- Start with a popper or a jig. They’re the most forgiving and teach the core skills.
- Buy components in bulk to cut your cost per lure by half or more.
- Test every lure in a bucket before you take it to the lake. Fix action problems at home, not on the water.
- Bend the line tie to fix a lure that runs sideways. Add weight to fix one that rolls over.
- Match your lure colors to the local forage: brown and orange for crawfish, white and chartreuse for shad.
- Always work with proper ventilation when pouring lead or using epoxy.
- Rinse, dry, and sharpen your homemade lures after every trip to make them last.