
You’ve just spooled fresh line onto your baitcaster, you make that first long cast, and then it happens. The spool keeps spinning, the line goes slack, and your lure flies off into the water. The whole spool is spinning freely under the line. That’s line slip, and it’s one of the most frustrating things in bass fishing.
Most anglers think any knot will hold. They tie a basic knot, crank it down, and hope for the best. Then they lose a $15 crankbait on the first cast. The truth is that a baitcaster spool has a smooth, polished metal arbor that most knots simply can’t grip. You need a specific connection, and you need to do it right.

KastKing
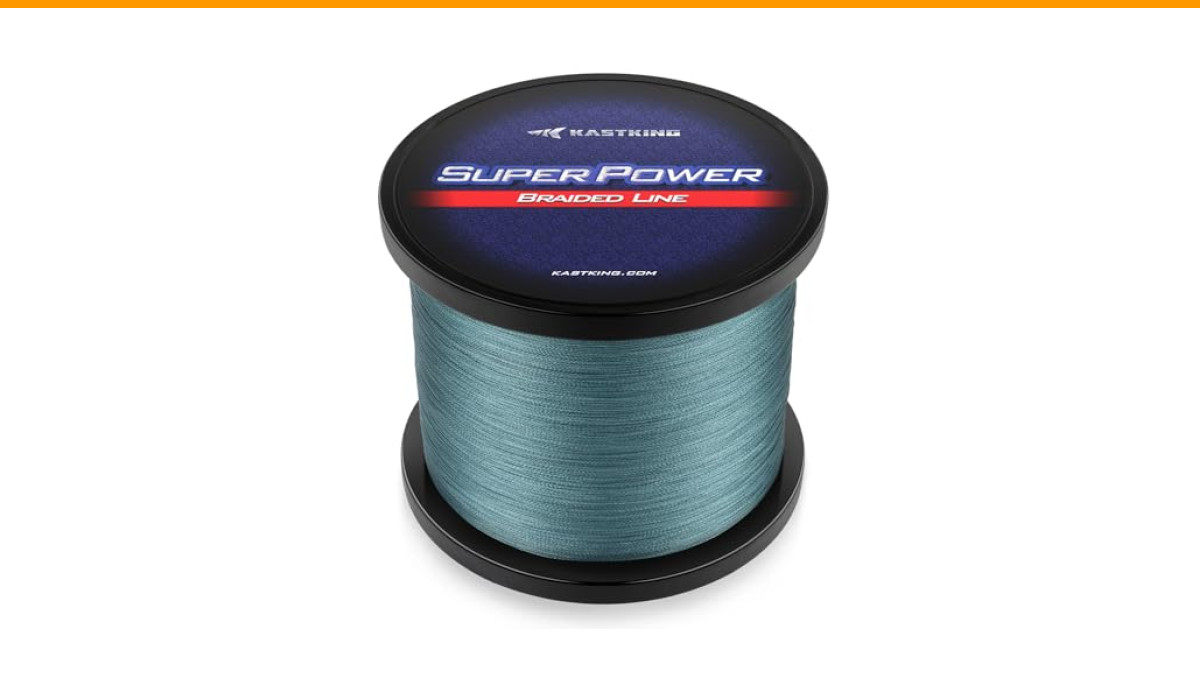
KastKing Superpower Braided Fishing Line,Low-Vis Gray,20 LB,327 Yds | Zero Stretch, Strong Knot Strength, Smaller Diameter, Enhanced Sensitivity, Long Casting, Superior Strength
- Strong knot strength - dynamically incorporated strands in KastKing Superpower braided lines allow you to easily tie a more solid…
- Low memory - helps you achieve a better, farther casts, less chance of wind Knots
- Greater abrasion resistance - of KastKing braided fishing line decreases the likelihood of losing your "big one"! KastKing Superpo…
This guide walks you through three proven methods to tie fishing line on a baitcasting reel so it never slips. You’ll learn the classic arbor knot, a tape backing trick that works when you’re in a hurry, and the Alberto knot for joining braid to a mono backing. You’ll also get a pre-cast test that takes ten seconds and saves you from losing expensive lures.
If you’re spooling with braid, you’ll want a line that handles knots well and resists digging in. The KastKing Superpower Braided Fishing Line is a solid choice here. It has strong knot strength, so a cinch knot holds tight on the spool, and its low memory means fewer wind knots on the cast. The smaller diameter lets you fit more line on the spool, which matters when you’re trying to fill a deep reel.
Why Line Slips on a Baitcaster (and How to Stop It)
Line slip happens in two places. The first is on the arbor, which is the smooth metal cylinder at the center of the spool. The second is under the spool lip, where the line digs into the side of the spool and pulls the whole spool sideways.
Most people only think about the arbor. They tie a knot, pull it tight, and assume that’s it. But a smooth metal arbor has almost no friction. A simple overhand knot will just slide around when you put tension on it. The line needs something to bite into, or it needs to be locked down with pressure from the line above it.
Spool lip slip is different. It happens when you fill the spool too full, past the point where the spool lip angles inward. When you cast, the line pulls against that angled lip, and if there’s too much line, it can pull the top layer down under the lip. That creates a bird’s nest that’s nearly impossible to untangle.
The fix for both problems is the same: use a knot that grips the arbor tightly, or use tape to create friction, and don’t overfill the spool. Leave about 1/8 inch of space between the line and the spool lip.
Tools You Need Before You Start
You don’t need much, but you need the right stuff. Here’s what to have on hand:
- Your baitcasting reel and rod
- The new line (mono, fluorocarbon, or braid)
- A scissors or line cutter
- Electrical tape or painter’s tape (for the tape method)
- A wet rag or paper towel
- A pencil or dowel to keep tension on the spool of line
One thing I recommend: wet the knot before you cinch it down. This is critical for braid and fluorocarbon. Dry line creates friction heat that can weaken the knot. A quick dip in water or a dab of saliva reduces that heat and lets the knot seat properly.
The Step-by-Step Arbor Knot Method
The arbor knot is the standard way to tie line to a baitcaster spool. It’s simple, it works, and it’s the first thing you should learn. But it only works if you tie it correctly. Most people skip a step or two and end up with a knot that slips.
Tying the Arbor Knot
- Run the line through the rod guides and the levelwind bar, then open the bail or release the spool so you can access the arbor.
- Wrap the line around the spool arbor once. You want a single loop around the metal.
- Tie an overhand knot in the tag end, leaving about 6 inches of tag. This knot is your stopper.
- Tie a second overhand knot in the main line, about 4 inches above the first knot. This second knot acts as a jammer.
- Pull the main line tight. The two knots will slide together and jam against each other, gripping the arbor.
That’s the whole thing. The two knots create a cinch that locks the line to the arbor. The single overhand knot alone won’t hold. The second knot is what makes it bite.
Cinching and Trimming the Tag End
Before you pull it tight, wet the knot. Then pull hard. I mean really hard, as hard as you can. If it slips, you’ll feel it immediately. If it holds, you’re good.
Trim the tag end close to the knot. Leave about 1/8 inch. Don’t cut it flush. A tiny nub helps the knot stay seated, and it gives you something to grab if you ever need to remove the line.
One note: the arbor knot works best with mono or fluorocarbon. Braid is slicker, and the knot can sometimes pull loose under heavy tension. If you’re spooling braid directly, use the tape method below, or tie a braid-to-mono backing.
The Tape Backing Method (No Knot Required)
This is the trick that tournament anglers use when they’re in a hurry. It’s not the most elegant solution, but it’s fast, it’s reliable, and it works with any line type, including braid.
Here’s how it works. Instead of tying a knot, you lay a strip of tape across the arbor, then spool line over it. The tape creates friction, and the line above it locks everything in place. The pressure from the line on top is what actually holds it.
How to Do It
- Cut a piece of electrical tape about 2 inches long.
- Place the tape across the arbor, sticky side down, so it covers the full width of the arbor. Press it down firmly.
- Run the line over the tape and start spooling.
- Apply heavy thumb pressure on the spool as you fill it. The first few wraps are the most important.
- Fill the spool completely, then test the connection before you cast.
The pros: it takes about 30 seconds, it works with braid and mono, and it doesn’t create a lump under the line. The cons: if you ever need to remove the line, the tape can leave a sticky residue on the arbor. Also, if you don’t apply enough tension when spooling, the line can slip on the tape. It’s not perfect, but it’s a solid backup.
I’ve used this method for years on my heavy flipping reels. It’s held up to 40-pound braid and big fish without a single slip.
How to Tie Braid to a Mono Backing (Alberto Knot)
Here’s the thing most people get wrong. They spool braid directly onto the arbor. Braid is slick, and even with a good arbor knot, it can slip under heavy load. The better approach is to use a mono backing.
A mono backing is a layer of monofilament line tied to the arbor first, then you connect your braid to the mono with a knot. The mono grips the arbor better than braid, and the braid-to-mono connection is stronger than a braid-to-arbor connection.
The Alberto knot is the best connection for this. It’s easier to tie than the FG knot, and it’s strong enough for almost any situation.
Step-by-Step Alberto Knot
- Overlap the mono and braid lines, with about 6 inches of each overlapping.
- Take the braid and make 7-8 wraps around the mono. Keep the wraps tight and neat.
- Bring the braid tag end back and thread it between the two lines, right where the wraps started.
- Moisten the knot and pull both main lines in opposite directions. The wraps will tighten and lock together.
- Trim the tag ends close to the knot.
The Alberto knot is strong, but it’s not invisible. It creates a bump that can catch on the rod guides if you cast too hard. To minimize this, make sure the knot is small and the tag ends are trimmed very close.
One more thing: the knot should be on the spool, not out in the guides. Fill the spool with enough mono backing so that the knot sits about 1/4 inch below the spool lip. Then fill the rest with braid.
Filling the Spool: Tension, Leveling, and the Spool Lip
Once your line is attached, the job isn’t done. How you fill the spool matters just as much as how you tie the knot. A poorly filled spool will cause wind knots, backlash, and line slip, even with a perfect knot.
First, tension. You need consistent tension on the line as it goes onto the spool. If you spool it loose, the line will shift on the spool and create a spongy feel. If you spool it too tight, you’ll stretch the line and cause memory issues.
The best way to apply tension is to run the line through your fingers or a wet rag as you reel. Hold the line between your thumb and forefinger, applying steady pressure. You want the line to lay flat on the spool, not dig into the layers below.
Second, leveling. The line needs to lay evenly across the spool, side to side. If it piles up on one side, it will cause casting problems. The levelwind bar does this automatically on most reels, but you should still watch the first few wraps to make sure they’re laying flat.
Third, the spool lip. This is where most people mess up. They fill the spool to the absolute edge, thinking they’ll get more casting distance. That’s wrong. Overfilling causes the line to catch under the spool lip, which creates a massive tangle on the first cast.
Stop filling when the line is about 1/8 inch below the spool lip. That’s the sweet spot. You’ll get maximum casting distance without the risk of line slip under the lip.
Common Mistakes That Cause Line Slip
Let’s bust a few myths. People blame the knot, but often it’s something else entirely.
Mistake 1: Using a single overhand knot. A single knot just slides on the smooth arbor. You need the two-knot cinch or the tape method. No exceptions.
Mistake 2: Not wetting the knot. Dry knots heat up when you cinch them down. The heat weakens the line, and the knot can fail later under load. Always wet the knot.
Mistake 3: Overfilling the spool. This is the number one cause of line slipping under the spool lip. Leave that 1/8 inch of space. It’s not costing you distance; it’s saving you from a backlash.
Mistake 4: Using braid without a mono backing. Braid is too slick for a direct arbor connection. The arbor knot can hold, but it’s not reliable under heavy drag. Use a mono backing or the tape method.
Mistake 5: Ignoring the spool tension knob. If your spool tension is set too loose, the spool will overrun on the cast, which can cause the line to slip and tangle. Set the tension so the lure falls slowly when you release the spool.
Quick Pre-Cast Test to Ensure a Slip-Free Setup
Before you tie on a lure and make that first cast, do this test. It takes ten seconds and it’ll save you from losing tackle.
- Strip about 20 feet of line off the spool.
- Grab the line near the rod tip and pull hard, as if you’re setting the hook on a big fish.
- Watch the spool. If it turns, your connection is slipping. If it doesn’t, you’re good.
- Repeat the test with the drag set to maximum.
If the spool turns, you have a problem. The line is slipping on the arbor. You need to re-tie the knot or add tape. Don’t skip this test. It’s the difference between a confident cast and a heartbreaking backlash.
I’ve seen anglers skip this step and lose their first fish of the day because the line spun on the spool. The test takes ten seconds. Do it.
Frequently Asked Questions
Should line go over or under the levelwind bar?
Line should go through the levelwind bar, not over or under it. The levelwind bar is the little guide that moves side to side as you reel. Run the line through that guide, then down to the spool. If you route it over or under the bar, you’ll get uneven line lay and increased friction, which can cause casting problems.
How much backing do you need?
For a mono backing, you need enough to fill the spool about one-third to one-half full. The exact amount depends on your spool depth and the line diameter. A good rule of thumb: fill the spool with mono until the spool is about half full, then tie on your braid and fill the rest. For the tape method, you don’t need any backing. The tape replaces the need for a knot.
Can I use fluorocarbon line on a baitcaster?
Yes, but fluorocarbon is stiffer and has more memory than mono. It’s more prone to backlash on a baitcaster. If you’re a beginner, start with mono. If you’re experienced, fluorocarbon works well for its low visibility and sink rate. Use the same arbor knot or tape method, and make sure to wet the knot before cinching.
Why does my line keep slipping even after I tie the arbor knot?
You’re probably not cinching it tight enough, or you’re not using the second jam knot. The arbor knot requires two overhand knots that jam together. If you only tied one, it will slip. Also, make sure you’re pulling with maximum force. If it still slips, switch to the tape method or add a mono backing.
What’s the best knot for tying braid to a baitcaster spool?
The best option is to use a mono backing and tie the braid to the mono with an Alberto knot. If you insist on tying braid directly to the arbor, use the tape method. A braid-to-arbor arbor knot is unreliable. The Alberto knot is stronger and more reliable than any direct braid-to-arbor connection.
Final Verdict: Best Knot for Your Reel
There’s no single best method for every situation. The arbor knot is the standard for mono and fluorocarbon. The tape method is the fastest and most reliable for braid. The Alberto knot with a mono backing is the strongest and most professional setup.
Here’s what I recommend based on your line type:
| Line Type | Best Method | Why It Works | Difficulty |
|---|---|---|---|
| Monofilament | Arbor Knot (two-knot cinch) | Mono grips the arbor well; the jam knot locks it in place | Easy |
| Fluorocarbon | Arbor Knot (wet it first) | Fluorocarbon is slick; wetting prevents heat damage | Easy |
| Braided Line | Tape Backing or Mono Backing + Alberto Knot | Braid is too slick for a direct knot; tape or mono provides friction | Moderate |
| Heavy Braid (30lb+) | Mono Backing + Alberto Knot | Provides the strongest connection for heavy drag and big fish | Moderate |
Whichever method you choose, always do the pre-cast test. That’s the only way to be sure it’s going to hold.
Here’s a quick recap of everything you need to remember:
- Use the two-knot arbor cinch for mono and fluorocarbon, not a single overhand knot.
- Wet every knot before cinching down to prevent heat damage.
- For braid, use the tape backing method or a mono backing with an Alberto knot.
- Fill the spool to 1/8 inch below the spool lip, never to the edge.
- Apply steady tension while spooling to prevent loose line and wind knots.
- Always perform the ten-second pre-cast test before tying on a lure.
- If the line slips, re-tie or add tape. Don’t just hope it holds.
Get the connection right, and you’ll spend more time fishing and less time picking out backlashes. That’s the whole point.
