You just bought a fresh spool of fluorocarbon, and you’re staring at your baitcaster like it owes you money. The last time you tried this, the line twisted into a bird’s nest before you even made a cast. The line coiled off the spool in loops that looked like a slinky. Sound familiar?
Fluorocarbon behaves differently than monofilament. It’s stiffer, denser, and holds memory like a grudge. But once you understand why it acts that way, spooling becomes a straightforward process that takes maybe ten minutes. This guide walks through every step, from tying the arbor knot to setting your brakes, with the specific techniques that prevent twist and backlash before they start.

Seaguar
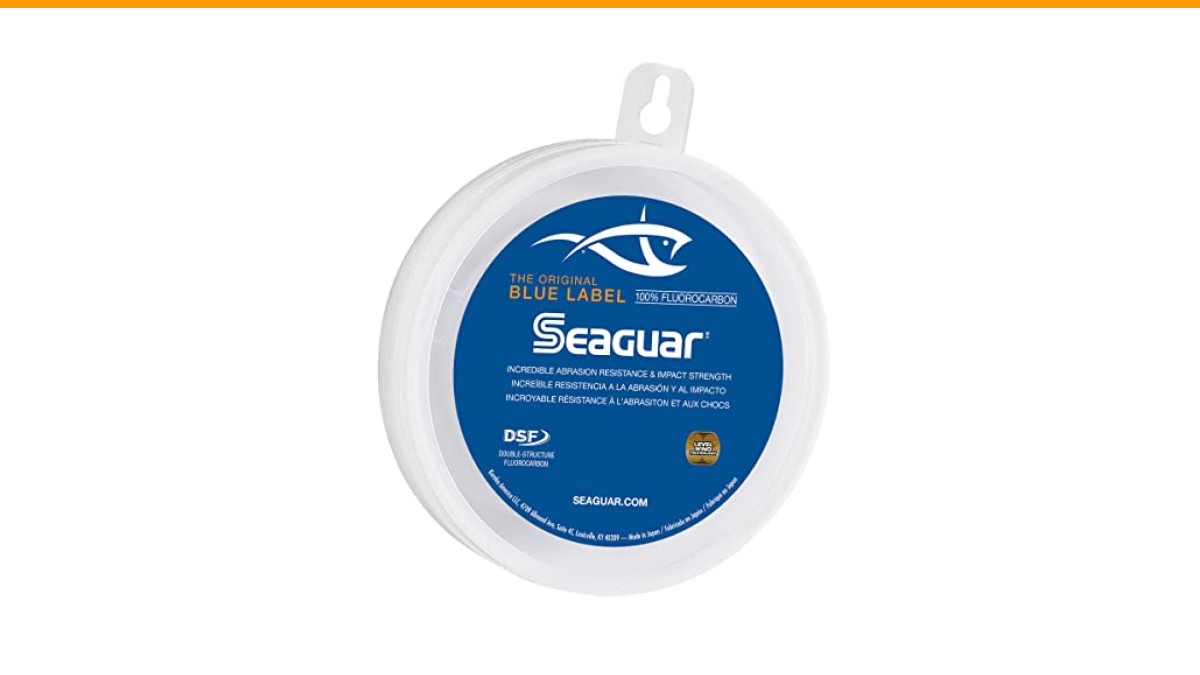
Seaguar Blue Label 100% Fluorocarbon Fishing Line leader, 30lbs, 25yds Break Strength/Length - 30FC25
- This double structure 100% fluorocarbon boasts exceptional knot and tensile strength. It’s a top choice for braid to leader connec…
- Blue Label Leader Material has a proven track record and is a captain’s top choice for targeting a wide variety of saltwater game…
- Whether you’re trolling, casting plugs or deep water jigging, Blue Label helps you make solid hook-ups and keep fish pegged
You’ll learn how to control line tension, which direction the spool should face, and how to fix a bad spool job without wasting line. Let’s get your reel ready for the water.
Why Fluorocarbon is Tricky on a Baitcaster
Fluorocarbon has a higher density than water, which makes it sink faster than mono. That’s great for getting lures down to fish, but it also means the line is less forgiving on the spool. The stiffness that gives fluorocarbon its abrasion resistance also gives it a strong memory. Leave it coiled on a spool for a month, and it will remember that coil shape.
When you spool it wrong, that memory translates into loops and spirals coming off your reel. Casting distance drops, backlash frequency goes up, and you spend more time picking birds’ nests than fishing. The fix isn’t buying expensive line—it’s in how you put the line on.
Most spooling problems trace back to one of three mistakes: no tension, wrong spool direction, or overfilling. This guide addresses all three with specific numbers and techniques.
If you’re fishing heavier cover or targeting toothy saltwater species, consider a quality leader material like Seaguar Blue Label 100% Fluorocarbon. It’s a 30-pound test in a 25-yard spool, perfect for braid-to-leader connections where knot strength matters. The double structure gives you extra confidence on hook sets.
What You Need Before You Start
Gather these items before you touch the reel. Running back and forth to the tackle box mid-spool invites mistakes.
- Your baitcasting reel mounted on a rod
- The fluorocarbon line spool
- A line conditioner (like KVD Line & Lure or Reel Sauce)
- A pencil or dowel to hold the line spool
- Scissors or line cutters
- A wet rag or paper towel
Essential Tools and Line Conditioner
Line conditioner isn’t optional with fluorocarbon. It softens the line, reduces memory, and makes the spooling process noticeably smoother. Spray it on the line spool before you start, and again after you finish. The difference is immediate—the line feels more pliable and lays flatter on the reel.
A pencil through the center of the line spool lets it spin freely as you wind. Hold the pencil horizontally, with the spool between your knees or resting on a table edge. This setup prevents the spool from flipping and twisting the line.
Step 1: Mount the Reel and Thread the Rod
Attach your reel to the rod securely. Run the line through the rod guides from the tip down to the reel. The line should pass through each guide smoothly, with no rubbing or binding.
Thread the line through the level wind mechanism on the reel. The level wind is that metal bar that slides back and forth as you crank. It distributes line evenly across the spool. If you skip this step, line piles up in one spot and creates an uneven surface that ruins casting.
Open the bail (the wire arm that flips up) and pull enough line to work with. You’ll need about two feet of slack for tying the arbor knot.
Step 2: Tie the Arbor Knot to the Spool
The arbor knot connects your line to the spool. It’s simple but must be tied correctly—a loose arbor knot lets the spool spin freely under a heavy cast, costing you a lure and a lot of line.
Wrap the line around the spool arbor once. Tie an overhand knot in the standing line (the line going back to the source spool). Then tie another overhand knot in the tag end (the short piece). Pull the tag end knot tight against the arbor, then pull the standing line to seat the main knot against the spool. Trim the tag end to about an eighth of an inch.
This double-knot system grips the arbor without slipping. Test it by pulling firmly on the line. If it moves, redo it. You don’t want to discover a loose arbor knot on your first cast.
Step 3: The Critical Step—Spool Direction and Line Twist
Here’s where most people mess up. The line spool must rotate in the same direction as the reel spool when you crank. If they spin opposite directions, you’re twisting the line as it goes on. That twist shows up later as loops and tangles.
Picture a spool of thread. When you pull thread off the end, it comes off with a slight twist. When you wind that twisted thread onto a reel spool, the twists accumulate. After a few dozen cranks, you have a spool full of line that wants to twist itself into knots.
How to Test the Spool Rotation
Here’s the simple test. Place the line spool on a pencil with the label facing you. Look at the reel spool. Crank the handle forward one full turn. Watch which direction the reel spool rotates.
Now, let out a few inches of line from the source spool. Hold the line between your thumb and forefinger. Crank the reel again. If the line spool rotates in the same direction as the reel spool, you’re good. If it rotates opposite, flip the line spool over so the label faces the other way.
Most reels have the handle on the right side, which means the spool rotates counterclockwise when viewed from the front. Your line spool should also rotate counterclockwise. Test it every time you spool a new reel—brands differ, and you don’t want to rely on memory.
Step 4: Apply Tension Like a Pro
Fluorocarbon needs firm, consistent tension during spooling. Too loose, and the line lays sloppy with gaps. Too tight, and you stretch the line, which weakens it and creates memory.
The right tension feels like moderate resistance—enough that the line digs slightly into your thumb when you press it. You should be able to stop the line spool from spinning by squeezing the pencil, but not so hard that you fight yourself.
Manual Thumb Pressure vs. Line Winder
Manual method: Run the line between your thumb and index finger of your non-cranking hand. Apply steady pressure as you crank. This works fine for shorter spools but gets tiring on a full 150-yard spool.
Line winder method: A drill-powered line winder, like the Piscifun or the cheap plastic ones, holds the source spool and spins it at a controlled speed. You still need to apply tension with your fingers, but the winder keeps the spool stable and prevents it from flipping.
I’ve used both. The manual method works, but your thumb gets sore and your pressure varies as you fatigue. The winder costs about twenty bucks and pays for itself in saved line and sanity. If you spool more than a few reels a year, buy one.
Whatever method you choose, keep the tension even. Stop every 20 cranks and check the line lay. It should be flat and even, with no gaps or hills.
Step 5: Fill to the Exact Right Level
Fill the spool until the line sits about 1/8 inch below the spool’s outer edge. That’s roughly the thickness of a dime. Overfilling causes line to spill off during casts, which creates instant backlash. Underfilling reduces casting distance because the line has to climb over the spool lip.
Here’s a specific number: a typical baitcaster spool holds about 150 yards of 12-pound fluorocarbon. If you’re using heavier line, say 20-pound, you’ll get less. If you’re using braid, you’ll get more.
Check the level as you go. Stop when the line reaches the 1/8-inch mark. If you have line left on the source spool, that’s fine—you don’t need to use it all.
Step 6: Treat the Line to Prevent Memory
After filling, spray line conditioner directly on the spool. Work it in with your fingers as you rotate the spool. This softens the fluorocarbon and reduces the coil memory that causes wind knots.
Some anglers soak the line spool in warm water for 10 minutes before spooling. The warmth relaxes the line’s internal structure, making it more pliable. I’ve done this with stiff fluorocarbon brands, and it helps. Just dry the spool before you start, or the water can affect the drag system.
Another trick: after spooling, let the reel sit overnight before fishing. The line settles into its new shape on the spool. It’s not perfect—fluorocarbon will always have some memory—but it reduces the initial coiling dramatically.
Step 7: Set the Brakes and Test Cast
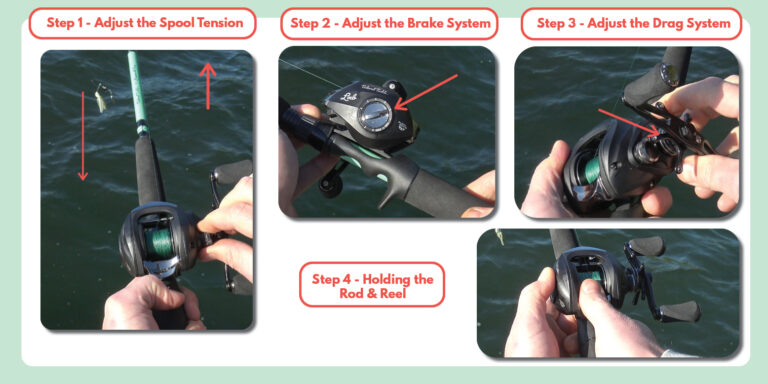
Now that the line is on, set your reel’s brake system. Most baitcasters have either magnetic brakes, centrifugal brakes, or both. Start with the brakes at about 70% of maximum. This prevents backlash while you get used to the new line.
Make a few practice casts in an open area. Watch how the line comes off the spool. It should flow smoothly with no loops. If you see loops, your tension was too loose during spooling. If the line digs into itself on the spool, your tension was too tight.
Adjust the spool tension knob (the small dial on the handle side) until the lure falls slowly when you press the thumb bar. It should hit the ground without causing a backlash. Fine-tune from there.
Fixing Common Spooling Mistakes
Sometimes you don’t realize the spool job is bad until you’re on the water. Here’s how to fix the most common issues.
Line twist: If your line has visible twists or loops coming off the reel, the spool direction was wrong. Strip the line off into a bucket of warm water, then respool with the source spool flipped. The warm water helps release the twists.
Loose line lay: If the line sits unevenly, with gaps or ridges, you didn’t apply enough tension. Strip the line and respool with firmer thumb pressure. Don’t try to fix it by casting—the uneven surface will cause backlash.
Overfilled spool: If line spills over the edge, strip off about 20 yards. You’re better off with slightly less line than a reel that won’t cast without tangling.
One more fix: if you have a bad spool job but the line is expensive, you can flip the spool over and wind the line back onto the source spool, then respool it correctly. It’s tedious but saves the line.
Mono Backing vs. Full Fluorocarbon
You don’t have to fill the entire spool with fluorocarbon. Many anglers use monofilament backing—fill the spool about halfway with mono, then tie on fluorocarbon for the top half. This saves money because fluoro costs more per yard, and it reduces the weight on the spool.
The connection knot matters. The Alberto knot is the easiest to tie and holds well. The FG knot is stronger but takes practice. For a baitcaster, I prefer the Alberto because it’s thinner and passes through the rod guides smoothly.
Here’s the ratio: for a reel that holds 150 yards of 12-pound fluoro, use about 75 yards of 12-pound mono backing, then 75 yards of fluoro. Adjust the ratio based on your fishing style. If you need long casts, use less backing. If you’re fishing close quarters, more backing is fine.
Braid backing works too, but it’s more expensive and requires a different knot. Stick with mono for simplicity.
| Method | Cost | Line Capacity | Knot Required | Best For |
|---|---|---|---|---|
| Full Fluorocarbon | Highest | Full spool | None | Maximum sensitivity, low stretch |
| Mono Backing + Fluoro | Moderate | Half fluoro | Alberto or FG | Budget-conscious, most anglers |
| Braid Backing + Fluoro Leader | Moderate | Full spool | FG or double uni | Maximum casting distance, heavy cover |
Pro Tips for Zero Backlash
Even with perfect spooling, backlash happens. These tips reduce the frequency and severity.
First, always check your line lay before you cast. Run your thumb along the spool. If you feel any rough spots, fix them before casting.
Second, use your thumb as a brake. The thumb bar isn’t just for releasing the spool—it’s your primary control. Feather the spool with your thumb as the lure decelerates. This takes practice, but it’s the difference between a clean cast and a bird’s nest.
Third, adjust your brakes for wind. On a windy day, increase the brakes by 20-30%. The wind catches the line and can cause the spool to overrun. Don’t be stubborn about it—just turn the dial.
Fourth, replace your line regularly. Fluorocarbon degrades with UV exposure and heat. If your line has been on the reel for more than a season, respool. Old line has more memory and is more prone to backlash.
Finally, store your reels properly. Keep them out of direct sunlight and extreme heat. A reel left in a hot car trunk will have a spool of line that’s full of memory. Store it in a cool, dark place, and your line will behave better.
Frequently Asked Questions
Why does my fluorocarbon line keep coiling off the spool?
That’s line memory. Fluorocarbon is stiff and remembers its coiled shape from the manufacturer’s spool. To reduce it, use line conditioner before and after spooling, and soak the line spool in warm water for 10 minutes before you start. Also, make sure you’re not overfilling the spool—line that sits above the edge will coil more.
Can I use monofilament backing with fluorocarbon on a baitcaster?
Yes, and it’s a smart money saver. Fill the spool halfway with mono, then tie a strong knot (Alberto or FG) and add fluorocarbon on top. The mono backing doesn’t affect casting performance, and you’ll spend less on expensive fluoro.
How tight should I spool fluorocarbon on a baitcaster?
Tight enough that the line lays flat with no gaps, but not so tight that you stretch it. A good test: press your thumb on the line and crank. You should feel firm resistance, but you shouldn’t have to strain. If the line digs into the spool when you stop cranking, you’re too tight.
What’s the best knot for tying fluorocarbon to the spool arbor?
The arbor knot is standard—two overhand knots that cinch against each other. It’s simple and effective. For connecting fluorocarbon to a backing line, use the Alberto knot for ease or the FG knot for maximum strength.
How often should I replace fluorocarbon on my baitcaster?
Replace it when you see signs of wear: nicks, abrasions, or increased coiling. For regular fishing, that’s about every 3-4 months. If you fish in heavy cover or around rocks, check the line before every trip and replace it more often. Fluorocarbon doesn’t stretch like mono, so it’s more prone to breaking at nicks.
Final Thoughts Before You Spool
The difference between a frustrating day and a productive one often comes down to how your line sits on the spool. Take the extra five minutes to do it right the first time.
- Always test spool rotation direction before winding—flip the line spool if needed.
- Apply steady, moderate thumb pressure throughout the entire spooling process.
- Fill to 1/8 inch below the spool edge—no more, no less.
- Use line conditioner on the source spool and the finished spool.
- Set brakes to 70% for your first casts, then adjust down.
- If you see line twist, strip it off and respool rather than trying to fish through it.
- Consider mono backing to save money without sacrificing performance.
Spooling fluorocarbon isn’t hard once you understand what causes the problems. The stiffness that makes it great for sensitivity also makes it picky about how it’s handled. Respect that, and you’ll get clean casts, longer distance, and fewer birds’ nests.
Now go spool that reel and get on the water.