
You’ve probably thrown a $12 crankbait into a snag and watched it disappear. That hurts. But it hurts more when the lure was working perfectly — the right wobble, the right depth — and now it’s gone. Building your own balsa lures solves that problem in a few ways. You control the action, you control the paint, and when you lose one, you lose a few dollars of material instead of a retail markup.
This guide walks through the entire process, from picking the right block of balsa to tuning the finished lure in your bathtub. You’ll learn why through-wire construction beats simple screw eyes, how to calculate lip size for shallow versus deep divers, and what to do when your lure rolls onto its side. This is the engineering side of lure making, not just the carving side.

Bluvizo
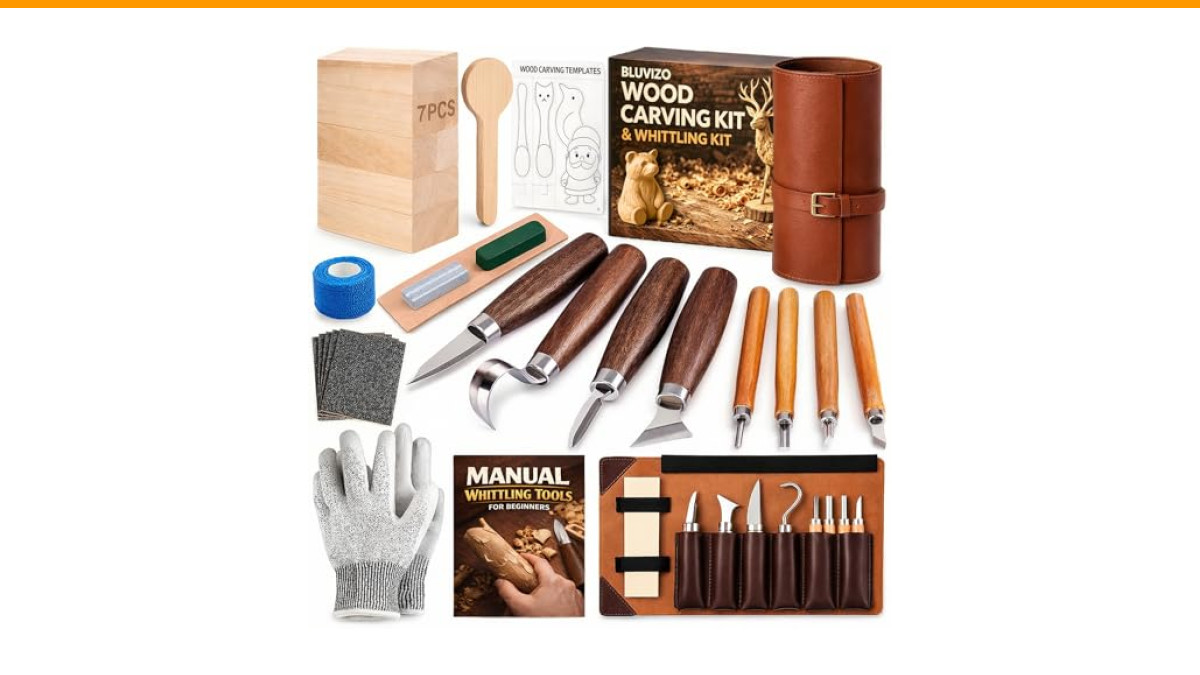
Wood Carving Kit Whittling Kit: Wood Carving Knife Tools with Leather Case | Deluxe Woodworking Hobby Kit for Beginners Adult Kids, Relaxing Creative Projects, DIY Art Craft Gift for Men Teens
- [Wood Carving Kit Deluxe Edition] Everything you need to start carving: 4 knives, 4 chisels, 7 basswood blocks, spoon blank, polis…
- [Premium Walnut Handles & Sharp Blades] Blades are precision-sharpened for effortless cuts. Metal cap prevents blade breakage. Erg…
- [Complete Maintenance & Storage Set] The wood whittling kit comes with a portable storage bag, easy to store and carry. Leather st…
Before you start cutting, consider your tool situation. A sharp knife makes the difference between a clean cut and a crushed, crumbling blank. A basic hobby knife works, but a proper carving set with a few blade profiles speeds things up considerably. The Bluvizo Wood Carving Kit includes four knives, four chisels, and a leather strop for keeping edges keen — everything needed to shape a lure body without fighting dull steel.
Why Balsa is the Ultimate Lure Wood
Balsa floats. That’s the simple reason it dominates topwater and shallow-diving lure construction. But it’s not just about buoyancy — balsa has a unique cell structure that produces a lively, erratic wobble at slow retrieve speeds. Denser woods like maple or oak give a tighter, more stable action, but they sink. You’d need to add significant buoyancy chambers or use them only for deep divers that rely on the lip to dive.
The trade-off with balsa is durability. It’s soft. A bass’s teeth can shred an unsealed balsa body in one strike. That’s why the sealing and topcoat steps are non-negotiable. A good epoxy sealant turns a fragile blank into a tough, fishable lure.
Balsa also cuts beautifully when you use the right technique. The grain runs long and straight, so you can shape a body with a series of controlled planing cuts. The key is to cut with the grain, not against it. Cutting across the grain crushes the cells and leaves a fuzzy, ragged surface.
Sourcing and Selecting the Right Balsa Wood
Not all balsa is the same. The density varies wildly depending on where the tree grew and how fast it grew. For lure making, you want a density between 6 and 10 pounds per cubic foot. That’s a medium-density balsa — light enough to float high in the water, but firm enough to hold a screw eye without tearing out.
You can buy balsa sheets from hobby stores, but most of that stock is too soft and too thin. Look for balsa blocks specifically sold for carving, or order from a specialty lumber supplier. A block measuring 2 inches by 2 inches by 12 inches gives you plenty of material for several lures.
Check the grain before you buy. The grain should run straight down the length of the block. Avoid pieces with swirls, knots, or dramatic color changes — those areas cut unpredictably and create weak spots. You want a consistent, uniform texture.
Essential Tools and Materials for Balsa Lure Crafting
Here’s the full list of what you need. Some items are optional, but the core list is non-negotiable.
- Carving knife: A sharp, fixed-blade knife with a comfortable handle. You’ll do 90% of your shaping with this.
- Small chisels: Useful for hollowing out belly channels for weight and for cutting the lip slot.
- Sandpaper: 80-grit for rough shaping, 220-grit for smoothing, and 400-grit for final finishing before sealing.
- Through-wire: Stainless steel wire, 0.035 to 0.045 inches in diameter. You’ll bend this into the frame of the lure.
- Epoxy sealant: Two-part epoxy that penetrates the wood and hardens. This is your primary defense against water absorption.
- Lip material: Clear polycarbonate or aluminum. Polycarbonate is easier to cut and shape.
- Lead or tungsten weights: For adjusting buoyancy and getting the lure to sit at the correct angle in the water.
- Paint and topcoat: Airbrush paint works best, but rattle cans work too. A UV resin topcoat gives the hardest, clearest finish.
- Split rings and hooks: Standard tackle components for the final assembly.
- Draw your profile: Trace the side profile onto the block. Use a pencil — a pen line can be hard to see once you start cutting.
- Cut the side profile: Use your knife to slice away the waste material outside your pencil line. Take thin cuts, about 1/8 inch at a time. Cutting too deep can split the block along the grain.
- Round the top and bottom: Now view the block from the front. Round off the corners to create the cross-sectional shape. The belly should be slightly flat, the back more rounded.
- Shape the nose: The nose of the lure takes the most abuse. Leave it slightly blunt and rounded. A sharp point will chip and crack on the first cast.
- Sand to final shape: Switch to sandpaper. Wrap 80-grit around a small block of wood and work the body to its final contours. Then move to 220-grit to remove the knife marks.
- Bend the nose loop: Using pliers, create a small loop at one end of your wire. This becomes the line tie.
- Bend the belly hangers: About 1.5 inches back from the nose loop, bend the wire down at a 90-degree angle, then back up to create a small U-shaped loop. This is your front hook hanger. Repeat this about 1.5 inches further back for the rear hanger.
- Cut the wire: Leave about 1 inch of wire past the rear hanger. Bend this into a loop for the tail hook.
- Install the wire: Cut a channel in the belly of the lure with a small chisel. The channel should be just wide enough to fit the wire. Press the wire into the channel so the hangers protrude from the belly.
- Fill the channel: Mix a small batch of epoxy and fill the channel, embedding the wire completely.
- Pick a single lure design and build three copies. The second and third will be dramatically better than the first.
- Invest in a good carving knife and keep it sharp. A sharp knife is safer and produces cleaner cuts.
- Always use through-wire construction for any lure over 3 inches. Screw eyes are a weak point you don’t need.
- Test your lure in a bathtub before you paint it. Fix any swimming issues before you spend time on the finish.
- Keep a notebook. Record the lip angle, lip size, and weight for each lure. You’ll build a reference library of proven designs.
- Seal twice. The second coat of epoxy is what makes the lure tough enough for real fishing.
- Start with simple colors. A white belly and a dark back catch fish just as well as an elaborate airbrush pattern.
You don’t need all of this on day one. Start with a knife, sandpaper, some wire, and epoxy. Build one lure. Learn the process. Then expand your toolkit.
Step-by-Step: Shaping Your Balsa Lure Body
Start with a block that’s slightly larger than your finished lure. A 4-inch crankbait, for example, starts as a block about 4.5 inches long, 1 inch wide, and 1 inch tall.
Here’s the trick with balsa: cut with the grain, always. If you’re shaping the belly and the knife is biting into the wood and lifting chunks, you’re cutting against the grain. Turn the lure around and cut from the other direction.
Don’t overwork the sanding. Balsa is soft, and you can remove material faster than you expect. Stop frequently and check the symmetry by holding the lure up to a light source.
Installing Hardware: Through-Wire vs. Screw Eyes
This is where most beginner lure makers cut corners, and it’s a mistake. Screw eyes are fine for small, lightly fished lures. They’re easy to install — just drill a pilot hole and twist them in. But they pull out. A big fish thrashes, the screw eye rips through the soft balsa, and you lose the fish.
Through-wire construction solves this. You bend a single piece of stainless steel wire into a continuous loop that runs from the nose, through the body, and out the tail. The hook hangers are formed as loops in the same wire. The entire force of the fight transfers to the wire, not to the wood.
Here’s how to do it:
This method takes longer, but the result is a lure that can handle a trophy fish without failing. For larger lures — anything over 4 inches — through-wire is the only sensible choice.
The Science of the Lip: Sizing and Angling for Depth
The lip is the brain of the lure. It controls how deep the lure dives and how violently it wobbles. Get the lip wrong, and you’ll have a lure that skims the surface or dives straight to the bottom and snags.
Two variables matter: the angle of the lip and the surface area of the lip.
Angle: A lip angled downward at 45 degrees creates a wide, tight wobble and dives moderately deep. A lip angled at 60 degrees dives faster and deeper but has a narrower wobble. A lip angled at 30 degrees produces a slow, wide wobble that’s perfect for shallow, slow retrieves.
Area: The larger the lip, the deeper the dive. A small lip on a 4-inch lure might get you 4 to 6 feet of depth. A larger lip on the same lure might reach 10 to 12 feet. The trade-off is that larger lips create more drag, which makes the lure harder to cast.
Here’s a practical starting point for a 4-inch balsa crankbait:
| Target Depth | Lip Length | Lip Angle | Lip Material |
|---|---|---|---|
| Shallow (2-4 ft) | 0.5 inches | 30 degrees | 0.04-inch polycarbonate |
| Medium (5-8 ft) | 0.75 inches | 45 degrees | 0.06-inch polycarbonate |
| Deep (9-15 ft) | 1.0 inches | 60 degrees | 0.08-inch polycarbonate |
Cut the lip slot with a small saw or a chisel. The slot should be slightly deeper than the lip material. Insert the lip and secure it with epoxy. Make sure the lip is perfectly centered — an off-center lip will cause the lure to run sideways.
Sealing and Weighting: Getting the Buoyancy Right
Balsa absorbs water. If you skip the sealing step, your lure will waterlog within an hour and lose its action. Sealing is not optional.
Use a thin, penetrating epoxy. Apply a coat to the entire body, including the lip slot and any wire channels. Let it cure completely, then sand lightly with 400-grit to remove any raised grain. Apply a second coat. This double-sealing process creates a hard shell that keeps water out.
Weighting is about balance. A balsa lure floats, but you need it to sit at a specific angle in the water. Add weight to the belly, just behind the front hook hanger. This lowers the center of gravity and makes the lure more stable in the water.
Start with a small amount of weight — a single 1/8-ounce lead wire or a few split shot. Place the weight in the belly channel before you seal it. Test the buoyancy in a glass of water. The lure should float with the nose slightly up, at about a 20-degree angle. If it floats tail-up, add weight to the front. If it sinks, you’ve added too much — remove some.
This process takes patience. You’ll likely add and remove weight several times before you get it right. That’s normal.
Painting and Finishing for Durability
Paint is where you can get creative, but the finish needs to be tough. A soft, matte paint will chip and fade quickly.
Use an airbrush for the best results. Start with a white or silver base coat — this makes the colors pop. Then add your color patterns. A simple three-color scheme works well: a light belly, a darker back, and a single accent stripe.
After the paint dries, apply a clear topcoat. UV resin is the best option. It cures hard, resists scratching, and has a high gloss that reflects light. Apply a thin coat, cure it under a UV lamp, and then apply a second coat for extra protection.
One note: epoxy topcoats take 24 hours to cure fully. UV resin cures in minutes. If you’re impatient, go with UV resin. The finish is just as durable.
Testing and Tuning: Fixing Common Swimming Problems
You’ve built it. Now you need to make it swim correctly. Fill a bathtub or a large plastic tub with water and test the lure with a slow, steady retrieve.
If the lure rolls onto its side: The weight is placed too far back, or the lip is angled incorrectly. Add a small weight to the front of the belly, just behind the line tie. This lowers the center of gravity and stabilizes the lure.
If the lure spits or blows out at high speed: The lip is too large or angled too steeply. The water is pushing the lure sideways instead of downward. Reduce the lip angle by 5 to 10 degrees, or trim the lip smaller.
If the lure runs sideways: The lip is off-center, or the line tie is not in the center of the nose. Check both. A slight bend in the line tie can also cause this.
If the lure dives too deep: Use a smaller lip or a shallower angle. The lure is creating too much downward force.
If the lure doesn’t wobble: The lip is too small, or the lure body is too thick. The water isn’t getting enough purchase on the lip to create the side-to-side motion.
Tuning is an iterative process. Make one adjustment at a time and retest. Small changes make big differences.
Frequently Asked Questions
What is the best balsa wood density for crankbaits?
Aim for 6 to 10 pounds per cubic foot. This range floats well but holds screw eyes and hardware securely. Softer balsa (under 6) is too fragile. Denser balsa (over 10) loses too much buoyancy and requires extra weighting to float.
Can I use regular wood glue instead of epoxy to seal balsa?
No. Wood glue dries hard but it doesn’t penetrate the balsa cells. Water will find its way in through the glue layer. Use a thin, two-part epoxy that soaks into the wood and cures into a waterproof barrier.
How do I keep the lip from breaking off on a hard strike?
Use polycarbonate instead of acrylic. Polycarbonate bends and flexes under impact; acrylic shatters. Also, make sure the lip is seated deeply into the slot and glued with epoxy. A shallow slot creates a stress point.
What’s the ideal hook size for a 4-inch balsa crankbait?
Use size 2 treble hooks for the front and rear. This size matches the body proportions without overpowering the action. For a 3-inch lure, drop to size 4 hooks. For a 5-inch lure, go up to size 1.
How do I make a lure that dives deeper without changing the lip?
Add weight to the belly. A heavier lure dives deeper because it has more momentum to push against the water. You’ll need to add weight incrementally and test after each addition to avoid making the lure sink.
