To attach a bobber to a fishing line, simply slide the bobber onto the line and secure it in place with a knot. In fishing, bobbers are used to indicate when a fish has taken the bait by bobbing up and down in the water.
Attaching a bobber to a fishing line is a quick and easy process that can greatly enhance your fishing experience. By following a few simple steps, you can ensure that your bobber stays securely in place and allows you to effectively monitor for any bites.
We will guide you through the process of attaching a bobber to your fishing line, so you can get out on the water and start catching fish.

Credit: www.wikihow.com
Understanding The Purpose Of A Bobber
Importance Of Using A Bobber In Fishing
Fishing with a bobber is a common and effective method for many anglers. This simple yet ingenious device serves an important purpose in helping fishermen detect fish bites. If you’ve ever wondered why anglers attach bobbers to their fishing lines, here’s a breakdown of their significance:
- #### provides visual cues:
- Fishermen rely on bobbers to provide a visual representation of what’s happening beneath the water’s surface.
- When a fish bites the bait, the bobber will dip, twitch, or completely submerge, alerting the angler to a potential catch.
- #### assists in setting the hook:
- By using a bobber, fishermen have a better chance of successfully setting the hook when a fish bites.
- Once the bobber shows signs of movement or submersion, the angler knows it’s time to react quickly and jerk the rod to set the hook.
- #### facilitates proper bait presentation:
- A bobber helps maintain proper bait depth and presentation, ensuring that fishermen present their bait in the strike zone of target fish.
- By adjusting the bobber’s position on the fishing line, anglers can control how deep their bait floats.
- #### enhances accuracy and precision:
- Attaching a bobber allows fishermen to precisely target specific fishing spots, especially when fishing in areas with structure or cover.
- By adjusting the bobber’s position, anglers can ensure that their bait will be at the desired depth.
- #### increases catch rate:
- The use of a bobber significantly increases the chances of catching fish.
- It provides real-time feedback, enabling anglers to react quickly and effectively to fish bites.
Understanding the purpose of a bobber in fishing is crucial for both beginner and experienced anglers. The bobber serves as a visual indicator, assistance for setting the hook, facilitator of proper bait presentation, enhancer of accuracy and precision, and ultimately, an aid in increasing catch rates.
Incorporating a bobber into your fishing setup will greatly enhance your chances of success on your next fishing trip.
Selecting The Right Type Of Bobber
When it comes to attaching a bobber to your fishing line, selecting the right type of bobber is crucial. Different types of bobbers are available in the market, each with its own features and benefits. Here are a few key points to consider when choosing a bobber:
- Different types of bobbers available:
- Float bobbers: These are the most common type of bobbers. They are designed to float on the surface of the water and provide visual indication when a fish bites. Float bobbers are usually made of materials like plastic, cork, or foam.
- Slip bobbers: Slip bobbers offer more flexibility as they can slide up and down the fishing line. They are ideal for fishing in deeper waters, where you can adjust the depth of your bait by moving the bobber up or down the line.
- Pencil bobbers: Pencil bobbers are long and slim, resembling a pencil. They are suitable for casting longer distances and can handle strong currents. Pencil bobbers are versatile and work well in various fishing conditions.
- Clip-on bobbers: As the name suggests, clip-on bobbers can be attached to the fishing line without the need for any additional tools or knots. They are easy to use and adjust, making them a popular choice for beginners.
- Lighted bobbers: Lighted bobbers have a built-in led light that helps you see the bobber in low-light conditions or at night. They enhance visibility and make it easier to detect bites when fishing in darker environments.
- Factors to consider when choosing a bobber:
- Fishing location: Consider the fishing environment, such as whether you will be fishing in calm waters, rivers, or lakes. This will help you determine the size and type of bobber that will work best in that specific location.
- Targeted fish species: Different fish species have different feeding habits and preferences. Some may require a more sensitive bobber to detect subtle bites, while others may require a larger, more visible bobber.
- Bait and rig setup: The type and weight of bait you are using, as well as your rig setup, may influence the choice of bobber. Heavier baits may require larger bobbers to provide buoyancy and maintain stability.
- Personal preference: Ultimately, selecting the right bobber comes down to personal preference. Some anglers may prefer a certain type of bobber based on their experience or the fishing techniques they employ.
Remember, when selecting a bobber, it’s important to choose one that fits your fishing needs and helps you achieve a successful and enjoyable fishing experience.
Step-By-Step Guide To Attaching A Bobber
Fishing with a bobber can greatly enhance your chances of success by allowing you to easily detect when a fish is biting. Attaching a bobber to your fishing line is a fairly simple process that can be done in a matter of minutes.
In this step-by-step guide, we will walk you through the process of attaching a bobber to your fishing line, ensuring that it is securely attached and adjusted to your desired depth. So let’s dive in and get started!
Choosing The Correct Fishing Line
Before attaching a bobber to your fishing line, it’s important to select the right type of fishing line for your needs. Consider the following points when making your choice:
- Line weight: The weight of your fishing line should be suitable for the type of fish you are targeting. Heavier lines are more suitable for larger fish, while lighter lines are better for smaller species.
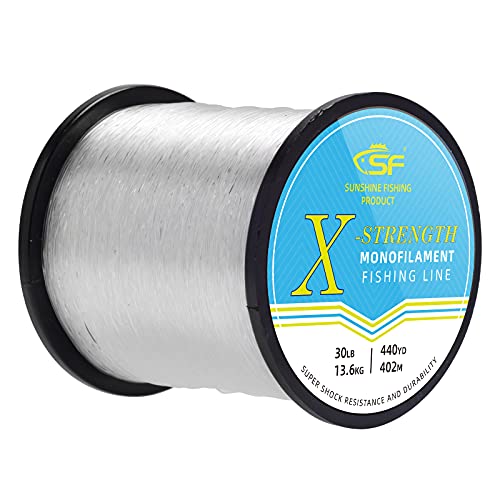
- Line material: Fishing lines are available in different materials such as monofilament, fluorocarbon, and braided. Each material has its own unique properties, so choose one that aligns with your fishing style.
- Line visibility: Depending on the fishing conditions and the behavior of your target fish, you may want to consider a line color that is less visible or more visible in the water.
Positioning The Bobber On The Line
Now that you’ve chosen the right fishing line, it’s time to position the bobber correctly. Follow these steps to ensure proper placement:
- Slide the bobber onto the line: Start by sliding the bobber onto your fishing line, ensuring that it is positioned above the hook. The bobber should be able to freely move up and down the line.
- Determine the desired fishing depth: Consider the depth at which you want to fish and adjust the position of the bobber accordingly. If you’re not sure about the depth, start by setting it at a shallower level and make adjustments as needed.
Attaching The Bobber Securely
Attaching the bobber securely is crucial to prevent it from slipping or getting tangled. Take the following steps to ensure a secure attachment:
- Tie a stopper knot: Tie a small stopper knot below the bobber, creating a barrier that prevents the bobber from sliding any further. This knot should be tight enough to hold the bobber in place but loose enough to allow easy adjustment if needed.
Adjusting The Bobber For Desired Depth
Now that your bobber is securely attached, it’s time to adjust it to your desired fishing depth. Here’s how:
- Test the depth: Lower your bobber into the water and observe if it sinks or floats. If it sinks, adjust the bobber higher on the line. If it floats too high, lower the bobber.
- Find the right balance: You want your bait to be at the desired depth, so make adjustments until you find the perfect balance.
By following these step-by-step instructions, you can easily attach a bobber to your fishing line and ensure it is securely fastened and adjusted to your desired fishing depth. Happy fishing!
Supporting Point: Properly Tying The Fishing Line To The Bobber
Using The Appropriate Fishing Knot:
When it comes to attaching a bobber to your fishing line, one of the most important steps is properly tying the fishing line to the bobber. This ensures a strong and secure connection that will prevent the bobber from slipping off and provide better control over your fishing lure.
To accomplish this, follow these steps carefully:
- Choose the right fishing knot: There are several types of fishing knots that can be used to tie the fishing line to the bobber. Some popular options include the improved clinch knot, uni knot, and palomar knot. Each knot has its own strengths and weaknesses, so it’s important to choose a knot that you feel comfortable tying and that offers good knot strength.
- Prepare the fishing line: Before tying the fishing knot, make sure the end of the fishing line is clean and free from frays or tangles. This will ensure a smooth and secure knot.
- Hold the bobber in place: Place the bobber on the fishing line where you want it to sit. Hold the bobber firmly in place with one hand, ensuring it doesn’t move while you tie the knot.
- Begin tying the knot: Start by creating a small loop with the fishing line near the end. Pass the tag end of the line through the loop, ensuring that you leave enough tag end to work with.
- Wrap the line around: Take the tag end of the line and wrap it around the main line, creating several wraps. The number of wraps may vary depending on the type of knot you are using, but it is generally recommended to make at least five to seven wraps for a secure connection.
- Thread the tag end: After wrapping the line, thread the tag end back through the loop you initially created. Make sure to pass it through the loop in the same direction as the wraps.
- Tighten the knot: Holding onto the tag end and the main line, slowly tighten the knot by pulling both ends of the line. Make sure to keep the wraps tight and organized as you pull.
- Trim excess line: Once the knot is tightened, trim the excess tag end of the line. Leave a small tail of about 1/8 inch to prevent the knot from unraveling.
- Test the connection: Give the bobber a gentle tug to ensure that the knot is strong and secure. If the knot holds up without slipping, you have successfully attached the bobber to your fishing line.
Remember, practicing tying various fishing knots will help build your confidence and proficiency in this essential fishing skill. With a secure connection between the fishing line and bobber, you can cast with confidence, knowing that your bait is properly presented and ready to attract fish.
Happy fishing!
Supporting Point: Adjusting The Bobber For Depth Control
Factors To Consider When Determining The Desired Depth
When it comes to attaching a bobber to your fishing line, one important aspect to consider is the desired depth at which you want your bait or lure to run. Factors to consider when determining the desired depth include:
- Type of fish: Different species of fish prefer to feed at specific depths. Knowing the type of fish you are targeting will help you determine the appropriate depth for your bobber.
- Water conditions: Factors such as water temperature, clarity, and depth can influence where the fish are located in the water column. Understanding the current water conditions will guide you in adjusting the bobber to the right depth.
- Seasonal patterns: Fish behavior can change with the seasons. During colder months, for example, fish tend to move to deeper waters. Considering the seasonal patterns will help you adjust the bobber to the appropriate depth.
Techniques For Adjusting The Bobber Accordingly
Once you have determined the desired depth, it’s time to adjust the bobber accordingly. Here are some techniques you can use:
- Sliding bobber: A sliding bobber allows you to easily adjust the depth without having to re-tie your fishing line. Simply slide the bobber up or down the line to the desired position. Use a bobber stop or a rubber band to secure the bobber at the desired depth.
- Fixed bobber: If you prefer a fixed depth, you can use a fixed bobber. Attach the bobber to your line at the desired depth and secure it in place with a bobber stop or a knot. This method works well when fishing at a consistent depth.
- Experimentation: Don’t be afraid to experiment with different depths until you find what works best for the current fishing conditions. Start with the depth you think will be most effective and make adjustments as needed. Pay attention to any bites or signs of fish activity to fine-tune your bobber placement.
Remember, adjusting the bobber for depth control is crucial for successfully targeting fish at the desired depth. Take into account the factors that influence fish behavior and use appropriate techniques to position your bobber accordingly.
Tips For Enhancing Your Fishing Experience With A Bobber
A bobber, also known as a float, is a simple yet effective tool that can greatly enhance your fishing experience. By attaching a bobber to your fishing line, you can easily detect when a fish is biting and adjust your technique accordingly.
Here are some valuable tips to make the most out of your bobber setup:
Fishing Techniques For Maximizing Bobber Effectiveness
- Adjusting the depth: Experiment with different depths to find the sweet spot where fish are biting. Start with the bobber set at a shallower depth and gradually increase it until you find success.
- Using the right bait: Pairing your bobber setup with the appropriate bait is key to attracting the fish you’re targeting. Consider the preferences of the species you’re after and choose your bait accordingly.
- Casting technique: When casting with a bobber, aim for a gentle landing to avoid startling the fish. Practice your casting technique to achieve a smooth and quiet entry of your bait into the water.
- Watching for movement: Keep an eye on the bobber for any movement or sudden dips. These indications can be signs that a fish is interested in your bait. Be prepared to react quickly when you see this action.
Troubleshooting Common Issues With Bobber Attachment
- Sliding bobber solution: If your bobber keeps sliding up and down the line instead of staying in place, consider using a bobber stop. These small plastic or rubber pieces are placed above the bobber to prevent it from sliding.
- Bobber visibility: In situations where the bobber is difficult to spot due to low light or glare, consider using brighter or fluorescent colored bobbers. These are easier to see and can help you detect bites more accurately.
- Balance and stability: If your bobber is unstable, causing it to tip over easily, try adjusting the weight distribution. You can add split shot sinkers to the line above the bobber to create better balance and stability.
Customizing Your Bobber Setup For Different Fishing Conditions
- Wind and waves: In windy or wavy conditions, opt for a larger bobber that can withstand the current and provide better visibility. This will help ensure your bobber stays afloat and visible despite the challenging conditions.
- Clear or murky waters: Adjust the color and size of your bobber based on water clarity. In clear water, use subtle and natural-colored bobbers to avoid spooking fish. In murky or stained water, opt for brighter colors to improve visibility.
- Deep or shallow fishing: Different depths require different bobber setups. For fishing in deeper waters, use larger bobbers that can support the weight of your bait and provide better visibility. In shallower waters, smaller bobbers will suffice.
By implementing these tips and customizing your bobber setup based on fishing conditions, you can enhance your fishing experience and increase your chances of a successful catch. Take the time to experiment and refine your technique, and soon you’ll be reeling in more fish than ever before.
Happy fishing!
Conclusion
Attaching a bobber to your fishing line is a simple yet crucial step in enhancing your fishing experience. By following the steps outlined in this blog post, you can ensure that your bobber is securely attached and functioning effectively. Remember to choose the right type and size of bobber for your specific needs, and use the appropriate knot to attach it to your line.
This will allow you to accuratelydetect bites and keep your bait at the desired depth. Don’t forget to adjust the position of the bobber as needed and be patient – sometimes it takes time for the fish to strike. With practice, you’ll become more proficient in attaching a bobber and increase your chances of catching that perfect fish.
So grab your gear, head out to your favorite fishing spot, and enjoy the thrill of getting your bobber in the water and waiting for the next big catch.


