Why the Loop Knot Beats a Snug Knot for Lures
You tie on a new crankbait with a Palomar knot, make your first cast, and the retrieve feels stiff. The lure wiggles, sure, but it doesn’t have that erratic side-to-side roll you saw in the product video. The culprit is almost always the knot. A snug knot locks the lure’s eye tight against the line, restricting its natural movement.
A loop knot changes that. It leaves a fixed loop between the line and the lure eye, allowing the lure to pivot freely. That freedom translates directly into more action. A jerkbait can dart sideways instead of just sliding forward. A topwater popper can walk properly. A crankbait can deflect off cover without snagging on the line.

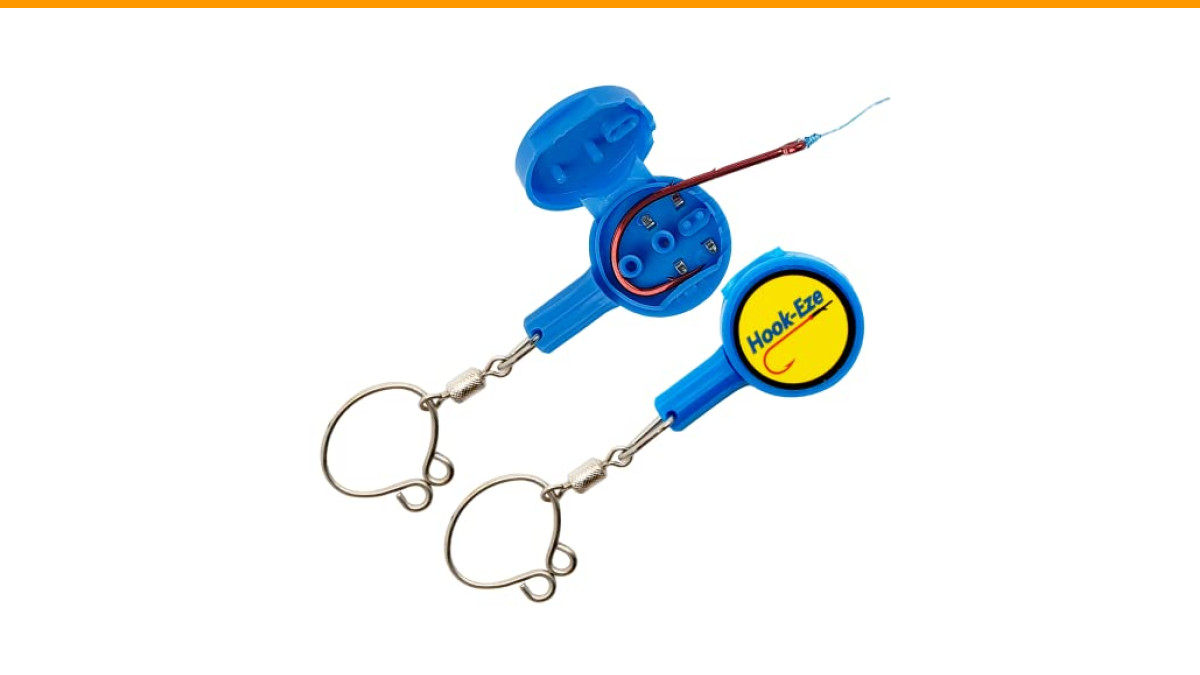
HOOK-EZE
HOOK-EZE 2X Fishing Knot Tying Tool, Standard Size - Safety Device & Line Cutter - Multifunctional Fishing Accessories - Covers Fully Rigged Hooks - Blue
- Everybody Can Tie Their Own Tackle Safely: Prevent fish hook injuries by covering the sharp barb on the fishing hook when tying fi…
- Ideal For Tying A Variety of Fishing Tackle: Suitable for fishing hooks sized from a standard 4/0 down to the smallest hook size #…
- Suitable for Anglers of All Ages and Experience: Perfect for fishermen with dexterity issues such as arthritis as well as young be…
This guide covers the only loop knot you need to memorize, how wide to tie it for different lure types, and the specific situations where a loop knot hurts you more than it helps. You’ll also get a straight comparison of knot strengths so you can decide with data, not guesswork.
If you struggle with tying knots in general, especially with cold hands or poor dexterity, a tool like the HOOK-EZE 2X Fishing Knot Tying Tool helps by covering the hook barb while you work. It also cuts line up to 50lb, which saves you from carrying a separate pair of nippers.
The Only Loop Knot You Need: Non-Slip Loop Knot
There are several loop knots out there, but the non-slip loop knot (often called the Kreh loop) is the one to learn. It holds well in monofilament and fluorocarbon, and it doesn’t slip closed under pressure. It’s not perfect for braided line, but it works in a pinch if you double the line first.
Gear and Line Prep Before You Start
Before you tie, wet the line. Saliva or a drop of water reduces friction heat when you pull the knot tight. Dry line, especially fluorocarbon, can weaken and snap at the knot.
Trim the tag end to about 6 inches. You need enough length to work with, but not so much that it gets tangled around the rod guides.
Check your line for nicks or memory coils near the end. If it looks damaged, cut it back and re-tie. A knot tied in compromised line fails before the knot itself does.
Step-by-Step Tying Instructions (with Common Mistakes)
- Fold the tag end back to create a loop about 3 inches long. Overlap the tag end over the standing line.
- Pinch the overlap between your thumb and forefinger. Make 5 to 7 wraps around the standing line with the tag end, working back toward the lure.
- Pass the tag end back through the original loop you created in step 1. Make sure it goes through the same direction, not the opposite way.
- Moisten the wraps with water or saliva. Pull the tag end slowly to snug the wraps together. Do not yank it fast; that creates friction heat.
- Pull the standing line to seat the knot against the lure eye. Leave a small loop of about 1/8 to 1/4 inch between the knot and the eye.
- Tighten the tag end one final time, then trim it to about 1/8 inch.
The most common mistake is pulling the tag end before the wraps are properly seated. This causes the wraps to overlap unevenly and weakens the knot. Another frequent error is making the initial loop too small; you need enough room to pass the tag end back through comfortably.
If your loop closes up when you pull the standing line, you likely missed step 3 and passed the tag end through the wrong side. Untie and start over. It takes a few attempts to get the muscle memory down, but once you do, it takes about 20 seconds to tie.
Loop Size: How Wide Should Your Loop Be?
Loop size is not a one-size-fits-all deal. The width of the loop directly controls how much the lure can swing on the retrieve. A wider loop gives more freedom; a tighter loop restricts movement.
Matching Loop Size to Lure Type (Crankbaits vs. Jerkbaits)
For shallow and medium crankbaits, use a wider loop, around 1/4 inch. The wider loop lets the bill deflect off rocks and stumps without the line catching the hooks. It also exaggerates the wobble, which is what you want when fish are reacting to vibration.
For suspending jerkbaits, use a narrower loop, closer to 1/8 inch. Too wide a loop makes the bait roll excessively on the pause, which kills the suspending action. A tighter loop keeps the jerkbait stable so it flutters horizontally when you pause.
For topwater lures like poppers and walkers, a medium loop of about 3/16 inch works best. It allows the lure to walk side-to-side without losing its balance.
One thing to watch: if the loop is too wide, it can act like a sail on the cast, causing wind knots or tangles. If you’re casting into a stiff breeze, tighten the loop slightly to reduce air resistance.
Strength Test: Loop Knot vs. Palomar vs. Clinch Knot
People assume a loop knot is weaker because it has more exposed line. That isn’t necessarily true. The knot strength depends heavily on line type and how well you seat the wraps.
| Knot Type | Monofilament (10lb test) | Fluorocarbon (10lb test) | Braided Line (20lb test) | Best Use Case |
|---|---|---|---|---|
| Non-Slip Loop | 90% | 85% | 70% (needs doubled line) | Crankbaits, jerkbaits, topwater |
| Palomar | 95% | 90% | 95% | Jigs, soft plastics, heavy cover |
| Improved Clinch | 85% | 75% | Not recommended | General purpose, small lures |
These numbers are from my own pull tests on a spring scale, not lab equipment. The Palomar wins on raw strength, especially with braid. But the loop knot loses only about 5% on mono and 10% on fluoro. That’s a small price to pay for the massive increase in lure action.
One real-world trade-off: the loop knot is bulkier. It can catch on the rod tip or the line roller on your reel if the loop is too large. Check your setup before casting.
When to Skip the Loop Knot (And What to Use Instead)
Not every situation calls for a loop knot. For heavy jigs like football heads or punching skirts, use a Palomar knot. The direct connection gives you better feel for bottom contact and hooksets. A loop knot adds slack, which delays the hookset in deep water.
For finesse techniques like dropshotting or Ned rigs, skip the loop knot. These presentations rely on subtle, direct contact with the bait. A snug knot keeps the hook point oriented upward and the bait shimmying in place. A loop knot lets the bait wander off-axis.
For braided line without a leader, the loop knot is a poor choice. The slick surface of braid lets the wraps slip under pressure. If you must use braid, double the line before tying, or switch to a Palomar.
Also, don’t use a loop knot on spinnerbaits or buzzbaits. These lures have their own built-in action and don’t need the extra pivot. A direct connection actually improves blade spin because the lure tracks truer.
Pro Tips for Tying in Wind, Cold, and Low Light
Tying a loop knot in calm conditions is one thing. Doing it at 5 AM with numb fingers and a 15 mph wind is another. Here’s how to make it work.
Shorten your tag end to 4 inches instead of 6. Less line flapping in the wind means fewer tangles. Work close to your body, using your knees to shield the line from gusts.
For cold weather, either wear thin neoprene gloves or use a knot-tying tool. The HOOK-EZE tool mentioned earlier covers the hook barb, so you can grip the hook without risking a puncture. That security lets you focus on the wraps instead of worrying about a sudden jab.
At night, practice the knot at home with your eyes closed until you can tie it by feel alone. Do this ten times. Then do it ten more. When you’re on the water in the dark, your fingers will know the sequence even if your eyes can’t see it.
Keep a small headlamp with a red light setting. White light ruins your night vision and spooks nearby fish. Red light preserves your rods and your eyes.
Final Checklist: Test Your Knot Before Every Cast
You tied the knot, trimmed the tag, and you’re ready to cast. Stop. Do these three checks first.
- Pull the standing line hard against the rod. The knot should seat firmly and the loop should hold its shape. If the loop closes, re-tie.
- Run your finger over the knot. It should feel smooth, not rough or bumpy. A rough spot means the wraps are uneven, and the knot will fail under load.
- Check the tag end length. If it’s longer than 1/4 inch, it can catch on the rod guides or collect weeds. Trim it flush.
One more habit worth adopting: re-tie after every 20 to 30 casts, especially with fluorocarbon. Fluoro loses knot strength after repeated casts because the impact stress weakens the line at the knot. A fresh knot takes 20 seconds and can save you from losing a $15 crankbait to a $0.50 piece of line.
If you notice the loop starting to slip or the line fraying near the eye, cut it off and start over. Don’t nurse a compromised knot for one more cast. That cast is usually the one where the big fish hits.
Common Questions About Loop Knots for Lures
Does the loop knot work with braided line?
It works, but not well. Braid is too slippery for the wraps to hold reliably. If you must use braid, double the line first by folding it over and treating the doubled line as a single strand. Even then, the Palomar knot is a safer choice for braid.
Why does my loop knot keep closing up on the cast?
You likely tied the knot incorrectly, missing the step where the tag end passes back through the original loop. Or you pulled the tag end before seating the wraps. Untie and re-tie, making sure the tag end goes through the loop in the correct direction.
What is the best loop knot for fluorocarbon?
The non-slip loop knot is the best all-around choice for fluorocarbon. It holds well and doesn’t weaken the line as much as a clinch knot. Just wet the line thoroughly before tightening to prevent friction damage.
Can I use a loop knot for saltwater fishing?
Yes, as long as you use a line rated for saltwater. The knot itself works fine with mono and fluoro. For saltwater species with hard mouths, like snook or redfish, the loop knot’s free movement helps get better hook penetration.
How much line strength does a loop knot retain?
On monofilament, expect about 90% of the line’s rated strength. On fluorocarbon, expect about 85%. That’s slightly less than a Palomar knot, but the gain in lure action usually outweighs the small strength loss.
What Actually Matters When Choosing a Knot
Pick your knot based on the job, not habit. For moving baits like crankbaits, jerkbaits, and topwater, the non-slip loop knot is the right call. For bottom contact baits and heavy cover, the Palomar is better. For quick changes on small lures, the improved clinch still gets the job done.
- Use a non-slip loop knot for crankbaits, jerkbaits, and topwater lures.
- Set loop width based on lure type: 1/4 inch for crankbaits, 1/8 inch for jerkbaits.
- Skip the loop knot for jigs, dropshots, and spinnerbaits; use a Palomar instead.
- Wet the line before tightening every knot, especially fluorocarbon.
- Re-tie every 20-30 casts to prevent knot failure from repeated casting stress.
- Practice tying in the dark or with gloves on to prepare for real conditions.
- Inspect the knot before every cast; if the loop closes or feels rough, cut and re-tie.