
You dropped the transducer in the water, powered up the unit, and now you’re staring at a screen full of blue blobs and faint squiggles. The manual told you what every button does, but it didn’t tell you what the screen means. You know fish are down there. The question is whether your Garmin is showing them to you or hiding them.
This guide fixes that. You’ll learn a specific gain calibration routine that takes under a minute, how to tell mud from rocks just by looking at the bottom line, and why your battery might be creating false fish arches. You’ll also get a practical breakdown of when to use DownVü versus SideVü, plus a method for turning sonar data into a permanent fishing map. No vague advice, no theory. Just what to look for and what to do.

Garmin
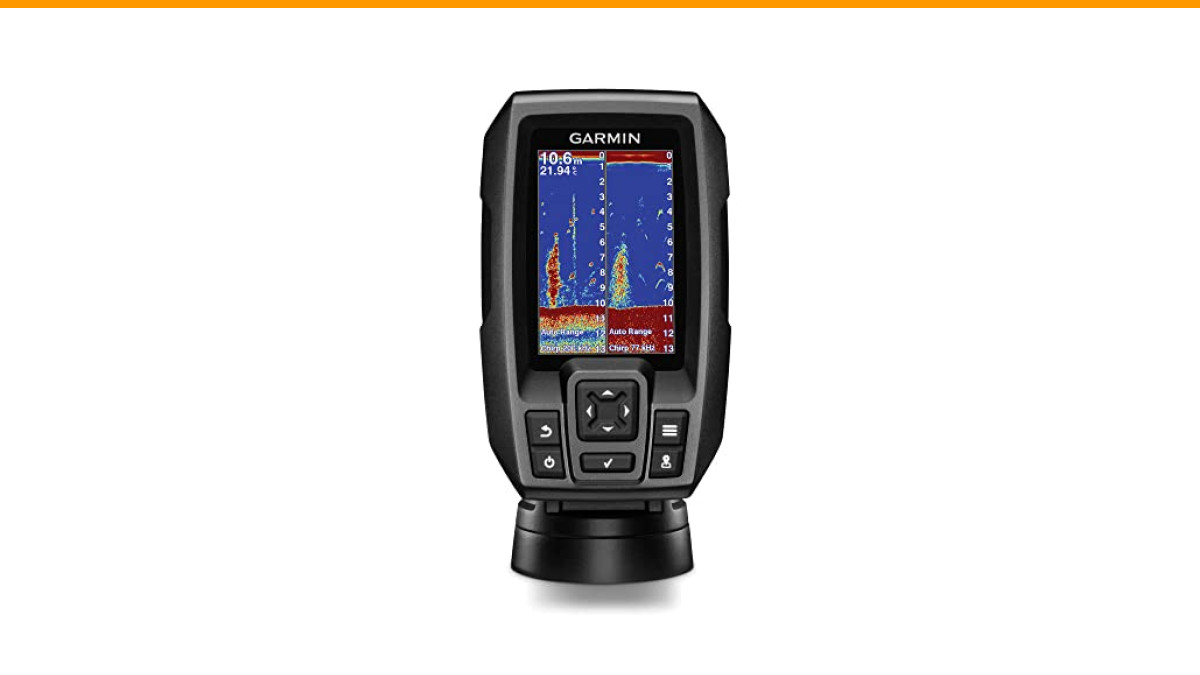
Garmin 010-01550-00 Striker 4 with Transducer, 3.5" GPS Fishfinder with Chirp
- Clear Vu scanning Sonar shows you more of what is in the water around your boat; This high frequency sonar gives near photographic…
- The power of simple offers a keyed interface with dedicated buttons; The device is easy to use and easy to install; Available in 3…
- Waypoint map: Use the way point map to easily view, mark and navigate to locations such as brush piles, stumps and docks; Maximum…
For anglers running a compact unit, the Garmin Striker 4 with transducer is a solid entry point. It packs CHIRP sonar and a waypoint map into a 3.5-inch screen, which is enough to practice every technique covered here. The small display forces you to read return signals carefully, a skill that transfers to any larger unit later.
Why Your Garmin Screen Looks Like Noise (And How to Fix It)
Most anglers assume a noisy screen means the unit is broken or the water is empty. Neither is usually true. The real culprit is settings that don’t match your depth or boat speed.
If you’re seeing random speckles and faint lines scattered across the display, check your gain first. Too much gain amplifies every tiny particle in the water column, including plankton and suspended sediment. The screen gets cluttered and real fish arches blend into the mess.
Scrolling speed matters just as much. Set it too slow at idle and the same fish gets drawn repeatedly, creating a long, stretched blob. Set it too fast while trolling and fish arches get compressed into tiny dots. A good rule: match the scroll speed to your boat speed. At 2-3 mph, keep scroll speed in the middle. At 5 mph or faster, bump it up one notch.
Interference is another hidden problem. If you run a trolling motor with a sonar transducer near your main unit, you’ll often see vertical lines or diagonal streaks on the display. This is electrical noise from the motor’s PWM controller. The fix is simple: move the trolling motor transducer to the opposite side of the boat, or turn off one unit while the other runs.
The 60-Second Gain Test: Calibrating for Clarity
Everyone tells you to adjust gain until the screen looks clean. That’s useless advice because clean looks different at 20 feet than it does at 120 feet. Here’s a routine that works in any depth.
- Set gain to auto. Let the unit pick a starting point.
- Find the bottom return. You should see a solid, continuous line. If it’s broken or faint, increase gain manually until the line becomes solid.
- Turn gain up slowly. Increase it in 10% increments until you see light speckling appear across the middle of the water column. That speckling is noise.
- Back off 5-10%. Reduce gain until the speckling disappears but the bottom line stays solid. This is your baseline.
- Check for fish. If you see distinct arches, you’re set. If not, the fish aren’t there or they’re hugging the bottom where the return signal masks them.
This test takes less than a minute. It works on the Striker series, Echomap units, and most other Garmin models because the gain scale is consistent across the lineup.
One caveat: gain isn’t a set-and-forget setting. When you move from 30 feet to 80 feet, re-run the test. Water absorbs sonar energy, so deeper water needs slightly more gain. Shallow water needs less.
Reading the Bottom: Mud, Rocks, Weeds, and Hardness
The bottom line isn’t just a depth reading. Its thickness and color tell you what the bottom is made of, which tells you what kind of fish might be holding there.
Mud or soft silt: The bottom line appears thin and faint. The return signal penetrates the soft bottom, so the line looks slightly blurred or has a secondary ghost line just below it. You’ll typically see this in flat, featureless areas.
Rocks or gravel: The bottom line is thick and bright, often with a reddish or orange tint on color displays. Hard surfaces reflect more sonar energy, so the return is strong. You may also see scattered points below the main line, which are individual rocks.
Weeds: The bottom line looks fuzzy, like a fuzzy caterpillar crawling across the screen. The thickness of the fuzz tells you the weed height. Tall weeds show up as a distinct layer above the bottom line, often with a lighter green or yellow color.
Bottom hardness matters for lure selection. Hard bottoms hold crawfish and baitfish, which attracts bass and walleye. Soft bottoms hold worms and insect larvae, which attracts catfish and carp. If you see a hard bottom near a drop-off, that’s a spot worth marking.
Thermoclines also show up on sonar. A thermocline appears as a faint horizontal line across the middle of the water column, often with a slight shimmer or ripple. Fish often suspend just above or below it. If you see a thermocline, check both sides of it for arches.
Spotting Fish Arches vs. Bait Balls vs. Debris
Fish arches look like arches, but not every arch is a fish. Here’s how to tell the difference.
Fish arches: A true fish arch has a distinct curve, thicker at the top and tapering at the ends. The size of the arch roughly correlates to fish size, but depth and cone angle distort this. A fish on the edge of the cone produces a partial arch, sometimes just a half-moon shape. A fish directly under the boat produces a full, symmetrical arch.
Bait balls: These show up as dense, irregular clusters of small dots or short lines. They often look like a cloud or a swarm. Bait balls move constantly, so they’ll change shape from one sweep to the next. Predator fish usually lurk below or beside them, so look for larger arches near the edges.
Debris: Leaves, sticks, and plastic bags create irregular shapes that don’t move in a predictable pattern. They might show up as a single dot that disappears, or a long streak that doesn’t have the clean curve of a fish arch. Debris often appears at the same depth as the current flow, so a series of dots at the same depth is usually junk, not fish.
Target separation is the key skill. CHIRP sonar, like the kind in the Striker 4, sends a continuous sweep of frequencies rather than a single pulse. This gives you crisper arches and better separation between fish that are close together. If you see two arches overlapping, they’re two fish. With older single-frequency sonar, they’d show up as one blob.
Fish icons are a feature some Garmin units offer, but I recommend turning them off. The unit’s algorithm decides what a fish looks like, and it’s wrong often enough that you’ll miss real fish or chase false ones. Learn to read the raw sonar instead.
Using Waypoints to Turn Sonar Data into a Fishing Map
Sonar tells you what’s under the boat right now. Waypoints let you remember it for the next trip. This is the step most anglers skip, and it’s a mistake.
When you find a promising spot, mark it immediately. Don’t rely on memory or landmarks, especially on open water where everything looks the same.
- Mark the spot. Press the waypoint button on your Garmin. The unit saves your current GPS position.
- Name it meaningfully. Instead of leaving it as waypoint 001, rename it to something like rock pile NE or weed line 15ft. You’ll thank yourself in a month.
- Mark the edges. If you found a brush pile, mark the north edge and the south edge. This gives you a line to follow on your next pass.
- Build a pattern. After a few trips, you’ll have a map of productive spots. Look for patterns: maybe all your best spots are on the north side of points, or near creek channel bends.
The waypoint map on the Striker 4 is basic but functional. It lets you navigate back to any saved spot with a simple arrow and distance readout. For a more advanced map with contour lines, you’d need a unit with Quickdraw Contours, but the basic waypoint approach works fine for most freshwater fishing.
Down Imaging vs. Side Imaging: When to Use Each
Garmin offers two scanning technologies, and they serve different purposes. DownVü sends a fan-shaped beam straight down, giving you a detailed picture of what’s directly under the boat. SideVü sends beams to the left and right, giving you a wide view of the area around your boat.
Use DownVü when you’re idling over a specific spot and want to see structure in detail. It’s excellent for identifying brush piles, stumps, and rock piles because it renders them with near-photographic clarity. You’ll see individual branches on a submerged tree, which is impossible with traditional sonar.
Use SideVü when you’re scanning new water. It covers a much wider area, so you can find structure faster. Cruise along a bank at 4-5 mph with SideVü running, and you’ll see weed lines, drop-offs, and isolated stumps that you’d miss with DownVü alone.
The trade-off is that SideVü doesn’t show fish arches well. Fish show up as bright dots, but you can’t tell size or species easily. The workaround: when you see a promising structure on SideVü, turn over it and use DownVü to check for fish.
For the Striker 4, you get DownVü but not SideVü. That’s fine for kayak and small boat anglers who fish specific spots rather than covering miles of water.
The Hidden Impact of Battery Voltage on Your Display
Low voltage distorts sonar readings in ways that look like fish. This is the most overlooked issue in fish finder troubleshooting.
When voltage drops below about 11.5 volts, the transducer’s output power drops. The unit still displays data, but the signal-to-noise ratio worsens. You’ll see faint, wavy lines that look like suspended fish, but they’re actually electrical artifacts from the voltage fluctuation.
The fix is straightforward: check your battery voltage on the unit’s status screen before you start fishing. Most Garmin units display voltage in the settings menu. If it’s below 12.2 volts with the unit on, charge the battery or swap it.
Also, check your connections. Corroded terminals or loose connections cause voltage drops that come and go, which creates intermittent false arches on the screen. Clean the terminals with a wire brush and apply dielectric grease to prevent corrosion.
Battery management is more than just avoiding a dead unit. A fully charged battery gives you consistent sonar performance all day. I’ve seen anglers chase phantom fish for hours, only to discover their battery was at 11.8 volts the whole time.
Quick Reference: Settings for Shallow, Deep, and Moving Water
Here’s a practical settings table based on real conditions. These are starting points, not absolute rules. Adjust based on what your screen shows.
| Condition | Gain | Scroll Speed | Frequency | Notes |
|---|---|---|---|---|
| Shallow water (under 20 ft) | 40-50% | Medium | High (77 kHz or CHIRP high) | High frequency gives better target separation in shallow water. |
| Deep water (over 60 ft) | 60-70% | Slow to medium | Low (50 kHz or CHIRP low) | Low frequency penetrates deeper with less power loss. |
| Trolling at 3-5 mph | 50-60% | Fast | Medium (CHIRP medium) | Fast scroll speed prevents fish arches from stretching. |
| Idling or drifting | 45-55% | Slow | High (CHIRP high) | Slow scroll speed lets you analyze individual arches. |
| Ice fishing (vertical jigging) | 55-65% | Fastest | High (CHIRP high) | Use the flasher mode on the Striker 4 for real-time jig tracking. |
One more thing about frequency: CHIRP sends a continuous sweep of frequencies, which gives you better target separation than a fixed single frequency. The Striker 4 lets you pick CHIRP high, medium, or low. High is best for shallow water and small fish. Low is best for deep water and large fish. Medium is a compromise that works okay in most situations.
Final Checklist: Before You Leave the Dock
Run through this list before you launch, and you’ll spend more time fishing and less time fiddling with settings.
- Charge the battery fully and check voltage on the unit’s status screen. Anything below 12.2 volts means charge it.
- Clean the transducer face. A film of algae or grease cuts sonar performance dramatically.
- Set your scroll speed based on how you plan to fish. Slow for drifting, fast for trolling.
- Run the 60-second gain test in the first 10 minutes on the water. Don’t skip it.
- Turn off fish icons and learn to read raw sonar. Your catch rate will improve.
- Mark waypoints for every productive spot, and name them with details that help you remember.
- Carry a spare fuse and basic tools for the transducer mount. Gear fails at the worst times.
Reading a Garmin fish finder is a skill, not a talent. The screen gives you all the information you need, but you have to interpret it. Start with the gain test, learn to read the bottom line, and build your waypoint map over time. The more you practice, the faster you’ll spot the difference between a bait ball and a school of crappie, or a rock pile and a brush pile. And when you mark your first honey hole, you’ll wonder why you ever fished without the map.
