You’ve just bought a fresh spool of 10-pound mono, and you’re ready to hit the lake. You pop the cover off your trusty spincast reel, tie a knot, and start winding. Five minutes later, the line is looping off the spool in loose coils, and you’ve got a bird’s nest that would make a crow jealous. Sound familiar?
Putting new line on a closed reel doesn’t have to be a wrestling match. The problem isn’t your reel or your line — it’s the method. Most anglers wind line onto a closed reel the same way they would an open bail, and that’s exactly where the trouble starts. Closed reels (spincast) have a stationary spool inside a cover, so the line pays off differently than on a spinning reel. Get the tension and direction wrong, and you’ll be cutting line off before your first cast.

Beyond Braid
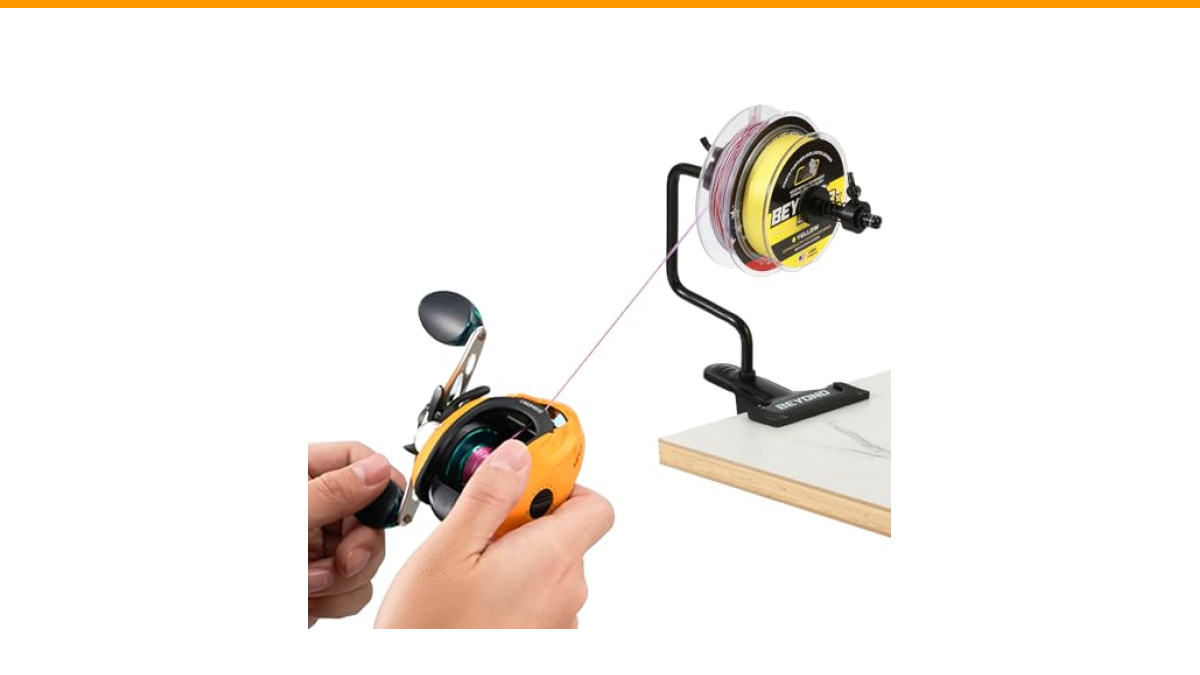
Beyond Braid EZ Fishing Line Spooler
- TABLE MOUNTING CLIP/PORTABLE - Our fishing line spooler features a heavy duty non slip clip at the base that fits nearly every kin…
- SPOOL UP TIGHT IN SECONDS - Switch out your line fast without the mess. Loading up fresh braid or mono tightly onto your reel, thi…
- FITS MOST SIZE SPOOLS- Will fit almost every type of fishing line spool from small to large. Ideal for spooling up with 100yd, 150…
This guide walks you through a complete, tangle-proof system for spooling any closed reel. You’ll learn the why behind each step — not just the what — so you can adapt when you’re on the water with a weird spool size or a finicky reel. By the end, you’ll know how to fill the spool to the right level, tie knots that hold, and fix a twist if one sneaks in.
If you’re tired of the pencil-and-bucket trick that never quite works, a dedicated Beyond Braid EZ Fishing Line Spooler takes the guesswork out of tension. It clamps to any table or rod, holds spools from 100 to 2026 yards, and lets you spool up solo with even pressure. It’s not magic — it just removes the two most common causes of line twist: uneven tension and a spool that jumps around.
Why Closed Reels Need Special Spooling Care
Closed reels, also known as spincast reels, hide the spool inside a cone-shaped cover. The line exits through a small hole in the front, which means it has to make a sharp turn as it leaves. That geometry creates friction and can induce twist if the line isn’t wound perfectly parallel.
Think about what happens when you cast: the line peels off the stationary spool in a spiral. If the line was wound with any slack or uneven tension, that spiral turns into a loop. The loop catches the lip of the cover, and suddenly you’re picking out a tangle that takes ten minutes to fix.
That’s why the golden rule for closed reels is: line must go on the spool under firm, even tension, and in the same direction it comes off. Most reels wind clockwise when you turn the handle, but some wind counterclockwise. You’ll check that before you start.
Tools You Need Before You Start
You don’t need a tackle shop full of gadgets, but a few items make the job easier:
- New line (monofilament, fluorocarbon, or braid — see the table below)
- A pencil or a line spooler tool for holding the filler spool
- Scissors or line cutters
- A small screwdriver (most closed reels have a cover screw)
- A clean, soft cloth for wiping the spool
- Optional: a line conditioner or silicone spray to reduce memory
You don’t need a line-winding machine unless you’re spooling dozens of reels. For a single reel, a pencil works fine — but it’s fiddly. If you fish often, the few bucks for a spooler is worth it.
Step 1: Remove the Reel Cover and Inspect the Spool
Every closed reel has a cover that comes off — usually a small screw on the front or a twist-lock mechanism. Consult your reel’s manual if you’re unsure. Once the cover is off, look at the spool. Check for:
- Old line that’s buried or tangled
- Dirt or grit that could abrade new line
- Any rough edges on the spool lip that might catch the line
If the spool has any burrs, smooth them with fine sandpaper. A rough edge will nick your line and cause breaks at the worst moment.
Step 2: Remove Old Line and Clean the Spool
Strip off all the old line. Don’t try to reuse it — mono degrades with UV exposure, and braid can have weak spots you can’t see. Cut it at the arbor knot and pull it free.
Wipe the spool with a dry cloth to remove dust and old line residue. If you see corrosion (white powder or green crust), clean it with a bit of isopropyl alcohol on a cotton swab. Let it dry completely before adding new line.
While you’re in there, check the drag washers and gears if your reel has a serviceable design. A little grease on the gears keeps things smooth, but don’t overdo it — you don’t want grease on the spool where the line sits.
Step 3: Tie the Perfect Arbor Knot (With a Visual Check)
The arbor knot is the standard for attaching line to the spool. It’s simple and strong, but it has to be tied correctly or it will slip.
- Pass the line around the spool arbor (the central hub).
- Tie an overhand knot around the standing line, leaving a tag end of about 6 inches.
- Tie a second overhand knot in the tag end, about 2 inches from the first.
- Pull the standing line tight so the first knot cinches down on the arbor, and the second knot acts as a stopper.
- Trim the tag end to about 1/8 inch.
Here’s the visual check: after you pull tight, the knot should sit snugly against the arbor, and the tag end should point back along the line, not stick straight out. If it sticks out, it can catch the line as it winds and create a bump.
For braided line, the arbor knot works, but some anglers prefer a double uni knot for extra security. Braid is slick, and a simple arbor knot can slip under heavy drag. I’ve had it happen — lost a fish and a lot of line. Use the double uni if you’re spooling braid.
Step 4: The Critical “Fill Line” Trick to Prevent Line Twist
Here’s the trick that separates pros from frustrated beginners: before you start winding, run the line through your fingers with a bit of tension, and then wet the line. Water acts as a lubricant and helps the line lay flat on the spool. Mono and fluorocarbon especially benefit from being wet during spooling — it reduces friction and heat buildup.
But the real trick is the direction of the spool. When you hold the filler spool on a pencil, the line should come off the spool in the same direction that the reel spool rotates. If your reel winds clockwise, the line should peel off the filler spool clockwise. If it comes off opposite, you’ll introduce a twist with every revolution.
How to check: hold the pencil with the filler spool, and look at the line as it leaves. Turn the reel handle slowly. If the line is twisting or kinking, flip the filler spool over so the line comes off the other side. This one adjustment eliminates 90% of line twist problems.
How to Use a Pencil vs. a Line Spooler
Using a pencil is the classic method: stick a pencil through the filler spool, hold it between your knees or have a friend hold it, and wind. It works, but it has two flaws. First, the spool can wobble, causing uneven tension. Second, you need a second person or a clever setup to keep tension while you crank.
A line spooler like the Beyond Braid EZ holds the spool on a spindle with a clip that mounts to a table or rod. The spool rotates smoothly, and you can apply consistent pressure with your fingers on the line. It’s not that the pencil method can’t work — it’s that the spooler removes the variables. If you spool more than once a season, the spooler is worth it.
Step 5: Wind the Line with Correct Tension and Direction
Now, the actual winding. Set the drag on your reel to a medium setting — not full tight, not loose. You want enough resistance to keep the line taut, but not so much that you stretch the line (mono can stretch up to 25% under load, which ruins its casting performance).
Thread the line through the line guides on the rod if you’re spooling with the rod assembled. If you’re spooling the reel alone, just run the line through your fingers.
Start winding slowly. Keep constant pressure on the line with your thumb and forefinger about 6 inches from the reel. You’re looking for the line to lay in neat, tight coils with no gaps and no overlapping. If you see a gap, stop and press the line down with your thumb.
Here’s a specific number: for most closed reels, you want the line to fill the spool to about 1/8 inch below the lip. Too much line and it will spring off during casts. Too little and you lose casting distance and the line can dig into itself under pressure.
Watch the line as it winds. If you see it twisting or forming loops, stop immediately. The problem is likely the filler spool direction or your tension. Fix it before you finish, or you’ll be stripping line off and starting over.
Step 6: Reassemble and Test the Drag System
Once the spool is filled, replace the cover and tighten the screw. Give the handle a few turns to make sure everything moves freely.
Now test the drag. Hold the line near the tip of the rod (or just at the reel if no rod) and pull. The drag should slip smoothly without jerking. If it feels rough, you might have a line twist that’s causing the line to bind. If the drag is too tight, back it off — you can always tighten it later.
Make a few practice casts in your yard. Watch how the line comes off the spool. If it loops or tangles, you’ve got a twist. See the troubleshooting section below.
Troubleshooting: Fixing Line Twists and Bird’s Nests
Even with perfect technique, twists happen. Here’s how to fix them when they do.
Line Loops Off the Spool
If the line springs off the spool in loose coils when you cast, the spool is overfilled. The line is too high, and the cover lip can’t hold it down. Solution: strip off about 10 yards of line. You want that 1/8-inch gap.
Line Digs Into the Spool
If the line buries itself under the top layers when you set the hook, the spool is underfilled. The line has room to move and digs into the softer layers below. Solution: add more line, but don’t overfill. This is a common issue with braid because it’s thinner and compresses more.
Line Snaps on Cast
If the line breaks on a cast, check for a few things. First, is there a sharp burr on the line guide or the cover hole? Second, is the line old or damaged? Third, is the drag set too tight? Also, check your knot — a poorly tied arbor knot can slip and cause a break at the spool.
Bird’s Nest (Tangled Mass)
A bird’s nest is usually caused by a combination of line twist and slack. To fix it, you have to cut the line. There’s no untangling a closed reel’s bird’s nest without removing the cover. Remove the cover, cut the line above the tangle, and re-spool. It’s painful, but it’s faster than trying to pick it out.
To prevent it, always store your reel with the line tight, not loose. And before each trip, give the line a quick pinch test — run your fingers along it to feel for nicks or weak spots.
How Much Line is Too Much? (The 1/8 Inch Rule)
I’ve seen anglers fill a spincast reel to the absolute brim, thinking more line equals more casting distance. It doesn’t. Overfilling causes the line to pile up and spring off in loops. Underfilling reduces casting distance and invites line dig.
The 1/8-inch rule is simple: when you look at the spool from the front, there should be a visible gap of about the thickness of a pencil lead between the line and the lip. That’s about 1/8 inch. If you can’t see the lip, you’re overfilled. If the line is more than 1/4 inch below the lip, you’re underfilled.
Here’s a quick reference table for different line types:
| Line Type | Best For | Spooling Notes | Memory |
|---|---|---|---|
| Monofilament | Beginners, topwater, crankbaits | Wet it before spooling; stretches but forgiving | High — needs to be wound tight |
| Fluorocarbon | Clear water, deep diving lures | Harder and denser; spool slower to avoid heat | Moderate — can be brittle |
| Braided line | Heavy cover, weedless lures | Thin for strength; use a mono backing to save line | Low — but can dig into itself |
For braid, consider using a monofilament backing. Fill the spool halfway with cheap mono, then tie on your braid and fill the rest. This saves money and gives the braid a grippy surface to hold onto.
Frequently Asked Questions
How often should I replace the line on my closed reel?
For mono and fluorocarbon, replace it at least once a year if you fish regularly, or every 3-4 months if you fish weekly. UV light and heat degrade the line. Braid can last 2-3 years if you trim off the first few feet each trip, but check for fraying.
Can I use braided line on a closed reel?
Yes, but with caution. Braid is thinner, so you’ll need to fill the spool more carefully to avoid line dig. Also, braid has no stretch, so the drag needs to be set a bit lighter to avoid breaking off on the hookset.
What’s the best knot to tie line to a closed reel spool?
The arbor knot is the standard, but for braid, a double uni knot or a cinch knot with a loop is more secure. The key is that the knot must not slip under pressure.
Why does my line keep twisting no matter what I do?
Check the direction of the filler spool. If the line comes off the filler spool opposite to the reel’s winding direction, you’ll get twist. Also, make sure you’re not winding with too much tension, which can stretch the line and cause it to coil.
Do I need a line spooler tool, or can I just use a pencil?
You can use a pencil, but a spooler tool makes it easier to get even tension and prevents the spool from jumping. If you spool more than a few reels a year, the tool is worth it. If you’re a casual angler, a pencil and a friend will do.
Final Cast: Pro Tips for Longevity
You’ve got the line on right. Now keep it that way.
- Store your reel in a cool, dry place, away from direct sunlight. Heat and UV are line killers.
- Loosen the drag before storing to relieve tension on the line and spool.
- Spray a silicone line conditioner on the line after spooling to reduce memory and friction.
- Check the line before each trip — run your fingers along it to feel for nicks, flat spots, or fuzz.
- If you see a twist starting, fix it immediately. Don’t wait until it becomes a bird’s nest.
- Keep a spare spool of line in your tackle box. You never know when you’ll need a quick re-spool on the water.
Spooling a closed reel isn’t hard once you understand the mechanics. The line has to go on tight, even, and in the right direction. Follow these steps, and you’ll spend less time untangling and more time catching.