

You just dropped the transducer in the water, powered up the unit, and now you’re staring at a screen full of blue static and a number that reads 42.3. You know it’s depth, but you’re not sure if that blob is a fish, a weed, or just your boat’s own wake messing with the signal. That moment is exactly why this guide exists.
This is a field manual for real-world conditions, not a button-by-button rehash of the manual. You’ll walk away knowing how to set up your Garmin for trolling, drifting, or anchoring, how to read the bottom hardness, and what to do when the screen goes blank or fills with noise. We’ll cover the specific settings that matter and the ones you can ignore forever.

Garmin
In this article
- Garmin 010-01550-00 Striker 4 with Transducer, 3.5" GPS Fishfinder with Chirp
- Before You Turn It On: Transducer Placement and Boat Speed
- The First 10 Minutes: A Step-by-Step Power-On and Setup Routine
- Decoding the Screen: Fish Arches, Bait, Weeds, and Bottom Hardness
- The Big Three Settings: Gain, Frequency, and Scroll Speed
- Traditional Sonar vs. ClearVü vs. SideVü: When to Use Each
- Advanced Tactics: Using Waypoints and Split-Screen to Build a Fishing Map
- Troubleshooting Common Screen Problems
- Scenario-Based Settings: Trolling, Drifting, and Anchoring
- Final Checklist: Turning Screen Time Into More Fish
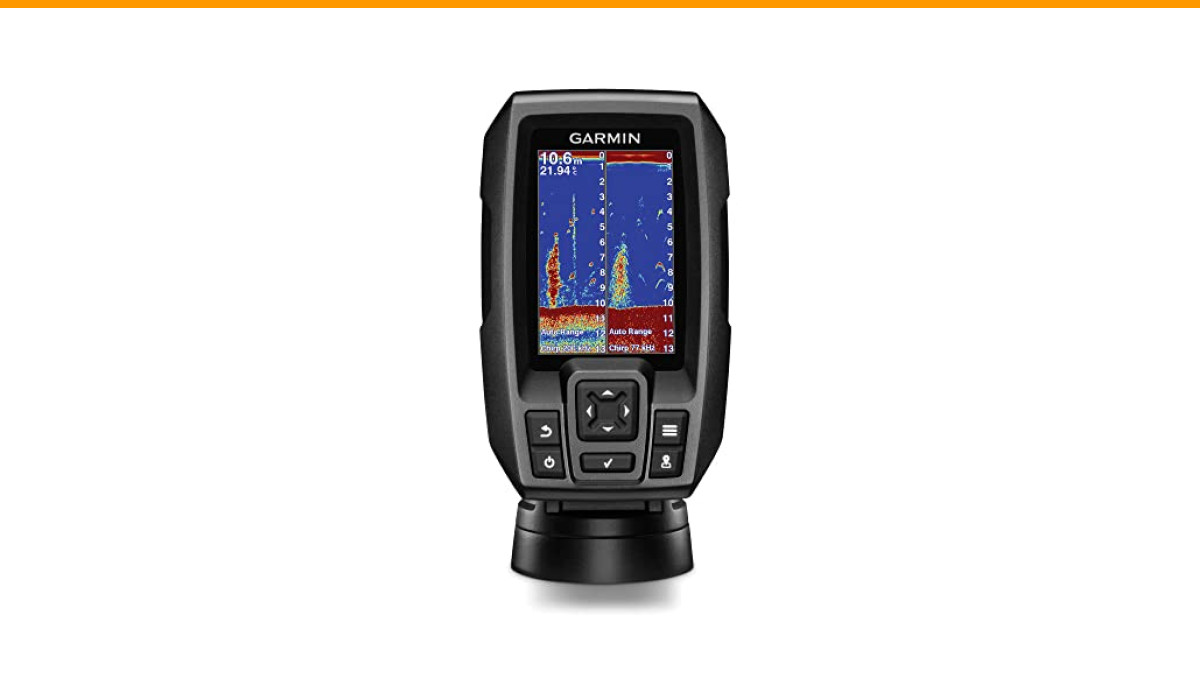
Garmin 010-01550-00 Striker 4 with Transducer, 3.5" GPS Fishfinder with Chirp
- Clear Vu scanning Sonar shows you more of what is in the water around your boat; This high frequency sonar gives near photographic…
- The power of simple offers a keyed interface with dedicated buttons; The device is easy to use and easy to install; Available in 3…
- Waypoint map: Use the way point map to easily view, mark and navigate to locations such as brush piles, stumps and docks; Maximum…
The Garmin Striker 4 with transducer is a solid entry point for all of this. Its CHIRP sonar and ClearVü scanning give you a lot of data to work with, and the 3.5-inch screen is enough to learn the craft without being overwhelming. It handles freshwater down to 1,600 feet and saltwater to 750 feet, which covers most inshore and inland situations. You can check the current price on Amazon if you’re in the market.
Before You Turn It On: Transducer Placement and Boat Speed
The single biggest mistake I see on the water is a transducer mounted wrong. You can have a $1,500 unit and it will still read garbage if the puck isn’t sitting clean in the water. The transducer needs a solid stream of water flowing across its face, not bubbles or turbulence.
Mount it on the transom, just below the hull line. It should sit slightly lower than the bottom of the boat, but not so low that it creates drag. If you’re on a pontoon or a boat with a stepped hull, you might need a mounting bracket to get it into clean water.
Boat speed matters more than most people think. At idle, you’ll get a great picture. At 25 mph, the transducer might lose the bottom entirely because of cavitation. The rule I use: if you see a rooster tail behind the transducer, you’re too fast. Slow down to trolling speed or planing speed and the sonar will lock on.
Here’s a quick checklist before you even power on:
- Transducer face is parallel to the water surface, not angled up or down.
- The cable is routed away from the engine’s electrical wires to avoid interference.
- No air bubbles trapped between the transducer and the water at rest.
- The unit is mounted where you can see it without craning your neck.
The First 10 Minutes: A Step-by-Step Power-On and Setup Routine
You’re at the ramp, boat in the water, and you want to get moving. Here’s the exact routine I use every time, and it takes less than ten minutes.
- Power on the unit before you leave the dock. Let it acquire GPS satellites while you’re tying off the fenders. This takes a minute or two on cold start, and doing it at the dock beats drifting in a current fiddling with menus.
- Set the transducer to the correct mode. If you’re in freshwater, use the freshwater setting. If you’re in saltwater, switch to saltwater. This changes the sonar algorithm and depth range.
- Turn on the A-Scope if your model has it. It shows a real-time view of what’s directly under the boat, which helps you see fish that are hugging the bottom.
- Set the depth alarm to 10 feet less than where you plan to fish. If you’re chasing bass in 20 feet, set it to 10. If you’re offshore in 100 feet, set it to 90. It’s a simple safety net.
- Go to the sonar settings and set the scroll speed to ‘Fast’ or ‘Maximum’. This gives you a real-time view, which is critical when you’re moving.
That’s it. You’re ready to idle out. You don’t need to touch every menu option on day one. Get the basics locked in and you’ll learn the rest as you go.
Decoding the Screen: Fish Arches, Bait, Weeds, and Bottom Hardness
Most beginners see a fish arch and think it’s a fish. It’s not. A fish arch is the sonar ping hitting a fish as it passes through the cone. The shape tells you more than just ‘fish present’. A tall, thick arch means a big fish. A thin, flat line means a small fish or a bait ball.
Here’s the part that trips people up: the arch only appears if the fish is moving through the cone. A fish holding still under the boat will show as a solid bar, not an arch. So if you see a lot of horizontal lines, those are fish sitting in the current or holding on structure.
Weeds show up as vertical, wispy lines coming off the bottom. They might look like thin trees. Baitfish show up as a dense cloud of tiny dots, usually suspended mid-water. If you see a cloud of bait and a few arches underneath it, you’ve found the spot. The predators are underneath the bait, waiting.
Bottom hardness is a game-changer. A hard bottom (rock, shell, sand) shows up as a thick, bright line on the sonar. A soft bottom (mud, silt) shows up as a thin, faint line. The Garmin’s CHIRP sonar does a great job of separating these. When you see a thick line, you’re over structure that holds fish. When you see a thin line, you’re over flat, featureless bottom that probably won’t hold much.
The Big Three Settings: Gain, Frequency, and Scroll Speed
You can ignore 90% of the menu settings on a Garmin fish finder. The three that matter are gain, frequency, and scroll speed. Get these right and everything else falls into place.
How to Tune Gain Without Guessing
Gain controls how sensitive the sonar is. Too low and you’ll miss fish. Too high and the screen fills with noise and clutter. The trick is to turn it up until you see a little bit of background noise, then back it off one notch.
Start with gain at 70% and watch the screen. If you see a clean bottom line with no speckles, turn it up. If you see a blizzard of dots everywhere, turn it down. The sweet spot is when you can see the bottom clearly, and you can just barely make out the texture of the bottom (rocks, sand, mud).
Use the auto-gain setting for the first few trips if you’re not confident. It’s not perfect, but it’s close. Once you get a feel for what the screen should look like, switch to manual and tune it yourself.
Frequency: When to Use High, Low, and CHIRP
High frequency (200 kHz) gives you a narrow cone and better detail. It’s great for seeing fish close to the bottom and for picking out individual fish in a school. Low frequency (50 kHz) gives you a wide cone and covers more water, but with less detail. It’s better for finding structure and drop-offs.
CHIRP is the best of both worlds. It sends a sweep of frequencies and combines the returns. The result is crisper fish arches and better target separation. On the Striker 4, use CHIRP as your default. Switch to high frequency when you’re jigging vertically and want to see exactly what’s under the boat.
Scroll Speed
Scroll speed is how fast the sonar image moves across the screen. At slow speeds, the image is compressed and you see a longer history. At fast speeds, you see a real-time view but the history is shorter.
For trolling, use fast scroll speed. You need to see what’s coming up in front of you. For anchoring or drifting, slow it down. You’re staying in one spot and you want to see the full picture of what’s below.
Traditional Sonar vs. ClearVü vs. SideVü: When to Use Each
This is where a lot of anglers get confused. Traditional sonar (the 2D view) uses a cone-shaped beam and shows fish as arches. ClearVü uses a high-frequency beam that gives a near-photographic image of the bottom, but it shows fish as small, bright dots rather than arches. SideVü scans out to the sides of your boat, showing structure and fish that are away from your path.
The rule I follow: use traditional sonar for finding fish. Use ClearVü for finding structure. Use SideVü for covering water efficiently.
If you’re fishing a new lake, start with SideVü to find points, humps, and weed lines. Once you find a spot, switch to traditional sonar to see if fish are holding there. Then use ClearVü to confirm the bottom composition and see exactly how the structure lays out.
| Mode | Best For | What Fish Look Like | When to Switch |
|---|---|---|---|
| Traditional Sonar (2D) | Finding fish, seeing arches | Arches and bars | Default mode, use most of the time |
| ClearVü | Seeing bottom detail, weeds, rocks | Bright dots, not arches | When you need to see structure clearly |
| SideVü | Covering water, finding drop-offs | Shadows on the sides | When you’re searching new water |
One caveat: ClearVü and SideVü are not great for seeing fish suspended in the water column. They’re designed for bottom detail. If you’re targeting suspended fish (like crappie or walleye), stick with traditional sonar.
Advanced Tactics: Using Waypoints and Split-Screen to Build a Fishing Map
Waypoints are the most underused feature on a Garmin. Most people mark a single spot and move on. That’s a wasted opportunity. You should be building a map of fish-holding locations over time.
Here’s the system: when you catch a fish, mark a waypoint. When you see a big school of bait on the sonar, mark a waypoint. When you find a weed line or a rock pile, mark a waypoint. Name them with a code: ‘B’ for bass, ‘W’ for walleye, ‘S’ for structure. Over a few trips, you’ll have a map of the lake that shows you where the fish live in different conditions.
Use the split-screen view to make this easier. Put the sonar on one side and the waypoint map on the other. When you see something on the sonar, you can immediately see where you are on the map and mark the spot without switching screens.
The Striker 4 has a waypoint map that makes this simple. You can mark a spot with a single button press and navigate back to it later. It’s not a full chartplotter, but it’s enough to build a personal fishing map.
Another trick: use the waypoint map to find ‘edges’. Mark the top of a drop-off and the bottom of the drop-off. Then troll along that edge, keeping your boat on the line between the two waypoints. Fish love edges, and this keeps you in the strike zone longer.
Troubleshooting Common Screen Problems
Every fish finder will act up eventually. Here’s how to fix the most common issues without calling tech support.
No Bottom Reading
If the screen shows ‘No Bottom’ or just a solid line of noise, check the transducer first. It might be out of the water or tilted up from the force of the water. Slow the boat down and see if the reading returns. If it doesn’t, check the cable connection at the back of the unit. A loose cable will cause intermittent readings.
If you’re idling and still getting no reading, the transducer might be mounted too high. It needs to be below the hull line to get a clean signal. Raise the boat on the trailer and adjust it.
Too Much Clutter
Clutter is usually caused by gain being set too high. Turn it down until the screen clears up. If that doesn’t work, check for interference from the trolling motor. The trolling motor’s electrical field can interfere with the sonar signal. Route the transducer cable away from the trolling motor wires.
Also check the transducer for air bubbles. If you see bubbles coming off the face of the transducer, it’s mounted too close to the hull or in a spot with turbulent water. Moving it a few inches can make a huge difference.
Lost GPS Signal
GPS signals don’t penetrate water, so if the unit is mounted below deck, it won’t work. The Striker 4 has an internal GPS antenna, so it needs a clear view of the sky. If you’re in a boat with a canvas top, the signal can be blocked. Move the unit to a spot with a clear view or use an external GPS antenna if your model supports it.
Also, GPS takes time to acquire on a cold start. If you haven’t used the unit in a few weeks, give it a few minutes to lock on. Don’t panic if it shows ‘No GPS’ for the first two minutes.
Scenario-Based Settings: Trolling, Drifting, and Anchoring
Your settings should change based on how you’re fishing. Here’s what I use for each scenario.
Trolling: Set scroll speed to maximum. Set gain to 65-75%. Use CHIRP. You want to see fish coming up ahead of you, so the fast scroll speed is critical. Also, turn on the A-Scope to see fish directly under the boat as you pass over them.
Drifting: Slow the scroll speed down to medium. You’re moving slowly, so you want a longer history on the screen. Lower the gain to 60% to reduce clutter from the wind and waves. Use the split-screen view with the waypoint map so you can mark spots as you drift over them.
Anchoring: Turn the scroll speed to slow. You’re not moving, so you want to see the full picture of what’s below. Crank the gain up to 80% to see fish that are holding tight to the bottom. Use the flasher mode if you have it. It shows a real-time, circular view of the water column, which is perfect for vertical jigging.
Final Checklist: Turning Screen Time Into More Fish
You’ve got the settings dialed in and you know what you’re looking at. Now it’s time to put it together. Here’s the short list of what matters most when you’re on the water.
- Trust the sonar over your gut. If the screen shows fish at 25 feet, put your bait at 25 feet, not 15.
- Mark every catch with a waypoint. Build that map over time.
- Use CHIRP as your default and switch to high frequency only when you need extreme detail.
- Keep the gain just high enough to see the bottom texture, not so high that you see noise.
- Adjust scroll speed based on your boat speed. Fast for moving, slow for sitting still.
- Check your transducer position before you blame the unit. Nine times out of ten, it’s a mounting issue.
- Spend 10 minutes at the dock setting up your screens before you fish. It saves you 30 minutes of fiddling on the water.
The Garmin Striker 4 is a capable unit that will serve you well for years. It’s not the fanciest unit on the market, but it’s honest and it works. Learn to read it and you’ll catch more fish, plain and simple.