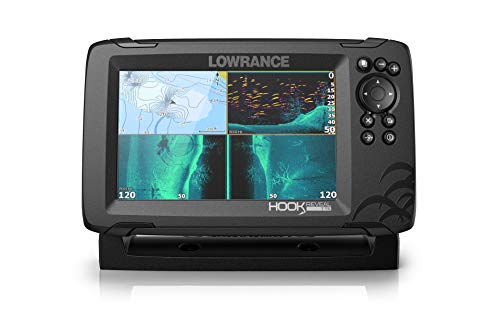
You just unboxed a new Humminbird fish finder, and the screen looks great. Then reality hits: you have to bolt this thing to your boat without drilling holes in the wrong spot or ripping the cable loose on the first run. Every angler has been there. The difference between a clean install and a messy one comes down to understanding why the transducer matters more than the display unit itself.
This guide walks you through the full installation process, from choosing the right mount type to setting the depth offset. You’ll learn how water flows across your hull, where to drill, how to seal everything against saltwater, and what to do when the readings look wrong. No fluff, just the stuff that actually matters on the water.
WINDFRD
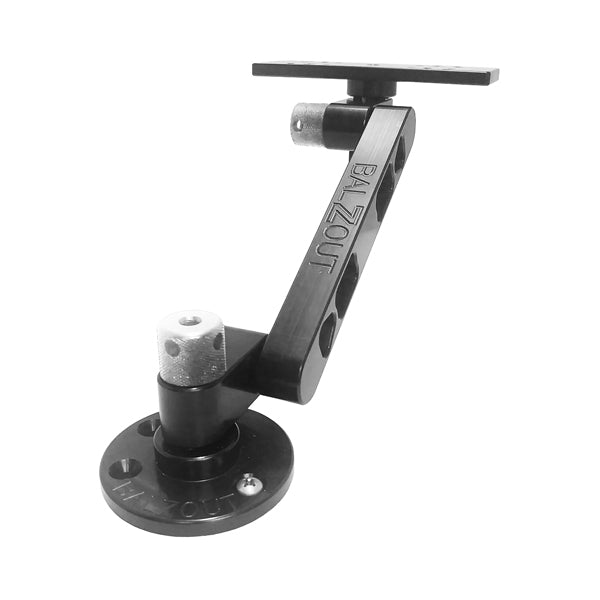
WINDFRD Aluminum Swing Arm Fish Finder Mount for 5"-12" Screens
- Heavy Duty - Extra strong load-bearing marine electronic mount is made of all aluminium and can hold up to 110 lbs. static and 22…
- Designed for High Salt Marine Environment - Constructed of Powder-Coated Marine-Grade Aluminum and Stainless Steel Hardware. The m…
- Superior Compatibility - Heavy-duty mounting base down-drilled to mount on any flat surface, such as the dashboards, decks of boat…
For anglers running larger screens, a sturdy mounting arm makes a real difference. The WINDFRD Aluminum Swing Arm Fish Finder Mount holds displays up to 12 inches with a 360-degree pivot, which helps you position the screen where you can actually see it while fighting a fish. It’s built from marine-grade aluminum and stainless hardware, so it won’t corrode after a season in saltwater.

Why Mounting Location Determines Sonar Performance
Your fish finder is only as good as its transducer. That small puck-shaped device sends sound waves into the water and listens for the echo. If the transducer sits in turbulent water or behind a hull step, the sonar beam gets scattered. You’ll see a fuzzy bottom line, lost fish, or no reading at all.
Think of it like a flashlight. Shine it through a window with water droplets and the beam diffuses. The same happens with sonar when air bubbles pass over the transducer face. The bubbles block the sound waves and create false echoes that show up as clutter on your screen.
So the golden rule is simple: mount the transducer in clean, laminar water flow. That means water moving smoothly along the hull without turbulence, spray, or air pockets. On most boats, that spot is slightly below the hull bottom, away from strakes, rivets, and through-hull fittings.
Choosing the Right Mount Type for Your Boat
Humminbird offers three main mounting styles, and each one suits a different kind of fishing. Pick the wrong one and you’ll fight poor performance all season.
Transom Mounts
This is the most common setup for bass boats, aluminum tillers, and center consoles. The transducer bolts to the back of the boat, just below the waterline. You get a permanent install that works at speed and doesn’t interfere with the trolling motor.
Pros: solid readings at high speed, no cable running through the hull, easy to remove if needed. Cons: you have to drill holes in the transom, and the bracket sits exposed to dock strikes and trailering damage. It also adds drag, though usually negligible.
Trolling Motor Mounts
For kayak anglers and anyone who fishes shallow water, mounting the transducer to the trolling motor shaft puts the sonar right where you’re fishing. You can see structure and fish directly under the boat without the transducer being affected by the main engine’s wake.
Pros: excellent shallow-water performance, no holes in the hull, easy to swap between boats. Cons: the transducer may not read well at trolling speeds above 3-4 mph, and the cable needs careful routing to avoid tangling with the motor’s power cord. Also, if you use spot-lock or GPS anchoring, the transducer swings with the motor, which can cause occasional signal loss.
In-Hull and Portable Mounts
In-hull mounts glue the transducer inside the boat, shooting through the hull material. This works only on fiberglass or aluminum hulls without cored sections. You get zero drag and no holes, but the sonar has to pass through the hull, which can reduce sensitivity.
Portable mounts use a suction cup or a bracket that clamps to the gunwale. They’re handy for rental boats or ice fishing, but they’re not stable at speed. The transducer can kick up and lose the bottom.
| Mount Type | Best For | Speed Capability | Installation Difficulty | Hull Penetration |
|---|---|---|---|---|
| Transom | Bass boats, center consoles, aluminum hulls | Up to 70+ mph with proper angle | Moderate (drilling required) | Yes (3-4 holes) |
| Trolling Motor | Kayaks, shallow water, bass fishing | Up to 3-4 mph | Easy (no drilling) | No |
| In-Hull | Fiberglass and aluminum hulls | Any speed | Moderate (epoxy work) | No |
| Portable | Rental boats, ice fishing, temporary use | Up to 5 mph | Very easy | No |
Step-by-Step: Transom Mount Installation
Let’s walk through the most common install, the transom mount. You’ll need a drill, a 1/8-inch pilot bit, a 3/8-inch bit for the bolt holes, marine sealant, a wrench, and a pencil.
Finding the ‘Clean Water’ Spot on Your Hull
Start by looking at the hull from behind. You want to avoid strakes (the raised ridges on aluminum boats) and any through-hull fittings. On a V-hull, the transducer should sit on one side of the center, about 6-12 inches from the keel. On a flat-bottom jon boat, place it near the corner where the bottom meets the transom.
For stepped hulls, the rule changes. A step creates aeration behind it, so you must mount the transducer on the step itself or well behind it, not between steps. On pod-style transoms (like some bay boats), the transducer should mount on the pod’s vertical face, not on the main transom. If you’re unsure, run the boat up on plane and watch the water flow—look for where it stays smooth and attached to the hull.
Drilling, Sealing, and Securing the Bracket
Hold the bracket in place and mark the holes with a pencil. Make sure the bracket sits level and the transducer’s bottom edge is just below the hull line. Drill pilot holes first, then enlarge them to the final size. For wood transoms, use 1/4-inch stainless bolts with washers and lock nuts. For aluminum, use 10-24 stainless screws, but coat them with Tefgel to prevent galvanic corrosion. For fiberglass, use 1/4-inch bolts with a backing plate inside the hull.
Apply a generous bead of marine sealant (3M 5200 or LifeSeal) to the bolt holes and the bracket base before tightening. Do not overtighten—you’ll crack the bracket. Snug it down until the sealant squeezes out, then wipe the excess.
Torque specs vary by bracket, but a good rule is 15-20 lb-ft for 1/4-inch bolts. Too much torque crushes the gasket; too little lets the bracket vibrate loose.
Routing the Cable Like a Pro
The cable is the weakest link in any install. Run it upward from the transducer, then loop it above the waterline before entering the hull. This drip loop lets water run off the cable instead of following it inside the boat.
Use a cable clamp or zip ties every 12 inches to secure the cable to the transom. Avoid sharp bends—the cable has internal wires that can break if you kink it. If you’re routing to a bow-mounted unit, plan the path along the gunwale, under the gunnel, and through a wiring chase. Leave extra cable at the bow for the trolling motor to swing.
For console mounts, run the cable through a plastic conduit or cable boot where it passes through the transom. Seal the entry point with marine caulk.
Step-by-Step: Trolling Motor Mount Installation
If you’re mounting to a trolling motor, you’ll need the Humminbird trolling motor adapter kit or a universal bracket. Slide the transducer onto the shaft and position it so it sits parallel to the water surface when the motor is deployed. The cable should run up the shaft alongside the motor’s power cord, secured with zip ties every 6 inches.
One thing people miss: check the transducer angle when the motor is stowed. If it hits the hull or the mount, you’ll need to adjust the bracket. Also, make sure the cable doesn’t wrap around the shaft when the motor rotates 360 degrees. Leave a small service loop at the top of the shaft.
Test the setup in shallow water before heading out. Raise the motor and lower it a few times to confirm the cable doesn’t snag.
Setting the Depth Offset and Angle for Accurate Readings
Once the transducer is mounted, you need to calibrate the depth offset. This setting tells the unit how far the transducer sits below the waterline. If it’s mounted 2 inches below the hull, set the offset to -2 inches. If it’s mounted inside the hull, you’ll need a positive offset equal to the hull thickness plus the distance to the waterline.
To set the angle, loosen the bracket bolts and tilt the transducer until its face is parallel to the water surface at rest. On a planing hull, the transducer should point slightly downward (about 2-3 degrees) to maintain contact when the bow rises. Check the readings at idle and at planing speed. The bottom line should stay solid, without gaps or excessive clutter.
If you see a solid bottom but no fish arches, the transducer angle is likely too steep. If you see surface clutter, it’s too shallow and catching turbulence.
Troubleshooting Common Mounting Problems
Here are the three most common issues and how to fix them.
Loss of Bottom at Speed
This usually means the transducer is lifting out of the water or sitting in aerated flow. Move it lower on the transom or adjust the angle to point more downward. On stepped hulls, you may need to add a wedge bracket to angle the transducer correctly.
Ghost Images and Double Bottoms
Ghost images look like a faint duplicate of the bottom line. This happens when the transducer picks up a reflection off a nearby object, like a trolling motor shaft or a hull step. Reposition the transducer away from the object, or lower it further below the hull.
Surface Clutter and Noise
If the screen shows a band of noise near the surface, the transducer is likely in turbulent water. Check for air bubbles under the transducer face. On aluminum boats, rivets and strakes create turbulence—move the transducer to a smoother section of the hull.
Networking Your Fish Finder
If your Humminbird supports NMEA 2026 or Wi-Fi, you’ll need to plan the cable routing before you secure everything. The NMEA backbone should run from the display to the power source and any peripherals (like a GPS antenna or a second unit). Keep the backbone away from the transducer cable to avoid electrical interference.
Use the supplied drop cables and T-connectors. A common mistake is running the NMEA cable parallel to the trolling motor power leads—this can cause erratic readings. Cross them at 90 degrees if you must, but keep them separated.
For Wi-Fi models, position the display unit so the antenna has a clear view of the sky. Metal bimini tops or hardtops can block the signal.
Winterizing and Maintaining Your Transducer
Before you store the boat for the winter, inspect the transducer for cracks or impact damage. Remove the cable from any clips and coil it loosely. If the boat sits outside, cover the transducer with a plastic bag or a purpose-made cover to protect it from ice damage.
Check the bracket bolts for corrosion. On aluminum boats, stainless bolts can cause galvanic corrosion over time. Apply a thin coat of anti-seize compound to the threads before reinstalling. If the transducer has a rubber boot, clean it with mild soap and water—never use solvents that can degrade the plastic.
Frequently Asked Questions
Can I mount a transducer on a stepped hull?
Yes, but you must place it on the step itself, not in the pocket between steps. The step creates aeration behind it, so mounting in that pocket results in constant signal loss. Use a wedge bracket to angle the transducer correctly for the step’s surface.
What size drill bit do I need for the mounting bolts?
For 1/4-inch bolts, use a 5/16-inch drill bit. For 10-24 screws, use a 7/32-inch bit. Always drill a pilot hole first with a 1/8-inch bit, then enlarge it. Clean the hole thoroughly before applying sealant.
How do I know if my transducer is level?
Put a small bubble level on the top flat surface of the transducer. At rest, the bubble should sit centered. On plane, the transducer should tilt down slightly—about 2-3 degrees—to maintain water contact. If you can’t see the bottom at speed, adjust the angle down.
Why does my fish finder work at idle but lose the bottom at speed?
This is almost always an angle or placement issue. The transducer is either lifting out of the water or sitting in aerated flow. Lower the bracket on the transom or increase the downward tilt. On some boats, you might need to move the transducer to the other side of the keel.
Can I mount the transducer inside the hull without epoxy?
You can use a water-filled container like a plastic bag or a PVC pipe cap glued to the hull, filled with water. This works for temporary testing, but it’s not reliable long-term. The water can evaporate or freeze. Use a proper marine epoxy for a permanent in-hull install.
Final Checks Before You Hit the Water
- Double-check the transducer angle with a level before tightening the bracket for good.
- Route the cable with a drip loop and secure it every 12 inches to prevent chafing.
- Set the depth offset in the unit’s settings menu to match your transducer’s actual depth below the waterline.
- Test the install at idle, planing speed, and in a tight turn to confirm the bottom line stays solid.
- If you’re networking the unit, verify the NMEA backbone is powered and the display recognizes all connected devices.
- Apply anti-seize compound to stainless bolts on aluminum hulls to prevent corrosion.
- Keep a spare transducer cable connector cap in your tackle box—saltwater can corrode the pins if left exposed.
Take your time with the install. A transducer that sits in clean water and points the right way will give you years of reliable readings. Rushing it means a season of frustration and missed fish.