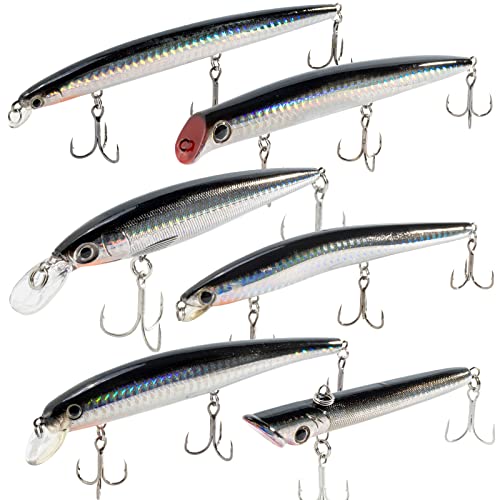
You’ve probably stood in the tackle shop, staring at a $7 pack of soft plastics and wondering why a few ounces of rubber cost more than your lunch. The worms tear on the first fish, the colors bleed, and you’re back buying more in a week. Making your own rubber fishing lures isn’t just a way to save money—it’s a way to get exactly the shape, color, and action you want, every time.
This guide walks you through the entire process, from sourcing a master lure to pouring your first batch of plastisol. You’ll learn the specific temperatures, times, and techniques that separate a clean, durable lure from a bubbly mess. By the end, you’ll know how to inject multi-color patterns, fix common defects, and keep your molds working for years. No fluff, just the practical steps.

EUPHENG
Eupheng PlastiCatch Series Plastisol Fishing Lure Making Plastic Rubber, Crystal Clear, Low Odor, Non Yellowing Soft Formula for DIY Fishing Lures
- Soft Formula is specially engineered for bait makers who want ultra-soft, lifelike lures with superior flexibility and clarity. Pe…
- Shake Before Use: Each bottle includes a built-in steel mixing bead to help re-blend settled materials. Shake thoroughly before ev…
- Low odor environmentally friendly formula, non yellowing. Clean and safe to work with in well-ventilated spaces with proper safety…
For the plastisol itself, the Eupheng PlastiCatch Series is a solid starting point. It’s a low-odor, non-yellowing formula that stays flexible after curing, which matters for finesse baits. The built-in steel mixing bead in the bottle is a nice touch—just shake it hard before each use to re-blend the plasticizers that settle over time.

Why Make Your Own Lures? (The Real Math)
Let’s do the numbers, because that’s what convinced me. A typical pack of four soft plastic worms costs $5 to $8. You might get two or three fish per worm before it’s shredded. That’s roughly $1.50 per fish, assuming you catch anything at all.
Making your own drops that cost to about $0.15 to $0.30 per lure, depending on the additive load. A quart of plastisol runs about $25 to $35 and yields roughly 80 to 120 standard 5-inch worms. The silicone mold material—about $30 for two pints—can produce 50 to 100 molds if you’re careful with your master. Your first lure costs more because of the setup, but by lure number 50, you’re saving real money.
The other reason is control. You can make a 4.5-inch finesse worm with a curly tail that no store carries. You can add salt, glitter, or scent in exact amounts. You can match the hatch on your local lake. That’s worth something.
| Item | Store-Bought Lures | DIY Lures (First 50) | DIY Lures (After 100) |
|---|---|---|---|
| Cost per lure | $1.50 – $2.00 | $0.50 – $0.75 | $0.15 – $0.30 |
| Setup cost | $0 | $75 – $120 | $75 – $120 |
| Time per lure | 5 minutes (driving to store) | 15 – 20 minutes | 5 – 10 minutes |
| Color options | Limited to store stock | Unlimited | Unlimited |
| Durability | Variable | Adjustable (add hardener) | Adjustable |
Essential Materials and Safety Gear
You don’t need a full workshop, but you do need the right basics. Here’s the list I use:
- Plastisol — liquid PVC that cures into soft rubber. The Eupheng PlastiCatch works well; it’s clear and low-odor.
- Silicone mold rubber (two-part, platinum-cure) — this makes the mold itself.
- A master lure — a store-bought soft plastic or a carved piece of wood.
- Mold box — a small plastic container or LEGO bricks to hold the silicone while it cures.
- Mold release — petroleum jelly or a commercial spray.
- Microwave or induction cooker — for heating plastisol. A dedicated microwave is best; you don’t want plastisol fumes in your food area.
- Syringes (10-20 ml) for injecting liquid plastic into the mold.
- Glitter, colorants, salt, scent — optional additives.
- Safety gear — nitrile gloves, safety glasses, and a respirator with organic vapor cartridges if you’re working in a small space.
Heating plastisol releases trace amounts of hydrogen chloride gas, especially if you overheat it. That’s not something to ignore. Work in a well-ventilated area, and don’t microwave plastisol in the same container you use for food. A dedicated plastic measuring cup with a pour spout is worth the $5.
Step 1: Creating or Sourcing Your Master Lure
The master is the original lure you’ll copy. You have three options: buy a new lure, use a worn-out one, or carve your own from wood or a dense foam.
Using an old store-bought lure is the cheapest route. Pick one with clean, sharp details—a beat-up worm with torn tails will copy those flaws into every mold you make. Wash it with dish soap and warm water, then dry it completely. Apply a thin coat of mold release (petroleum jelly works) to the surface. This keeps the silicone from bonding to the plastic.
If you’re carving your own, use basswood or a high-density foam. Sand it smooth—any scratch will show up in the mold. Seal the wood with a clear acrylic spray before applying mold release.
Step 2: Building the Mold Box and Pouring Silicone
Your mold box needs to be slightly larger than the master. A 2-inch gap around the lure is enough. For a 5-inch worm, a 6x4x2-inch container works. LEGO bricks make a great reusable mold box—they’re watertight and easy to disassemble.
Mix the silicone according to the manufacturer’s instructions. Usually that’s a 10:1 ratio by weight. Stir slowly for 3 minutes, scraping the bottom and sides. Fast stirring introduces bubbles.
Place the master in the box, then pour the silicone in a thin stream from a corner. Let it flow over the lure naturally. Pouring directly on top traps air underneath. Fill the box until the silicone covers the master by at least half an inch.
Degassing and Preventing Air Bubbles
Bubbles are the enemy. A vacuum degassing chamber is the professional solution, but you can get acceptable results without one.
After pouring, tap the box firmly on the counter 20 to 30 times. This brings bubbles to the surface. Pop them with a toothpick or a quick blast from a heat gun. Let the silicone cure for the full time specified—usually 4 to 6 hours at room temperature. Don’t rush it; tacky silicone tears easily.
If you see bubbles trapped against the master, that area of the mold will have a pit. The lure will come out with a bump or a hole. Prevention is easier than repair.
Step 3: Cutting the Injection Gate and Vent Lines
Once the silicone cures, remove it from the box and carefully cut the master out. Use a sharp scalpel or a box cutter. Make a single cut from the edge of the mold to the center, then peel the two halves apart.
The injection gate is the hole where you’ll inject the plastisol. For a worm, cut a small funnel-shaped channel at the tail end, about 1/4 inch wide at the top and tapering to the body. This gives the plastic a clear path in.
Vent lines are thin channels that let air escape as the plastic fills the mold. Cut two or three tiny grooves (1/32 inch deep) from the head and the appendages to the outside edge. Without vents, you get trapped air and incomplete lures.
This is the step most beginners skip, and it shows. A lure with a missing tail or a bubble pocket in the middle is almost always a venting problem.
Step 4: Melting and Injecting the Plastisol
Plastisol doesn’t melt like wax; it thickens into a gel as it heats, then thins out as it reaches the pouring temperature. The sweet spot is usually 300°F to 320°F. Use a candy thermometer to check.
Pour your plastisol into a microwave-safe cup. Heat it in 10-20 second bursts, stirring between each. The Eupheng bottle recommends short, repeated heating—that’s correct. When it becomes a clear, watery liquid with a few bubbles, it’s ready. Don’t let it boil; that creates bubbles that never come out.
Draw the hot liquid into a syringe. Work quickly—the plastisol starts to thicken as it cools. Insert the syringe tip into the injection gate and push firmly, but not violently. You want a steady flow, not a blast. Fill until you see plastic just start to appear at the vent lines. Hold the pressure for 5 seconds, then release.
Adding Color, Glitter, and Scent
Mix colorants into the plastisol before heating, or add them to the hot liquid and stir. Start with a tiny drop—one drop of colorant per 4 ounces of plastisol is often enough. You can always add more, but you can’t take it out.
For glitter, sprinkle it into the hot plastisol and stir. Use fine glitter for finesse baits, larger flakes for swimbaits. Scent is a different story. Most scents break down at high temperatures, so add them after the lure is cured. A drop of anise oil or garlic oil applied to the finished lure works better than mixing it in.
Fixing Common Casting Defects (Bubbles, Short Shots)
Here’s the troubleshooting chart I wish I had when I started:
| Problem | Cause | Fix |
|---|---|---|
| Air bubbles inside the lure | Plastisol overheated, or injected too fast | Lower heat, inject slower, use a thicker syringe needle |
| Incomplete lure (short shot) | Not enough plastic, or blocked vent lines | Push more plastic, clean the vents, check the gate for clogs |
| Torn lure when removing from mold | Mold not lubricated, or plastic not fully cured | Let the lure cool 2-3 minutes, apply mold release to the cavity |
| Lure sticks to itself | Plastic too hot when removed | Wait longer before demolding |
| Cloudy or yellowed plastic | Overheating, or old plastisol | Use fresh plastisol, monitor temperature closely |
Step 5: Removing, Trimming, and Rigging Your Lure
Let the mold cool for 3 to 5 minutes. The plastisol needs to solidify completely, but it should still be warm and flexible. Peel the two halves apart gently. The lure will have a small sprue—the excess plastic from the injection gate. Trim it off with scissors.
Check the lure for imperfections. Small bubbles near the surface can be popped with a pin and reheated briefly with a heat gun. Torn appendages mean you pulled too early or your mold is too tight. Add a drop of mold release to the cavity before the next pour.
Rigging is no different from store-bought lures. Use a wide-gap hook for worms, a jig head for grubs, or a weighted swimbait hook for paddle tails. The action of a well-made soft plastic is identical to a commercial one, and often better because you control the softness.
Advanced Customization: Multi-Color and Layering
Single-color lures are fine, but two-tone patterns catch more fish in clear water. The trick is layering, not mixing.
First, inject a small amount of the belly color—say, white—into the mold. Wait 30 seconds for it to start gelling. Then inject the back color, like chartreuse, on top. The two colors will meet in the middle and create a sharp line. This works because the first layer is still slightly tacky, so the second layer bonds to it.
For a more subtle blend, inject both colors simultaneously using two syringes. This creates a marbled effect that’s popular for crawdad patterns. It takes a few tries to get the ratio right, but the results are worth it.
You can also use a syringe to inject glitter directly into the center of the lure for a 3D effect. Push the needle into the gate after the initial fill, inject a small amount of glitter-loaded plastisol, then top it off with clear.
Mold Care and Storage
A good silicone mold lasts for hundreds of pours if you treat it right. After each session, rinse it with warm water and mild dish soap. Don’t use harsh solvents; they break down the silicone.
Store molds flat, not folded or stacked under heavy objects. Silicone holds its shape, but prolonged pressure can deform the cavity. Keep them in a zip-top bag with a little baby powder to prevent sticking.
If a mold gets a tear, you can repair it with a dab of fresh silicone. It won’t be invisible, but it’ll extend the mold’s life. Eventually, the mold will wear out—the details will soften, and the lures will look blobby. That’s normal. Cast a new mold from a fresh master and move on.
The three most common mistakes I see beginners make: overheating the plastisol (it bubbles and turns yellow), skipping the vent lines (every lure comes out short), and pulling the lure from the mold too early (it stretches and tears). Avoid those three, and you’ll be making fishable lures on your first evening.
Frequently Asked Questions
How long does a homemade soft plastic lure last compared to a store-bought one?
It depends on the plastisol formula and how you fish it. A standard soft plastisol lure will tear about as fast as a mid-range store-bought worm. You can add a hardener to the plastisol to make it more durable, but that reduces the action. For finesse fishing, softer is better. For flipping into heavy cover, add 5% hardener.
Can I use a regular microwave to heat plastisol?
Yes, but use a dedicated microwave that you don’t use for food. Plastisol fumes can linger. Heat in short bursts—10 to 20 seconds—and stir between each. A microwave with a rotating turntable helps distribute heat evenly. A candy thermometer is essential; don’t guess the temperature.
What’s the best material for the mold—silicone or something else?
Silicone is the standard for good reason. It’s flexible, which makes demolding easy, and it handles the heat of liquid plastisol without degrading. You can also use a two-part urethane rubber, but it’s stiffer and harder to demold. For a beginner, silicone is the right choice.
How do I get the lure out of the mold without tearing it?
Patience. Let the mold cool for at least 3 minutes after injecting. Then flex the silicone gently—don’t pull the lure by the tail. If it sticks, apply a thin coat of mold release to the cavity before pouring. A drop of dish soap mixed with water works in a pinch, but it can leave residue on the lure.
Is it cheaper to make lures or buy them?
After the initial setup, it’s significantly cheaper. A $30 bottle of plastisol makes dozens of lures for under $0.30 each. The setup cost—silicone, mold box, syringes—is about $75 to $120. If you fish often and lose lures regularly, you’ll break even within a season. If you fish twice a year, just buy them.
What to Do With This Knowledge
- Start with a simple worm or grub shape—don’t attempt a complex crawdad on your first try.
- Invest in a good thermometer; temperature control is the difference between clean lures and bubbly messes.
- Cut vent lines on every mold. They’re small, but they save you from constant frustration.
- Shake your plastisol bottle thoroughly before each use; the plasticizers settle.
- Work in a ventilated space and wear gloves. Plastisol is safe when handled properly, but it’s not something to breathe in.
- Make a batch of 10 lures at once, not one at a time. The setup time is the same, and you’ll have a supply ready.
- Keep notes on your color and temperature settings. Next time, you’ll know exactly what worked.
Making your own rubber fishing lures is a skill that pays off in both dollars and fish. The first few pours will have flaws, but every batch gets cleaner. Before long, you’ll have a tackle box full of custom baits that no one else has—and you’ll know exactly how to tweak them for the next trip.