Why DIY Lures Beat Store-Bought (and When They Don’t)
You know that moment. You’re at the tackle shop, staring at a wall of shiny lures, each one priced like it was carved from gold. You buy a few, lose one to a snag on the first cast, and wonder if the fish are even worth this much effort. That frustration is exactly why I started making my own lures a decade ago.
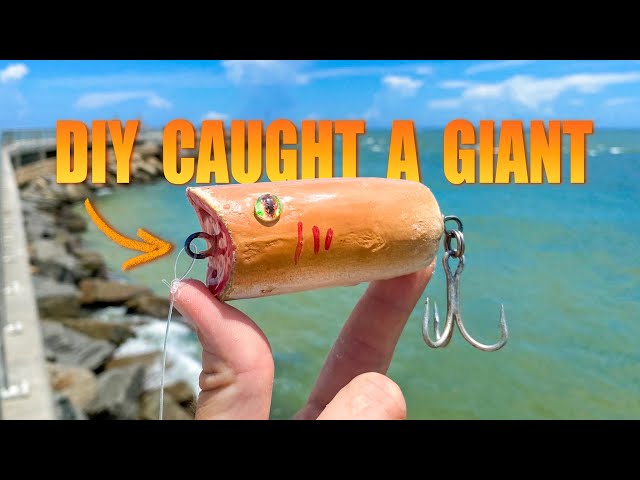
DIY lures cost a fraction of retail. A wooden crankbait might set you back $8 to $12 in a store. You can build one at home for under a dollar in materials, especially if you scavenge wood scraps and reuse old hardware. More importantly, you control the action. You can tune a lure to run at a specific depth, wobble at a certain frequency, or float with a particular posture. Store-bought lures are made for the average angler. Your lures can be made for your local water.

Dr.Fish
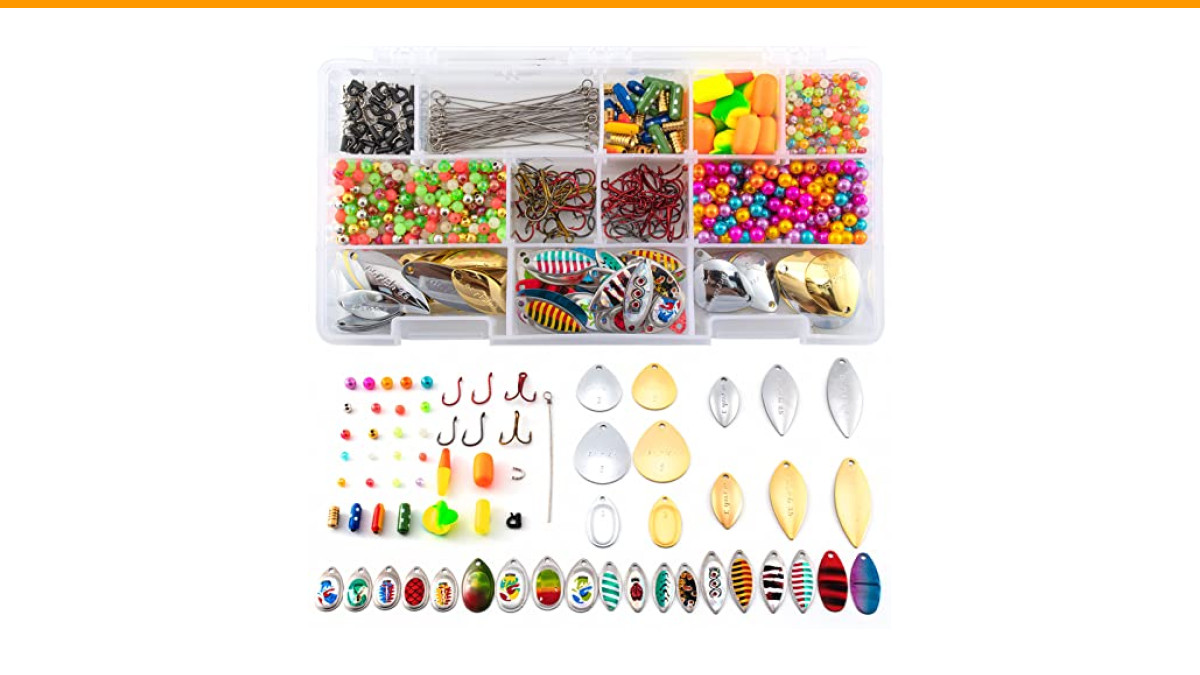
Dr.Fish 1310pk Spinner Making Kit Walleye Rig Lure Making Accessories
- 1310 pieces huge quantity lure making supplies including hooks, spinner blades, spinner shafts, clevises, lure bodies and rig floa…
- Includes total 100 pieces of spinner blade in multiple different styles, sizes and patterns
- Specially chosen tackles allow you to make spinners and walleye rigs with just one kit. We added rig floats, speed change clevis a…
But DIY isn’t always better. If you need a highly complex swimbait with a realistic internal rattle system, buying one is often smarter. And your first few lures will likely be ugly. They might not even swim straight. That’s fine. The learning curve is short, and the payoff is catching fish on something you built with your own hands. This guide walks you through the whole process, from a 15-minute spinnerbait to a wooden crankbait that runs true.
For those just starting out, a kit can remove the guesswork of sourcing individual parts. The Dr.Fish 1310pc Spinner Making Kit packs 1,310 pieces into a tackle box, including spinner blades, hooks, clevises, shafts, and beads. It’s a practical way to stock up for multiple projects without buying ten different bags of components.
Essential Tools and Materials: The Minimalist Starter Kit
You don’t need a workshop full of fancy equipment. I built my first lure with a pocket knife, sandpaper, and a drill. Here’s the honest list of what you need to start, plus what you can add later.
Tools You Need Right Now
- Pliers – Needle-nose and round-nose. You’ll use these for bending wire, crimping, and holding small parts.
- Drill – A hand drill works, but a small electric drill makes clean holes for hook hangers and line ties.
- Razor saw or hobby knife – For cutting wood blanks and trimming plastic.
- Sandpaper – 80-grit for shaping, 220-grit for smoothing, and 400-grit for final prep before painting.
- Heat source – A heat gun or lighter for bending plastic and setting epoxy.
Materials to Stock
- Wood – Balsa is light and easy to shape. Cedar is heavier and more durable. Both are classic choices for crankbaits.
- Wire – Stainless steel or brass. 0.035-inch diameter is a good starting point for most freshwater lures.
- Hooks – High-carbon steel hooks hold a point longer. Match hook size to the lure body, not the fish you dream about.
- Epoxy resin – For sealing wood and creating a tough clear coat. Use a slow-cure formula for a smooth finish.
- Paint – Acrylic paints are easy to work with and clean up with water. Airbrush paints give finer control but cost more.
One thing I learned the hard way: don’t buy cheap split rings. They open up under pressure and you lose a fish. Spend a few extra cents on quality rings. It’s not worth the heartbreak.
Safety First: Handling Resins, Lead, and Sharp Tools
Lure making involves chemicals and sharp objects. A little caution goes a long way. I’ve had epoxy on my hands more times than I can count, and it’s not a big deal if you wash it off quickly. But some materials are more serious.
Resin and Solvents
Epoxy and solvent-based paints release fumes. Work in a well-ventilated area, ideally outside or near an open window. Wear nitrile gloves when mixing resin. The hardener can cause skin irritation with repeated exposure. If you’re using solvent-based paints, a respirator with organic vapor cartridges is worth the money. A simple dust mask won’t protect you from those fumes.
Lead and Weighting
Many lures use lead wire or lead shot for weighting. Lead is toxic, especially when melted. Never melt lead indoors. If you’re pouring lead weights, do it outside, wear a proper respirator, and wash your hands thoroughly after handling. These days, I prefer tungsten putty or brass weights. They cost more but eliminate the health risk entirely.
Sharp Tools
Hobby knives are sharper than you expect. Always cut away from your body. Keep a bandage and antiseptic in your workspace. And when you’re drilling small wood blanks, clamp the piece down. A spinning piece of balsa can slip and take a chunk of your finger with it. I speak from experience.
The 15-Minute Beginner Lure: A Simple Spinnerbait
Start with a spinnerbait. It’s the easiest lure to make, requires no painting, and catches fish almost immediately. Here’s the quickest path to your first DIY lure.
- Cut a wire shaft – Use 0.035-inch stainless steel wire. Cut a 6-inch piece.
- Make the line tie – Use round-nose pliers to bend a small loop at one end. This loop connects to your fishing line.
- Add a clevis and blade – Slide a clevis onto the wire, then snap a spinner blade into the clevis. The clevis lets the blade spin freely.
- Add beads – Slide 2-3 beads onto the wire above the blade. Beads act as bearings and add a bit of noise.
- Bend the 90-degree angle – About 1.5 inches above the blade, bend the wire at a right angle.
- Attach the hook – Slide a skirted hook onto the wire, then bend the remaining wire into a second loop to hold everything in place.
- Trim and test – Trim any excess wire. Hold the lure in a bucket of water and pull it through. The blade should spin freely.
That’s it. Ten minutes of work, and you have a functional lure. The Dr.Fish kit mentioned earlier includes 100 spinner blades in different sizes and patterns, plus clevises and shafts, so you can experiment with blade shapes without buying separate packs.
Step-by-Step: Building a Wooden Crankbait That Runs True
This is where the real craft comes in. A crankbait that runs true requires attention to shape, weight distribution, and the angle of the diving lip. Let’s break it down.
Design and Template Creation
Start with a simple shape. A flat-sided minnow profile is forgiving for beginners. Draw your design on paper first. A 2-inch long body is a good size for trout and panfish. Mark the centerline and the hook hanger positions. Keep the belly flat and the back slightly curved. Transfer your paper template onto a piece of balsa wood.
Cutting, Shaping, and Sealing the Wood
Cut out the rough shape with a razor saw. Then shape it with sandpaper. Work slowly, checking the profile against your template. The key is symmetry. If one side is heavier than the other, the lure will roll in the water. Once you’re happy with the shape, drill a small hole through the center for the wire through-wire or just drill pilot holes for screw eyes. Seal the wood with two coats of thin epoxy or cyanoacrylate glue. This keeps water out and prevents the wood from splitting.
Installing the Diving Lip and Hardware
The diving lip is what makes a crankbait dive. A clear polycarbonate lip is standard. Cut a slot in the front of the lure with a hobby knife. The lip’s angle determines the diving depth. A 30-degree angle gives a shallow, tight wobble. A 45-degree angle dives deeper. Glue the lip into the slot with epoxy. Install the screw eyes for the front line tie and the belly hook hanger. Make sure the front screw eye is in line with the lip, not behind it.
Weighting for Proper Buoyancy
This is the step most beginners skip, and it’s why their lures don’t run right. Test the buoyancy in a glass of water before you paint. The lure should float with the nose slightly down. If it floats tail-down, add a small brass weight to the belly near the front. If it sinks, you’ve added too much weight or used too heavy a hook. Remove weight and try again. The goal is a slow, nose-down float. This ensures the lip engages the water immediately on the retrieve.
Painting and Finishing: From Airbrush to Epoxy
Painting is where personality comes in. You can go simple or full-on airbrush art. Both work. Fish care more about action than paint, but color matters in certain conditions.
Start with a white base coat. Acrylic paint works fine. Then add your colors. For a natural baitfish pattern, use a stencil to create a dark back and lighter belly. For a flashy pattern, use metallic paint. The key is to keep the paint thin. Thick paint adds weight and can ruin the buoyancy you just tuned.
Seal everything with a clear coat. I use two-part epoxy resin, applied with a brush or by dipping. It dries hard, clear, and protects against teeth and rocks. Let it cure for 24 hours. A heat gun can help remove air bubbles in the epoxy, but hold it at a distance. Too much heat will melt the paint.
Seasonal colors matter. In clear water, use natural silver, shad, or bluegill patterns. In stained water, switch to chartreuse, white, or fire tiger. In muddy water, go with black, dark purple, or bright orange. High contrast beats realism when visibility is low.
Troubleshooting: Why Your Lure Fails and How to Fix It
Your first lure might not swim straight. Don’t get discouraged. Here are the common failures and their fixes.
| Problem | Likely Cause | Fix |
|---|---|---|
| Lure rolls to one side | Asymmetrical body shape or uneven weighting | Sand the heavier side down slightly or add a small weight to the opposite side |
| Lure spins in circles | Line tie is off-center or lip is misaligned | Bend the line tie slightly toward the side it’s turning away from |
| Lure dives too deep or too shallow | Lip angle is wrong | Increase the lip angle for shallower dive, decrease for deeper dive |
| Lure floats tail-down | Too much weight in the back | Move weight toward the nose or remove weight from the rear hook hanger |
| Lure sinks | Too much weight or too heavy hooks | Switch to lighter wire hooks or remove some weight |
One trick I use: bend the line tie loop slightly to the left or right. This acts like a rudder and can correct a slight wobble issue. It’s a small adjustment that makes a big difference.
Advanced Variations: Soft Plastics and Jigs
Once you’ve mastered hard baits, try soft plastics. These are made by pouring liquid plastic into molds. You’ll need a melting pot, plastic pellets, and a mold. Heat the plastic to around 350 degrees Fahrenheit, add colorant and glitter, then pour it into the mold. It cools in about 10 minutes. The advantage is that you can make dozens of worms or craws for pennies each.
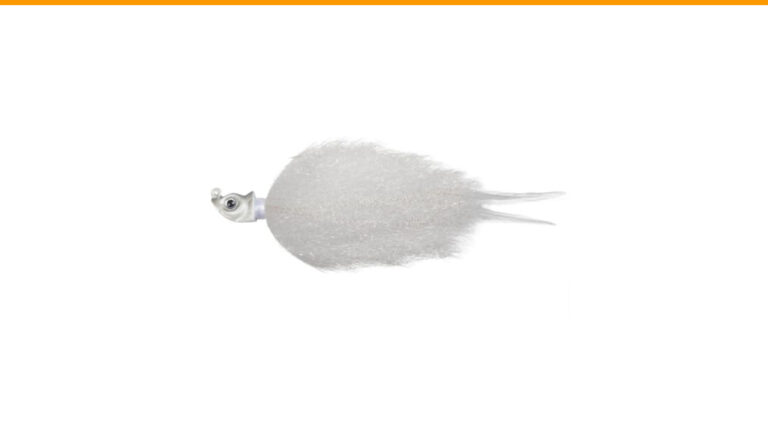
Jigs are even simpler. A jig is just a hook with a lead head. You can pour lead heads using a mold, then dress them with feathers, marabou, or silicone skirts. Feather dressing adds a lifelike pulse in the water. The downside is that feathers are fragile. They fall apart after a few fish. Silicone skirts last longer but have a different action.
Testing Your Lure: The Pool Test vs. Field Test
Always test a new lure in a controlled environment before you hit the water. A swimming pool is ideal. Attach the lure to your rod and make a short cast. Watch the action as it retrieves. Does it wobble consistently? Does it dive to the expected depth? Does it run straight?
The pool test won’t tell you everything. A pool has calm, clear water. Real water has current, weeds, and structure. The field test is the real judge. Bring a few different lures and be prepared to switch. Sometimes a lure that looks perfect in the pool gets snagged on every cast in a weedy lake. That’s not a failure. That’s information.
Maintenance and Storage for Long-Lasting Lures
Your DIY lures need care. After each fishing trip, rinse them in fresh water. Saltwater is especially corrosive. Dry them completely before storing. Check the hooks for rust and sharpen them with a file. Replace split rings if they show signs of spreading.
Store lures in a tackle box with individual compartments. Soft plastics should be stored separately from hard baits. The plasticizers in soft baits can melt the paint on hard lures. I learned this the hard way when a bag of worms ruined three of my favorite crankbaits.
Frequently Asked Questions
What is the best wood for making crankbaits?
Balsa is the classic choice. It’s light, easy to shape, and gives a lively action. Cedar is heavier and more durable, making it better for larger lures that need to cast far. Pine is a budget option but harder to shape cleanly.
How do I determine the right hook size for my lure?
Match the hook size to the lure body. A 2-inch crankbait typically takes a size 6 or 8 hook. A 4-inch lure might take a size 2 or 1. The hook gap should be wide enough to clear the lip and body so it doesn’t foul on the retrieve.
Can I use a regular household oven to cure epoxy?
You can, but I don’t recommend it. The fumes can contaminate your food later. Use a dedicated toaster oven in your workshop, or just let the epoxy cure at room temperature. It takes longer but is safer.
How do I make a lure rattle?
Drill a small hole in the center of the body before you seal it. Insert a small steel or brass rattle chamber, then seal the hole with epoxy. You can buy pre-made rattle chambers or make your own from small metal tubes. The sound attracts fish in murky water.
What’s the easiest way to source free materials?
Look for scrap wood from construction sites or furniture repairs. Old wooden spoons can be carved into lure bodies. Used fishing lures can be stripped down and rebuilt. Even old plastic bottles can be melted down and poured into molds for soft plastics. Check with local woodworkers for offcuts.
Final Cast: Your First Lure Awaits
Making lures is a skill that pays off every time you tie one on. Start with a simple spinnerbait to get the feel of wire bending and hardware. Then graduate to a wooden crankbait and learn the nuances of weighting and lip angle. Before long, you’ll be tuning lures to match the hatch in your favorite lake.
Here’s what to remember:
- Start with a spinnerbait kit to learn the basics without painting or weighting.
- Test buoyancy in water before painting. It’s much harder to fix after the paint is on.
- Use brass or tungsten weights instead of lead to avoid health risks.
- Keep your first lures simple. Flat-sided minnows are forgiving to shape.
- Always test in a pool before a field trip. It saves time on the water.
- Store soft plastics separately from hard baits to prevent paint damage.
- Don’t be afraid to fail. Every crooked lure teaches you something about hydrodynamics.
Your first lure won’t be perfect. It might not catch a fish. But the second one will be better, and the tenth one will be something you’re proud to show off. Grab some wire, a block of wood, and start building.