You’ve watched the videos. You’ve tied on a fly that looks like a real bug. Then you step into the river, strip out some line, and your first cast lands in a heap three feet in front of you. The line slaps the water, the leader tangles, and the fly drags behind like an anchor. That moment separates the curious from the committed. Most beginners quit right there, convinced they lack some genetic gift for timing.
That’s not the problem. The problem is almost always a misunderstanding of what the rod actually does. A fly rod doesn’t throw line like a baseball. It stores energy like a spring. You load it, and it unloads. This guide walks you through the mechanics of that spring, how to diagnose your own loops, and how to fix the three or four mistakes that cause 90 percent of beginner frustration.

SF
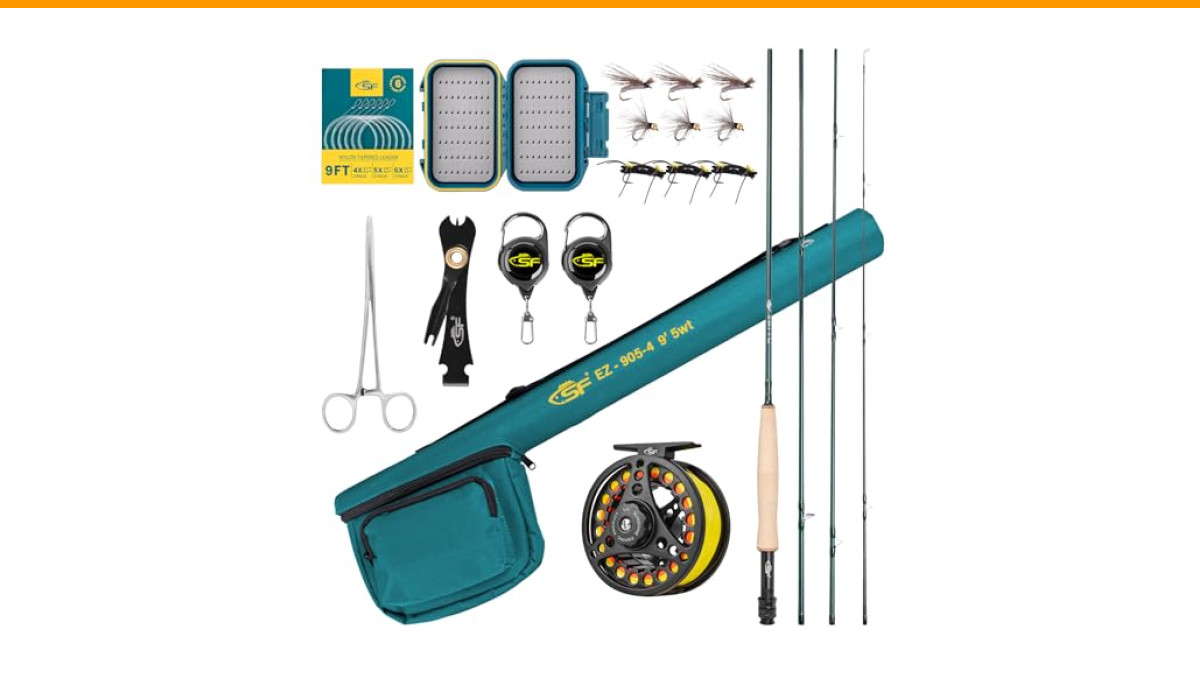
SF Fly Fishing Rod and Reel Combo Starter Kit for Beginners, 9' 5wt
- COMPLETE FLY FISHING STARTER KIT, READY OUT OF THE BOX: Open the case and fish — this kit includes a 9' 5wt 4-piece fly rod, pre-s…
- BUILT FOR LEARNING TO FLY FISH: The setup steps that confuse most beginners are done for you — the reel arrives loaded with weight…
- 24T CARBON FLY ROD FOR TROUT & PANFISH: The 9' 5wt blank blends IM7 24T+30T carbon fiber in a semi-gloss emerald green finish that…
If you’re starting from zero, a complete setup helps. The SF 5WT 9FT Fly Fishing Rod Combo Starter Kit includes a 9-foot 5-weight rod, a pre-spooled reel, a tapered leader, and a box of flies. That removes the guesswork of matching rod, line, and reel, so you can focus entirely on your casting stroke.
Why Your Cast Fails Before You Even Start (Gear Setup)
You can have perfect timing and still cast poorly if your gear fights you. The most common setup mistake is mismatched line weight. A 5-weight rod needs a 5-weight line. Slap a 7-weight line on it, and the rod overloads, making it feel mushy and hard to control. Put a 4-weight line on it, and the rod won’t load enough, so you’ll compensate by forcing the cast with your arm, which ruins everything.
Check your leader, too. A 9-foot tapered leader is standard for most trout fishing. If your leader is too short (under 7 feet), the fly turns over too fast and lands hard. If it’s too long (over 12 feet), it becomes difficult to manage, especially in wind. The SF combo includes six packs of 9-foot tapered leaders in 4X, 5X, and 6X, which covers most beginner scenarios.
One more thing: check your drag. Many beginners set the reel drag too tight, thinking it controls the cast. It doesn’t. The drag only matters when a fish runs. A tight drag during casting just strips line awkwardly and can cause wind knots. Set the drag light enough that line pulls off the reel with almost no resistance.
The 3 Core Mechanics: Load, Stop, and Drift
Every good cast boils down to three actions: load the rod, stop the rod, and drift the rod. Get these three right, and the fly line does the rest.
Load: The Physics of Bending the Rod
The rod loads when the line’s weight bends it backward (or forward) during the cast. You feel this as pressure, a pull, a springiness in your hand. That bending stores energy. When the rod straightens, it releases that energy into the line, accelerating it toward the target.
Here’s what most people get wrong: you don’t load the rod by yanking harder. You load it by timing the acceleration so the line’s weight is still pulling on the rod tip when you change direction. Imagine swinging a hammer. You don’t muscle the swing; you let the weight of the head do the work. Same idea here.
The “Why” Behind the Stop
The stop is the sudden halt of the rod tip after acceleration. This stop is what transfers the rod’s energy into the line, creating loop formation. Without a crisp stop, the line just slithers out with no energy, collapsing at the end.
Think of it like cracking a whip. The whip works because the handle stops abruptly, sending a wave down the thong. Your rod works the same way. A hard stop on the backcast and a hard stop on the forward cast are non-negotiable.
The Drift: The Secret to a Tight Loop
Drift is the subtle, slow movement of the rod tip after the stop, in the same direction the cast is traveling. It keeps the line straight and tightens the loop. Many beginners skip the drift entirely, yanking the rod back the other way as soon as the cast finishes. That kills the cast and creates slack.
After your forward stop, let the rod tip drift forward and down slightly, following the line toward the water. This gives the line time to straighten completely before it lands. The drift is not a big motion; it’s a few inches of subtle follow-through.
Step-by-Step: The Basic Overhead Cast
Let’s put those mechanics into a sequence you can practice. This is the bread-and-butter cast you’ll use 80 percent of the time.
The Grip and Stance
Grip the rod with your thumb on top of the cork handle, pointing toward the rod tip. Your other fingers wrap underneath. This “thumb-on-top” grip gives you the most control over the rod’s orientation and helps you stop the rod with your wrist, not your whole arm.
Stand with your feet shoulder-width apart, your casting shoulder facing the target. Keep your elbow close to your body, roughly in front of your hip. Don’t let your elbow fly out to the side; that creates a rounded, weak cast.
The Backcast (The Foundation)
Start with about 20 feet of line out. Lift the rod tip from the 10 o’clock position to the 1 o’clock position with a smooth acceleration, then stop abruptly. The line will shoot behind you. Wait for it to straighten completely. You’ll feel a slight tug on the rod tip when the line is fully extended.
Most beginners rush this pause. They start the forward cast before the line has straightened, which causes the line to collide with itself. The pause feels longer than it actually is. Count “one-thousand” in your head after the backcast stop before starting forward.
The Forward Cast and Pause
Once you feel that tug, accelerate the rod forward from 1 o’clock to 10 o’clock, then stop hard. The line will shoot forward. Let the rod tip drift down slightly as the line straightens and lands on the water.
Don’t drop the rod tip to the water immediately. Let the line finish its forward travel first. If you drop too early, you create slack, and the fly lands with a splash instead of a gentle settle.
Diagnosing Your Loop: Tailing vs. Open Loops
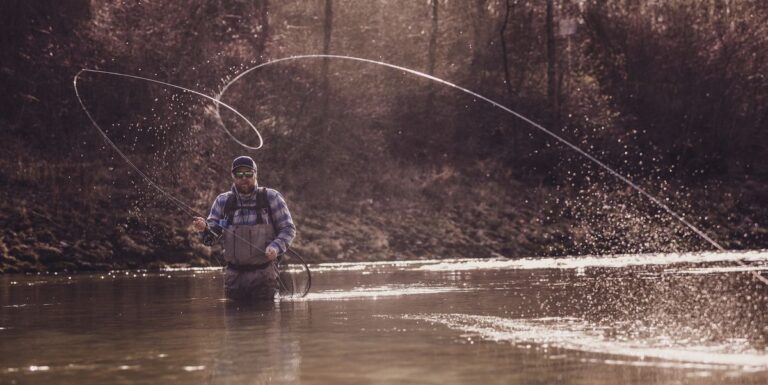
Your loop shape tells you exactly what you’re doing wrong. Look at the loop formed by the fly line as it travels. There are two common problems.
A tailing loop looks like a V or a pinched shape, where the top of the loop crosses over the bottom. This happens when you accelerate too hard at the end of the forward cast, causing the rod tip to dip downward. It’s also caused by starting the forward cast too early, before the backcast has straightened. The result is often a wind knot in your leader.
An open loop looks wide and round, like a U shape. The line lands with less force and often collapses. An open loop happens when you don’t stop the rod hard enough, or you drift too much. The rod tip travels in a wide arc instead of a straight line, which spreads the energy out.
To fix a tailing loop: slow down your acceleration and make sure you stop the rod at 10 o’clock, not lower. To fix an open loop: make your stop crisper and shorten your drift.
| Loop Problem | Visual Cue | Primary Cause | Quick Fix |
|---|---|---|---|
| Tailing Loop | V-shape, line crosses over itself | Too much power, early forward cast, rod tip dips | Reduce power, wait for backcast to straighten, stop higher |
| Open Loop | U-shape, wide and rounded | Soft stop, too much drift, wide rod arc | Crisp stop, shorter drift, keep rod tip in a straight line |
| Wind Knot (in leader) | Tight knot in tippet | Usually a tailing loop that collapses | Fix tailing loop; replace leader if knotted |
The 5 Most Common Beginner Mistakes (And the Fix)
Here’s what I see on the water, over and over, from new anglers. Each one has a simple correction.
- Using your whole arm. Your elbow and shoulder should be nearly locked. The power comes from your forearm and wrist, not your shoulder. If your shoulder moves a lot, you’re using too much body. Fix: practice with your elbow tucked against your side.
- Rushing the backcast pause. The line needs time to straighten behind you. Most beginners start forward too soon. Fix: say “pause” out loud after your backcast stop. Wait for the tug.
- Dropping the rod tip on the forward cast. You’re aiming at the water, but your rod tip should point up and forward, not down. Fix: stop the rod at 10 o’clock, not at 2 o’clock.
- Watching the fly, not the line. Your eyes follow the fly, but your brain needs to see the loop. Fix: watch the loop form in the air, not the fly on the water.
- Stripping line instead of casting it. You can’t cast 40 feet of line if you haven’t shot it out of the rod tip. Fix: practice with 20-25 feet of line only. Master that distance before adding more.
Backyard Drills to Build Muscle Memory
You don’t need water to practice. A backyard, a patch of grass, and a target (like a hula hoop or a paper plate) are enough.
The Clock Face Drill
Imagine a clock face in front of you. Your rod tip travels between 10 and 1 o’clock. Practice the casting stroke without any line, just the rod. Accelerate from 10 to 1, stop, pause, accelerate from 1 to 10, stop. Do this 20 times in a row. You’re building the muscle memory for the stop, which is the hardest part to learn.
The Paper Target Drill
Lay a paper plate on the grass about 25 feet away. Practice false casting (casting back and forth without letting the line touch the ground) and then drop the line on the plate on the final forward cast. The goal is accuracy, not distance. If you can hit a plate consistently, you’ve mastered the stop and the drift.
One more drill: practice with your eyes closed. Cast back and forth, and feel the rod load and unload. Feel the tug at the end of the backcast. This builds the tactile sense that makes good casting automatic.
Adapting to Real Conditions: Wind, Weight, and Distance
Once you’re comfortable on calm water, the real world hits you. Wind, weighted flies, and longer distances all require adjustments to the same basic cast.
Casting in the Wind
Wind from your left or right pushes your line sideways, collapsing your loop. The fix is to lower your casting plane. Instead of casting at 10 to 1 o’clock, cast more horizontally, say at 9 to 12 o’clock. This keeps the line closer to the water, where the wind is weaker.
A headwind (blowing at you) makes the forward cast difficult. The fix is to speed up your forward cast and use a harder stop. A tailwind (blowing behind you) makes the backcast difficult. In that case, slow down your backcast pause and let the wind carry the line.
Casting Weighted Flies and Indicators
Nymphing rigs with split shot or a strike indicator change the game. The added weight loads the rod differently. You’ll feel the rod bend more on the backcast. Don’t fight it. Slow down your stroke and use a slightly longer pause. The heavier weight needs more time to straighten the line behind you.
Also, don’t try to cast a heavy nymph rig like a dry fly. Use a shorter line, maybe 25-30 feet, and make an open, relaxed loop. A tight loop with a heavy fly can cause the fly to hit the rod or tangle the leader.
Beyond the Basics: False Casting and Shooting Line
False casting is casting back and forth without letting the line touch the water. It’s used to dry a dry fly, to measure distance, or to reposition the line. It’s also where most beginners get into trouble by adding too much power. Keep your false casts short and controlled. Two or three false casts is plenty before you lay the line down.
Shooting line means letting additional line slip through your line hand during the forward cast to add distance. To do this, strip about 10 feet of line off the reel and hold it in your line hand. On the forward cast, release that line just before the stop. The momentum of the cast pulls the extra line through the guides. It takes practice to time the release, but it’s the key to casting beyond 40 feet.
The 10-Minute Practice Routine
You don’t need hours. Ten focused minutes a day beats a three-hour session once a month. Here’s a routine that works.
- Minutes 0-2: Clock face drill with no line. Focus on hard stops.
- Minutes 2-4: Cast with 20 feet of line. Backcast, pause, forward cast. Watch your loop. Is it tight or open?
- Minutes 4-6: Practice false casting. Keep the line in the air for 5 cycles, then lay it down.
- Minutes 6-8: Aim at the paper plate. Cast, land the line, repeat. Count your accuracy.
- Minutes 8-10: Practice shooting line. Strip 10 feet, cast, release. See how much distance you gain.
Do this for two weeks, and you’ll notice a dramatic difference in your control and confidence.
Final Checklist Before You Hit the Water
Before you wade in, run through this list. It takes thirty seconds and prevents most on-water frustration.
- Rod is assembled with the guides aligned in a straight line.
- Fly line is threaded through every guide, not just most of them.
- Reel drag is set light enough to pull line easily by hand.
- Leader is attached to the fly line with a nail knot or loop-to-loop connection.
- Fly is tied on with a clinch knot, not a half-hitch.
- You have 20-25 feet of line out of the rod tip, not 40.
- You’ve practiced your backcast pause three times before you made your first real cast.
Master fly casting techniques takes time, but it’s not mysterious. The rod loads, you stop it, you let it drift. Watch your loop, fix your pause, and practice a little every day. The fish will notice the difference before you do.