You just pulled a brand-new rod and reel combo out of the box. The line is already on the spool, the guides are aligned, and you’re ready to fish. Then you cast once, and the line explodes into a bird’s nest. Or it coils off the spool like a slinky. Or the knot at your lure slips after three fish.
That’s the reality of pre-spooled fishing rods. The factory line is a starting point, not a finished product. It often sits in a warehouse for months, wrapped tight, developing memory and weak spots. Stringing it correctly—or re-stringing it when needed—makes the difference between a frustrating day and a productive one.
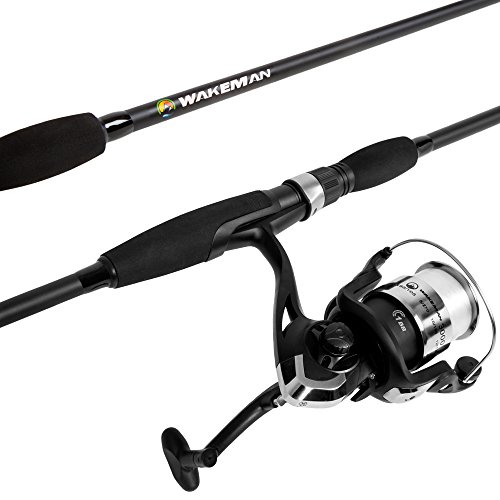
Wakeman
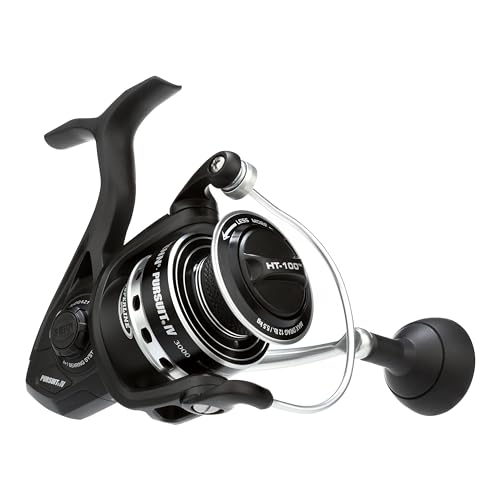
Fiberglass Fishing Pole - Strike Series Collapsible Rod and Spinning Reel Combo Gear for Catching Walleye, Bass, Trout, and More by Wakeman (Black)
- SPINNING ROD AND REEL COMBO - Measuring 78-inches-long, this fishing combo includes a fiberglass collapsible fishing pole with adj…
- COLLAPSIBLE DESIGN - The medium-action bait caster rod and reel combo features a split EVA foam handle for a secure grip and colla…
- DURABLE BUILD - This durably made fishing pole and reel combo comes outfitted with stainless-steel eyelets, ceramic guides, a grap…
This guide walks you through every step: inspecting the line, tying the right knots, setting proper tension, threading the guides, and troubleshooting the problems that pop up. You’ll learn what to do with that factory line and how to replace it when it’s past its prime.
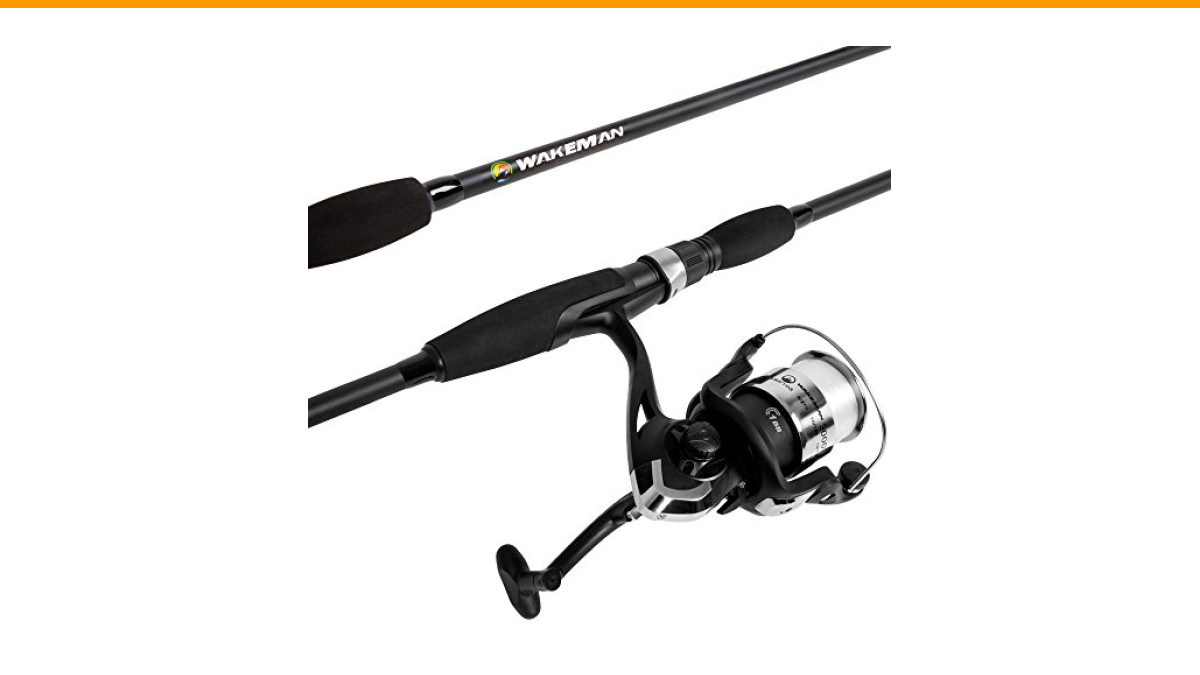
If you’re working with a Wakeman Strike Series collapsible rod and reel combo, the process is the same. It comes pre-spooled with 250 yards of 6 lb monofilament, and the medium-action fiberglass rod handles bass, trout, and walleye well. The collapsible design makes it easy to store, but the line still needs your attention before you trust it.
Why Properly Stringing a Pre-Spooled Rod Matters
Most people skip this step. They assume the factory line is ready to go. It’s not always.
Factory spooling is done by machine, quickly, with minimal tension control. The line often has memory—those tight coils that spring off the spool when you cast. It might have weak spots from being pinched or scraped during packaging. And if the rod sat on a shelf for a year, the monofilament could be dry-rotted.
Stringing the rod correctly fixes these issues. It ensures the line lays evenly on the spool, which prevents backlash and improves casting distance. It also means your knot at the lure won’t fail when a big fish hits.
The process takes about ten minutes. That’s a small investment for the peace of mind that comes with knowing your setup won’t fail at the worst moment.
What You Need Before You Start
Gather these items first. It’s annoying to start and realize you’re missing something.
- Your pre-spooled rod and reel combo
- A pair of line scissors or nail clippers
- A damp cloth or paper towel
- Your terminal tackle (hook, lure, or swivel)
- Optional: line conditioner (like Reel Magic or KVD Line & Lure)
That’s it. You don’t need a line winder or a special tool. You can do this by hand, though a friend or a rod holder helps keep the rod steady while you work.
If you’re replacing the factory line entirely, you’ll also need new monofilament, fluorocarbon, or braided line. For most beginners, monofilament is the easiest to work with. It’s forgiving, stretches a bit, and knots well. Braided line is stronger but has almost no stretch, so it’s less forgiving on hooksets. Fluorocarbon is nearly invisible underwater but stiffer and harder to manage.
Step 1: Inspect the Factory Pre-Spooled Line
Before you do anything, look at the line closely. Run your fingers along the first few feet. Feel for rough spots, nicks, or flat sections.
Check the color. If it’s cloudy, discolored, or has a chalky texture, that’s a sign of dry rot. Monofilament degrades with UV exposure and time. A line that’s been sitting in a storefront window for months is suspect.
Test a short section for strength. Pull it between your hands. If it snaps easily or feels brittle, replace the whole line. It’s not worth losing a fish over a few dollars of line.
Also, check how the line is wound on the spool. If it’s bunched up on one side, or if there are gaps between coils, that’s a problem. Uneven lay means the line will dig into itself when you cast, causing friction and shorter casts.
If the line looks good, you can keep it. Just be aware that it’s not high-end line. It’s usually basic monofilament that works fine for casual fishing. For serious anglers, replacing it with a quality line is a smart move.
Step 2: Attaching the Line to the Reel (The Arbor Knot)
If you’re keeping the factory line, skip this step. If you’re replacing it, you need to tie the line to the spool. The arbor knot is the standard for this.
Here’s how to tie it:
- Wrap the line around the spool’s arbor (the metal core) once.
- Tie an overhand knot in the tag end, leaving about 6 inches of tag.
- Tie another overhand knot in the tag end, about 2 inches from the first knot.
- Pull the tag end to slide the first knot down against the arbor. The second knot acts as a stopper.
- Tighten firmly. The knot should be snug against the arbor, not sliding.
This knot works for monofilament, fluorocarbon, and braided line. It’s simple and strong. Just make sure the knot is seated properly before you start winding.
One thing to note: if the line slips on the spool, it will twist when you reel. The arbor knot prevents that. Take the extra minute to tie it right.
Step 3: Spooling the Reel with Correct Tension
This is where most people mess up. They thread the line through the guides, tie on a lure, and start reeling. But they don’t apply enough tension, so the line goes on loose and sloppy.
To spool correctly, you need tension on the line as it winds onto the reel. Here’s the method:
- Open the bail (the wire arm on the spinning reel).
- Run the line through your fingers, pinching it lightly. This creates friction.
- Have someone hold the spool of line on a pencil or screwdriver so it can rotate freely.
- Close the bail and start reeling slowly.
- Keep constant pressure with your fingers as the line winds on.
The line should fill the spool to about 1/8 inch from the edge. Too little line means less casting distance. Too much line causes it to loop over the edge and tangle.
For a spinning reel, the line should come off the filler spool in the same direction it goes onto the reel. If you’re not sure, just let the line feed naturally. If it twists, flip the spool over and try again.
Line twist is a common issue with spinning reels. It happens when you reel against a drag that’s set too tight, or when you crank the handle while the line is under tension. To avoid it, always reel with the rod tip pointed at the water, and loosen the drag slightly when reeling in a fish.
Step 4: Threading the Rod Guides (Top to Bottom)
Now that the line is on the reel, you need to run it through the guides. Start at the tip and work your way down to the reel. That’s the opposite of what most people expect, but it’s the correct way.
Here’s why: if you start at the reel and thread up, you’ll have to pull the line through each guide. That’s fine, but it’s easier to thread from the tip because you can see the line as it goes through each eyelet.
For a spinning rod, the guides are on the bottom of the rod. Thread the line through the smallest guide first (the tip), then the next one, and so on, until you reach the reel. Make sure the line goes through each guide without crossing over itself.
If your rod has micro-guides (very small diameter), you need to be extra careful. Micro-guides are common on modern casting rods. They reduce friction and improve sensitivity, but they’re finicky with thick line. If you’re using a heavy braid, it might not pass through a micro-guide easily. In that case, consider a lighter line or a rod with standard guides.
Also, check that the line isn’t rubbing against the rod blank. It should pass cleanly through each guide. If it touches the rod, it will wear down the line over time.
Step 5: Tying the Terminal Tackle (Hook/Lure)
You’ve got the line through the guides. Now tie on your hook or lure. The knot you use matters more than you might think.
The improved clinch knot is the standard for monofilament and fluorocarbon. Here’s how to tie it:
- Pass the line through the eye of the hook or lure.
- Wrap the tag end around the standing line 5-7 times.
- Pass the tag end back through the loop near the eye.
- Pass it through the big loop you just created.
- Moisten the knot with saliva or water.
- Pull the tag end and standing line to tighten.
For braided line, the Palomar knot is stronger. It’s easier to tie and less likely to slip.
Whichever knot you use, test it by pulling firmly. If it slips or breaks, retie it. A knot that fails at home will fail on the water.
One more thing: leave a small tag end, about 1/8 inch. Too long, and it will catch weeds. Too short, and the knot might come undone.
Step 6: Testing the Setup for Casting and Retrieval
Before you head out, test the rod in your backyard or driveway. Make a few practice casts (with a rubber weight or a plug, not a hook).
Watch the line as it comes off the spool. It should flow smoothly without kinks or loops. If you see loops, your line has too much memory. That’s common with factory pre-spooled line.
To fix memory, you can stretch the line. Pull off about 20 feet, hold it tight, and run a damp cloth along it. The friction and moisture help relax the coils. You can also use a line conditioner, which softens the line and reduces memory.
If the line still loops, you might need to replace it. It’s not worth fighting with bad line all day.
Also, check the drag. Set it to about 25% of the line’s breaking strength. For 6 lb line, that’s about 1.5 lb of drag. You can test this by pulling line off the reel with a scale, or just by feel. If it’s too tight, the line will break on the hookset. Too loose, and fish will run.
Troubleshooting Common Stringing Problems
Even with careful setup, things go wrong. Here’s a quick reference for the most common issues.
| Problem | Symptom | Fix |
|---|---|---|
| Line twist | Line loops and coils off the spool | Open the bail and let the line untwist by dragging a lure behind a boat, or replace the line |
| Backlash (birds nest) | Line tangles on the spool during a cast | Set the spool tension knob correctly, thumb the spool during the cast, and use heavier lures |
| Poor casting distance | Line comes off in short, jerky bursts | Check for line memory, reduce spool tension, and ensure the line is not overfilled |
| Line digs into itself | Line cuts into the coil below it | Add more line to the spool, or use a backing of monofilament before braided line |
| Knot slips | Lure comes off during casting | Use a stronger knot, moisten it before tightening, and check for line damage near the knot |
These fixes cover 90% of the problems you’ll see. If you’re still having trouble, the line itself might be the culprit. Don’t be afraid to strip it off and start fresh.
Maintenance Tips for Pre-Spooled Rods
A little care goes a long way. Here’s how to keep your pre-spooled rod in good shape.
- Rinse the rod and reel with fresh water after every saltwater trip. Salt corrodes the guides and the reel’s internals.
- Loosen the drag when you’re done fishing. Leaving it tight puts constant pressure on the line and the drag washers.
- Store the rod with the line slack, not under tension. You can do this by releasing the bail and pulling a few feet of line off.
- Check the line for nicks and abrasions before each trip. Run your fingers along the first 10-20 feet. If it feels rough, cut off that section.
- Replace the line at least once a season, or more often if you fish frequently. Monofilament breaks down with UV exposure and time.
- Apply a drop of reel oil to the bail hinge and the handle knob periodically. It keeps the reel smooth.
These habits will extend the life of your rod and reel, and they’ll save you from mid-trip failures.
Frequently Asked Questions
How do I know if the pre-spooled line is any good?
Inspect it visually and by touch. Look for discoloration, brittleness, or flat spots. Pull a few feet off and test the strength by pulling on it. If it breaks easily, replace it. If it looks and feels fine, you can use it, but keep in mind it’s basic monofilament. It’s not high-performance line.
Can I just add new line on top of the pre-spooled line?
You can, but it’s not a good idea. The old line may have memory or weak spots that transfer to the new line. Also, the spool might not have enough capacity for both layers. It’s better to strip off the old line first, then spool fresh line. It takes an extra two minutes and avoids problems.
What’s the difference between stringing a spinning reel and a baitcasting reel?
Spinning reels have a fixed spool, so the line comes off in coils. You need to manage line twist carefully. Baitcasting reels have a rotating spool, so the line comes off straight. The main issue with baitcasters is backlash. For a baitcaster, you need to set the spool tension knob so the lure falls slowly when released. For a spinning reel, you just need even line lay.
How do I fix line memory on a pre-spooled rod?
Line memory is the tight coils that form in monofilament. To reduce it, stretch the line by pulling off 20-30 feet and holding it tight for a few seconds. You can also run a damp cloth along the line to add friction and heat, which relaxes the coils. A line conditioner works too. If the memory is severe, replace the line.
Why does my line keep twisting on my spinning reel?
Line twist is usually caused by reeling against the drag, or by spooling the line onto the reel in the wrong direction. To fix it, open the bail, let the line untwist by dragging a lure behind a boat, or just replace the line. To prevent it, always reel with the rod tip pointed at the water, and make sure the line comes off the filler spool in the correct direction.
Final Thoughts: Get the Most Out of Your Pre-Spooled Setup
- Inspect the factory line before you trust it. Replace it if it shows signs of wear or dry rot.
- Use an arbor knot to secure new line to the spool. It prevents slipping and line twist.
- Apply consistent tension when spooling. Uneven tension leads to loops and tangles.
- Thread the guides from the tip down. It’s easier and ensures the line isn’t crossed.
- Tie a strong knot (improved clinch for mono, Palomar for braid) and test it before fishing.
- Set the drag to about 25% of the line’s breaking strength. For 6 lb line, that’s roughly 1.5 lb.
- Maintain your rod and reel: rinse, loosen drag, and replace line regularly.
Stringing a pre-spooled rod isn’t hard. It just takes a few minutes and a little attention to detail. Do it right, and you’ll spend more time catching fish and less time picking out tangles.