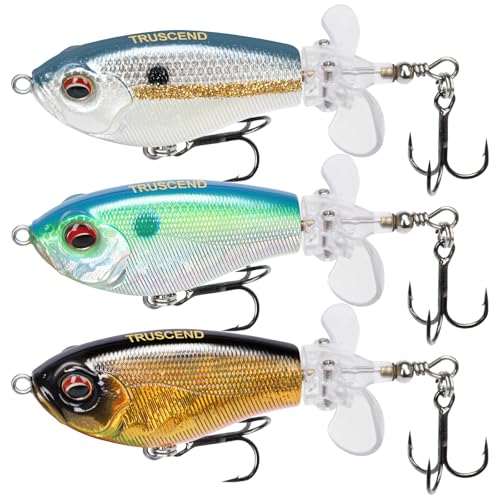
You’ve driven an hour to your favorite spot, the water’s glassy, and the bass are chasing bait on the surface. You tie on a new popper, make your first cast, and on the second retrieve you feel that telltale “thunk”—then nothing. The lure just flies off into the lake. The knot failed, not the fish.
That scenario happens to every angler at least once, and it’s almost never the line’s fault. It’s the connection between the line and the hook eye. This guide walks you through the exact knots that hold under pressure, why each one works, and how to tie them even when your hands are cold and wet. You’ll leave with a system for matching knots to lures, not just a memorized sequence of loops.
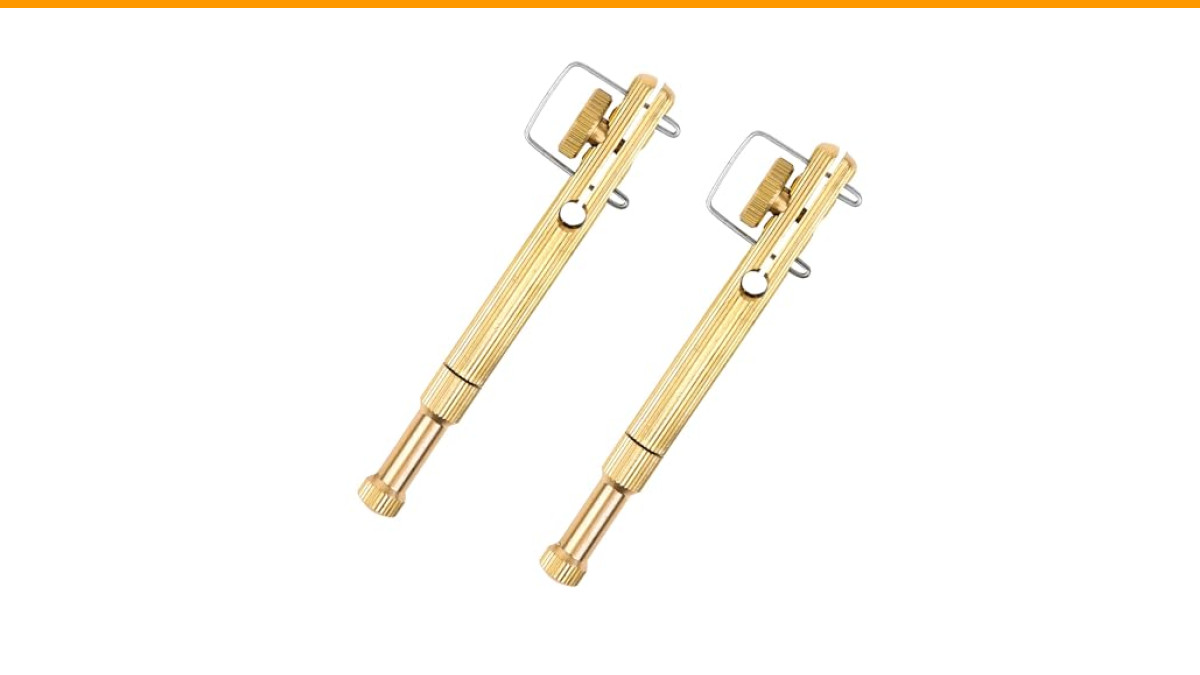
Before we get into the knots themselves, a quick note on tools. A small knot-tying tool like the FREGITO Fishing Line Hook Knot Tying Tool can save your fingers when you’re dealing with small hooks or braided line that likes to slip. It’s a simple copper device that holds the hook steady while you pass line through, which helps a lot when you’re in a rocking boat or the wind is up. I keep one in my tackle box for those exact moments.
Why the Right Knot Matters More Than the Lure
Think of your knot as the weakest link in a chain. The lure might be perfect, the rod action spot-on, but if the knot fails, nothing else matters. A poorly tied knot can reduce line strength by as much as 50%—that’s the difference between landing a 5-pound bass and watching it swim away with your favorite crankbait.
Different line types behave differently. Monofilament stretches and has memory, so it holds a knot well but can slip if the knot isn’t cinched properly. Braided line has zero stretch and is slick, so it needs a knot that grips itself, like the Palomar. Fluorocarbon is stiff and slippery, so it requires extra wraps and a wet cinch to prevent heat damage.
Here’s a number to keep in mind: a well-tied improved clinch knot retains about 85-90% of the line’s original test strength. A poorly tied one might only hold 60%. That 25% difference is the difference between a trophy and a story about the one that got away.
Essential Gear: Tools and Line Prep Before You Tie
You don’t need a dozen gadgets, but a few basics make a big difference. A pair of sharp scissors or a line cutter is non-negotiable—dull blades crush the line, creating a weak spot. A small knot-tying tool, like the FREGITO model mentioned earlier, helps with small hooks and stiff lines. And always carry a moistened rag or a little spit—you’ll see why in a second.
Before you tie anything, check the first 12 inches of your line for nicks, fraying, or wind knots. Run it between your thumb and forefinger; if it feels rough, cut it off and retie. That simple habit prevents most break-offs before they start.
One thing many anglers skip is wetting the line before cinching. Dry line creates friction, which generates heat and weakens the material, especially with fluorocarbon. A quick dip in the water or a lick of saliva is all you need. It also helps the knot slide smoothly into place.
The Big Three Knots: Clinch, Palomar, and Uni
You don’t need to know thirty knots. Three cover 95% of situations. Here’s a quick comparison table, then we’ll break down each one.
| Knot | Best For | Strength Retention | Ease of Tying | When to Use |
|---|---|---|---|---|
| Improved Clinch | Monofilament, fluorocarbon | 85-90% | Easy | Most lures, especially topwater |
| Palomar | Braided line | 95-100% | Very easy | Heavy cover, jigs, big baits |
| Uni | All lines, leaders | 85-90% | Moderate | Versatile, good for connecting lines |
| Non-Slip Loop | Any line type | 80-85% | Harder | Lures needing free action (poppers, jerkbaits) |
Improved Clinch Knot for Monofilament
This is the first knot most of us learned, and for good reason. It’s simple, strong, and works beautifully with mono and fluoro. Here’s the step-by-step:
- Thread the tag end through the hook eye, leaving about 6 inches of line.
- Wrap the tag end around the standing line 5 to 7 times. More wraps don’t mean stronger—stick to 7 max.
- Pass the tag end through the small loop right above the hook eye, then back through the big loop you just created.
- Moisten the line and pull the tag end slowly until the coils stack neatly against the eye.
- Trim the tag end to about 1/8 inch.
The key here is to pull slowly and steadily. If you yank it, the coils can bunch up and twist, which creates a weak point. You’ll know it’s right when the coils sit tight and parallel, not overlapping.
One caveat: the improved clinch knot loses some strength with braided line because the slick surface lets the coils slip. Stick with mono or fluoro for this one.
Palomar Knot for Braided Lines
The Palomar is the strongest knot for braid, period. It’s also one of the easiest to tie once you get the double-line step. Here’s how:
- Double about 6 inches of line and pass the loop through the hook eye.
- Tie a simple overhand knot with the doubled line, but don’t tighten it.
- Pass the hook through the loop you created.
- Moisten and pull both the standing line and the tag end to tighten.
- Trim the tag end.
The Palomar retains nearly 100% of the line’s strength because it doesn’t require the line to bend sharply around itself. That’s why it’s the go-to for heavy cover, where you need every ounce of breaking strength.
But here’s a gotcha: the Palomar is bulky. It can be tough to pass through the eyes of smaller lures or when you’re using a heavy braid. If that’s your situation, drop down to a lighter braid or use a different knot.
Uni Knot for Versatility and Leaders
The uni knot is the Swiss Army knife of fishing knots. It works for tying lures, joining two lines, and even attaching a leader. The trick is that you can adjust the number of wraps based on line type—more wraps for slick lines, fewer for stiff ones.
- Pass the tag end through the hook eye and bring it back parallel to the standing line.
- Form a loop with the tag end, then wrap the tag end around the doubled line 5 or 6 times.
- Moisten and pull the tag end to tighten the wraps.
- Slide the knot down to the hook eye and pull the standing line to finish.
The uni knot is my default when I’m switching between mono and braid on the same rod. It’s also the easiest to tie when your hands are cold because you can do it without looking too closely.
However, the uni knot can slip if you don’t pull all the wraps tight evenly. Take your time and check that the coils are snug before you trim.
The Non-Slip Loop Knot: When and Why to Use It
Most knots cinch down tight against the hook eye, which can restrict the lure’s movement. A non-slip loop knot leaves a small loop—about 1/4 inch—that lets the lure swing freely. This is critical for topwater lures like poppers and walking baits, where the action comes from the lure pivoting side to side. A tight knot kills that action.
Here’s how to tie the non-slip loop knot:
- Tie a loose overhand knot about 4 inches from the end of the line.
- Pass the tag end through the hook eye, then back through the overhand knot.
- Wrap the tag end around the standing line 4 to 5 times.
- Pass the tag end back through the overhand knot, on the other side.
- Moisten and pull the standing line to tighten, leaving the loop open.
The downside? This knot is finicky to tie in low light, and it does reduce strength slightly because the loop creates a bend point. But for lures that need to dart and pause, the action improvement is worth the trade-off.
Matching Knots to Lure Types and Water Conditions
Not all lures are the same, and your knot should match the job. Here’s a quick guide based on years of trial and error:
- Spinnerbaits and buzzbaits: Use a Palomar or a uni knot. These lures create a lot of vibration, and a loose loop can cause the blade to foul. A tight knot keeps everything streamlined.
- Topwater poppers and walkers: Non-slip loop knot. The free-swinging action makes the lure spit and chug properly. A tight knot makes it just plow through the water.
- Jigs and soft plastics: Palomar knot. You need maximum strength for hooksets in heavy cover, and braided line is the norm.
- Crankbaits and jerkbaits: Non-slip loop knot for the same reason as topwater—the lateral wiggle is what triggers strikes.
Water conditions matter too. In clear water, use a longer leader (3-4 feet) with a small, low-profile knot like the improved clinch. In stained water, you can get away with a bulkier knot and heavier line. And if you’re fishing around rocks or wood, check your knot after every few casts—abrasion can weaken it without you noticing.
Common Mistakes That Weaken Your Knots (And How to Fix Them)
I’ve seen anglers tie the same knot for years and still get break-offs. Here are the usual culprits:
- Not wetting the line: Dry line creates heat and friction. Always moisten before cinching.
- Pulling too hard, too fast: A sudden yank can cause the coils to twist or the line to burn. Pull steadily and slowly.
- Trimming too close: Leave at least 1/8 inch of tag end. If you cut flush, the knot can unravel under pressure.
- Using the wrong knot for the line: Braid needs a Palomar or uni, not a clinch. Mono can handle a clinch but not a loop knot designed for braid.
- Ignoring line memory: If your mono has been on the spool for months, it’s coiled and stiff. That makes it harder to seat a knot properly. Stretch the line a bit before tying.
Here’s a tip that took me years to learn: after you cinch the knot, give the tag end a sharp tug. If the knot slips or the line stretches, it’s not seated right. You should feel a solid “click”—that’s the knot locking into place.
Field Repairs: Tying Knots in Wind, Cold, and Low Light
Fishing isn’t always a sunny day at the dock. Sometimes it’s 30 degrees, the wind is howling, and your fingers are numb. In those conditions, fine motor skills go out the window. Here’s what works:
- Pre-tie several knots at home: Tie a bunch of lures on short leaders (12 inches) and store them in a tackle box. When you need to change, just clip and tie on a new leader with a simple uni-to-uni knot.
- Use a knot-tying tool: The FREGITO tool mentioned earlier is a lifesaver here. It holds the hook steady so you can focus on the line, and the copper material gives you a better grip than cold fingers.
- Slow down: It’s tempting to rush, but that’s when you drop the line or miss a wrap. Take a breath, do it methodically.
- Keep a small flashlight with a red light: Red light preserves your night vision and is less glare-y on the line.
And if you’re wearing gloves, cut the fingertips off a cheap pair of knit gloves. You’ll keep your hands warm and still have the dexterity to tie a decent knot.
Testing Your Knot: A Quick Field Checklist
Before you make that first cast, do a 10-second check. Pull the knot tight against the hook eye. Look for any gaps or visible twists. Run your finger over the tag end—it should be smooth, not frayed. Then give the whole thing a hard jerk, like you’re setting the hook. If it holds, you’re good.
Also, test the knot’s slip resistance by pulling the standing line while holding the hook. If the knot slides down the line, it’s not cinched enough. Re-tie it—don’t risk it.
Frequently Asked Questions
What is the strongest knot for tying a lure to braided line?
The Palomar knot is the strongest for braid, retaining nearly 100% of the line’s breaking strength. The uni knot is a close second and easier to tie in a hurry.
How many wraps should I use for an improved clinch knot?
Five to seven wraps is the sweet spot. More than seven and the knot gets bulky and can actually weaken the line. Fewer than five and it may slip under heavy pressure.
Should I wet the line before tightening the knot?
Yes, always. Wetting reduces friction, prevents heat damage, and helps the knot slide into place smoothly. It’s a 2-second step that saves you from break-offs.
Can I use the same knot for mono and fluorocarbon?
Yes, the improved clinch and uni knots work for both. Fluorocarbon is stiffer, so add one or two extra wraps and wet it thoroughly before cinching.
Why does my knot keep slipping on braided line?
Braided line is slick and doesn’t have the stretch that mono does. Use a Palomar knot, which grips the line without relying on friction alone. Also, make sure you’re pulling the knot tight enough—braid can feel deceptive when it’s not fully seated.
Final Cast: Mastering the Connection
- Match the knot to the line: Palomar for braid, improved clinch for mono, uni for versatility.
- Use a non-slip loop knot for lures that need free action—topwater, jerkbaits, crankbaits.
- Always wet the line before cinching; dry line = heat = weak knot.
- Check your knot after every few casts, especially in heavy cover.
- Pre-tie leader sections at home to avoid fumbling in the field.
- Invest in a small knot-tying tool for cold or wet conditions—it’s worth the few bucks.
- Practice each knot until you can tie it without looking. That’s when you’ll really notice the difference.
The knot is the only thing between you and the fish. Treat it with respect, and you’ll spend more time fighting fish and less time re-tying. Now go tie one on—the right way.