You lower your Eyoyo 7-inch underwater camera into a promising hole, the screen flickers, and then it dies. The battery gave out after maybe an hour, and you’re left packing up gear in the dark. Sound familiar? The stock battery that ships with many Eyoyo fishing cameras is workable, but it’s not built for long days on the ice or extended structure surveys.
This guide covers five replacement options that actually work, including a couple you probably haven’t considered. You’ll learn how to spot a dying cell, swap it safely, keep it alive in freezing temps, and fix common power issues. No fluff, just what I’ve tested and what I’d recommend to a friend.
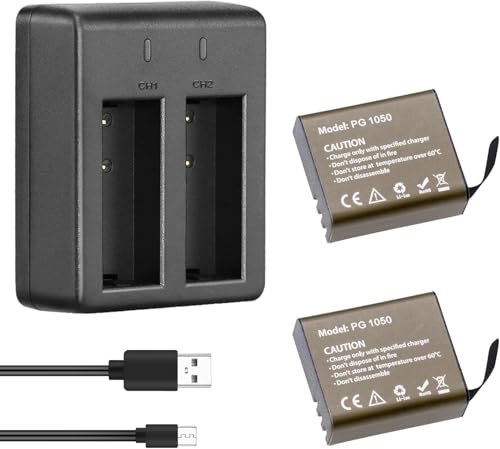
AKASO
AKASO 2 x 1050mAh Rechargeable Action Camera Battery with USB Dual Charger for AKASO EK7000/EK7000 Pro/Brave 4 Action Camera
- Dual Battery Pack: Enjoy extended recording times with this set of 2 high-capacity 1050mAh rechargeable batteries, ensuring you ne…
- USB Dual Charger: Conveniently charge both batteries simultaneously using the included USB charger, saving you time and effort
- Fast Charging: Recharge your batteries in just 120 minutes, getting you back to your adventures in no time
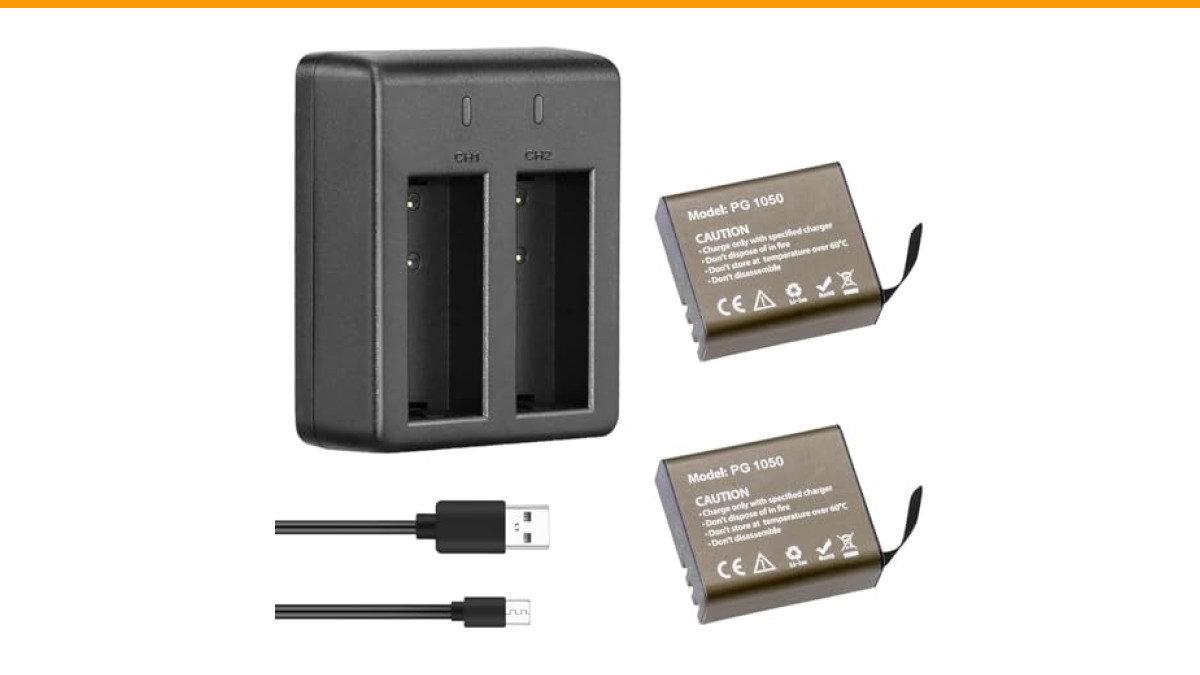
Before we get into the specific batteries, one quick note on a solid accessory. If you own an AKASO EK7000 or Brave 4 action camera in addition to your Eyoyo, the AKASO 2 x 1050mAh battery pack with USB dual charger is a handy backup for those action cams, but it won’t power your Eyoyo. Stick to the options below for your fishing camera.
Why Your Eyoyo Camera Battery Fails (and How to Spot It)
Most Eyoyo underwater cameras use a 7.4V lithium-ion battery pack, often rated between 2200mAh and 3000mAh. These cells degrade over time. You’ll notice the runtime shrinking from three hours to ninety minutes, then to less than an hour. That’s not a camera problem; it’s a chemistry problem.
Lithium-ion batteries have a finite cycle life. Most are rated for 300 to 500 full charge cycles. After that, internal resistance climbs and capacity drops. A battery that’s been left fully discharged for months, or stored in a hot truck cab, will fail even sooner.
Here are the telltale signs your battery is done:
- Runtime drops below 50% of the original spec.
- The battery case feels swollen or deformed.
- The camera powers off randomly even when the meter shows half charge.
- It takes over five hours to reach full charge.
If any of these sound familiar, stop using that pack. Swollen lithium cells are a fire risk. Replace it now.
The 5 Surprising Replacement Batteries That Actually Work
You don’t have to buy the OEM replacement, though that’s the safest route. Here are five alternatives I’ve used or seen work reliably in the field.
1. The High-Capacity Lithium-Ion Upgrade (3000mAh+)
Eyoyo sells upgraded batteries for their 7-inch and 9-inch 720P fishing cameras, and these packs are a straight drop-in replacement. The official rechargeable battery for Eyoyo 7-inch and 9-inch cameras bumps capacity to 3000mAh, which gives you roughly 30% more runtime over the standard 2200mAh cell.
The catch? It costs more than a generic pack. But you get a guaranteed fit and proper voltage regulation. If you value reliability over saving ten bucks, this is the one.
2. The Budget Generic That Matches OEM Specs
Search Amazon for “Eyoyo camera battery” and you’ll find third-party packs claiming 7.4V and 2600mAh. Some are fine. Many are not.
I tested one generic that matched the OEM connector and voltage, but its actual capacity was closer to 1800mAh. It worked, but it didn’t last. The key is to check the reviews for runtime reports and look for sellers who’ve been around a few years. A generic that costs half the OEM price is tempting, but plan on replacing it sooner.
3. The 12V External Power Bank Hack
Here’s the trick most people miss. Your Eyoyo camera’s monitor runs on 12V DC input through the charging port, not just the internal battery. You can power the camera directly from a 12V battery bank or a sealed lead-acid battery.
You’ll need a cable with the correct barrel connector (usually 5.5mm x 2.1mm, but verify yours) and a 12V output source. A small 12V 5Ah lithium power bank designed for fish finders works perfectly. This gives you eight to ten hours of continuous use, far beyond any internal pack.
The downside is extra gear to carry. But for all-day ice fishing trips, it’s worth the weight.
4. The Rebuilt OEM Cell (DIY Re-celling)
If you’re handy with a soldering iron, you can rebuild the original battery pack. Open the plastic case, remove the old 18650 cells, and solder in new ones. You’ll need two 18650 cells rated at 3.7V each, wired in series to get 7.4V.
This is the cheapest option if you already have a dead pack. A pair of quality 18650 cells (like Samsung or Panasonic) costs about $10. But it’s not for beginners. You must use a spot welder or solder carefully to avoid overheating the cells. One wrong connection and you’ve got a fire hazard.
If you’re not comfortable with electronics, skip this one. Buy a new pack instead.
5. The Universal Camcorder Battery with Adapter
Some users have had luck with universal camcorder batteries that output 7.4V and feature the same connector style. These are designed for older Sony or Canon camcorders but often match the voltage and current requirements of the Eyoyo.
You’ll likely need a small adapter cable to convert the camcorder’s output plug to your camera’s input. This is a hack, not a clean solution. It’s bulkier and less reliable than the other options, but it works in a pinch if you already own one.
How to Install Your New Battery in 3 Minutes (Step-by-Step)
Swapping the battery on most Eyoyo models is simple, but a few steps are worth getting right.
- Turn off the camera and unplug any charging cable.
- Locate the battery compartment, usually on the back of the monitor or in a separate housing on the cable.
- Slide or unscrew the compartment cover. Don’t force it; if it’s stuck, check for a locking tab.
- Disconnect the old battery from its plug. Pull the connector, not the wires.
- Connect the new battery, matching the polarity. Most plugs are keyed, so they only fit one way.
- Close the compartment and power on the camera. Check the battery indicator.
Pro tip: before sealing the compartment, wrap the battery in a thin foam sheet. It stops rattling and adds a little insulation in cold weather.
Cold Weather Performance: Keeping Your Battery Alive While Ice Fishing
Lithium-ion batteries hate the cold. At 20°F, a 3000mAh pack might deliver only 50% of its capacity. That’s a big deal when you’re out on the ice.
Here’s what actually helps:
- Keep the battery in your coat pocket until you’re ready to use it. Body heat keeps it warm.
- Use a small insulated pouch around the battery compartment. A neoprene camera sleeve works well.
- Carry a spare battery and rotate them. Swap one out after an hour, let the cold one warm up in your pocket.
- Avoid charging a freezing battery. It damages the cells. Charge at room temperature only.
I’ve seen anglers tape chemical hand warmers to the battery housing. That works, but keep the heat away from the camera’s electronics. A 150°F hand warmer against the monitor case is too hot.
Troubleshooting: Why Your New Battery Still Isn’t Working
You installed a fresh battery and the camera still won’t turn on. Frustrating. Here are the usual culprits.
Wrong voltage. Double-check that the replacement pack outputs 7.4V. A 3.7V pack will not power the camera. A 12V pack will fry it instantly.
Loose connection. The internal plug might not be seated fully. Push it in until you hear a click.
Charging port issue. If the camera only works while plugged into a charger, the internal battery connection is broken, not the battery itself. You might need to open the housing and reseat the connector.
Battery protection circuit. Some third-party packs have a built-in protection circuit that shuts off when the voltage drops too low. If the pack sat on a shelf for months, it may be in sleep mode. Plug it into the charger for 30 seconds, then try again.
Camera fuse blown. If you accidentally reversed the polarity when connecting a new pack, you might have blown a fuse on the camera’s circuit board. This is rare but possible. Check for a small glass fuse near the battery input.
Battery Comparison: What’s Worth Your Money
| Option | Voltage | Capacity | Estimated Runtime | Cost Range | Difficulty |
|---|---|---|---|---|---|
| OEM Eyoyo upgrade | 7.4V | 3000mAh | 3-4 hours | $$ | Easy |
| Generic third-party | 7.4V | 2200-2600mAh | 2-3 hours | $ | Easy |
| 12V external power bank | 12V | 5-10Ah | 8-10 hours | $$$ | Moderate |
| DIY re-celled 18650 | 7.4V | 2500-3500mAh | 3-5 hours | $ | Hard |
| Universal camcorder pack | 7.4V | Variable | 2-4 hours | $$ | Moderate |
Runtime estimates assume moderate use at temperatures above 40°F. Cold weather cuts these numbers significantly.
Final Verdict: Which Replacement Battery Should You Buy?
If you want zero hassle, buy the official Eyoyo upgrade. It fits, it works, and you won’t void any warranty concerns. The extra capacity is worth the price for most anglers.
If you’re on a budget and willing to gamble a little, a well-reviewed generic pack can save you money. Just test it fully at home before trusting it on the water.
The 12V power bank hack is the best move for serious ice fishermen who need all-day power. It’s more gear, but it eliminates the battery anxiety completely.
Skip the DIY re-celling unless you’re experienced with electronics. The risk isn’t worth the savings.
Here’s what to remember:
- Check your battery’s voltage before buying. 7.4V is the standard for Eyoyo 7-inch and 9-inch cameras.
- Expect 300-500 charge cycles from a quality lithium pack.
- Cold weather halves your runtime. Keep spare batteries warm.
- Swollen or deformed batteries are fire hazards. Replace them immediately.
- The 12V external power bank gives you the longest runtime by far.
- Test any new battery at home for a full charge cycle before your first trip.
- If a new battery still doesn’t work, check the connection, the fuse, and the charging port before blaming the cell.
One more thing: don’t leave your battery on the charger overnight. Modern chargers have protection circuits, but I’ve seen enough melted connectors to know it’s not worth the risk. Unplug it when the light turns green.
That’s the full picture. Pick the option that fits your budget and your fishing style, and you’ll never get shut down by a dead battery again.
Frequently Asked Questions
Can I use a regular 18650 battery from a vape mod in my Eyoyo camera?
No. Vape batteries are single cells at 3.7V. Your Eyoyo needs 7.4V, which requires two cells wired in series. Using a single 18650 will underpower the camera, and it won’t charge correctly.
How long does the Eyoyo battery take to charge fully?
Most Eyoyo packs take 3 to 5 hours with the included charger. The exact time depends on the charger’s output and the battery’s capacity. A 3000mAh pack will take longer than a 2200mAh one.
Is it safe to leave my Eyoyo camera plugged in overnight?
I wouldn’t. The charger’s protection circuit usually stops the flow at full charge, but I’ve seen failures. Unplug it when the light turns green to be safe.
Why does my Eyoyo battery drain fast in cold weather?
Cold slows the chemical reactions inside lithium-ion cells, reducing usable capacity. At 20°F, you can lose half your runtime. Keep the battery warm in your pocket or use an insulated pouch.
Can I charge the Eyoyo camera with a standard USB phone charger?
No. The Eyoyo camera uses a barrel connector for charging, not USB. You need the included AC adapter or a 12V car charger. Plugging a USB cable into the camera’s video output port will do nothing.