You’ve got the rod, the reel, and a tackle box full of lures, but the fish are hugging the bottom and your offering keeps floating past them. That’s the moment you reach for a sinker. It’s a small piece of lead, but it does the heavy lifting: it gets your bait down to where the fish live, keeps it there, and helps you feel the subtle bites. The problem is, if you don’t attach it right, you’ll spend more time re-tying knots than actually fishing.
This guide covers the exact methods for tying a sinker on a fishing line, from the simple fixed knot to the sliding fish-finder rig. You’ll learn how to match the sinker weight to your line test, how to test your knot so it doesn’t slip, and what to do when things go wrong. By the end, you’ll be able to set up a rig that casts cleanly, stays put on the bottom, and doesn’t break off on the hookset.

SANWEAL
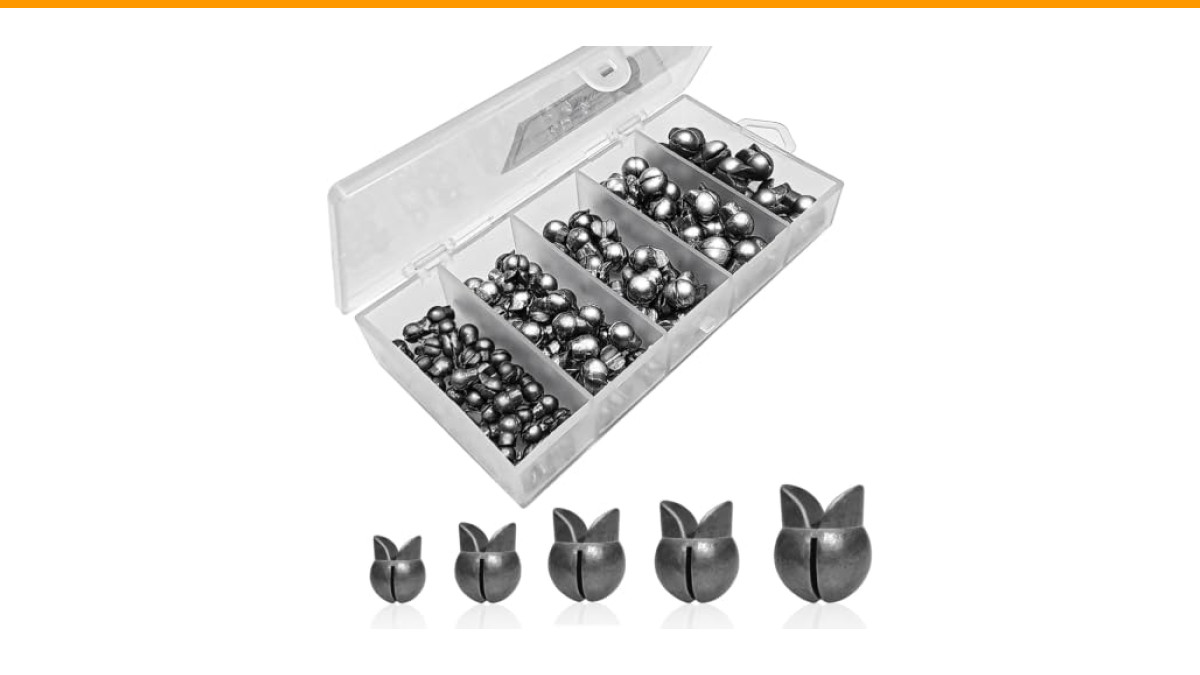
SANWEAL 120PCS/ 5 Sizes Removable Split Shot Fishing Weights Sinkers
- Premium Quality: SANWEAL fishing weights are made of high-quality lead core and durable, which are sturdy and not easy to deform.…
- Five Sizes: Our round sinkers can be used in different weight combinations for a wider range of applications. Includes 120 pcs of…
- Removable Duck-Mouth Design: The fishing sinkers feature a removable design, which allows you to easily change the weight and size…
If you’re starting out and want a versatile set to practice with, the SANWEAL 120PCS Removable Split Shot Fishing Weights are a handy option. They come in five sizes, from 0.02 oz to 0.09 oz, and the duck-mouth design lets you pinch them on or off with your fingers, no pliers needed. That makes them ideal for testing different weights while you learn the setups below.
Choosing the Right Sinker for Your Rig
Before you tie anything, you need to pick the right tool. Sinkers come in a few common shapes, and each one behaves differently on the bottom and in the current. Using the wrong shape can mean your bait rolls into a snag or your line twists into a mess.
Fixed vs. Sliding Sinkers
A fixed sinker is tied directly to the line or attached with a split shot. It doesn’t move. This setup is simple and works well for still fishing or when you need a precise presentation. The downside is that a fish can feel the weight immediately, which may make it drop the bait.
A sliding sinker runs freely on the line above a swivel. The fish picks up the bait and moves off without feeling the weight. This is the go-to rig for catfish, carp, and bottom feeders. The trade-off is that it requires a bit more terminal tackle — a bead, a swivel, and sometimes a leader.
Weight Selection by Line Test
Matching sinker weight to line strength is not optional. If the sinker is too heavy for your line, a good cast can snap the line right at the knot. Here’s a rough guideline for monofilament and fluorocarbon lines:
| Line Test (lb) | Sinker Weight (oz) | Best Use |
|---|---|---|
| 2–4 lb | 1/16 – 1/8 oz | Panfish, trout in small streams |
| 6–10 lb | 1/8 – 1/4 oz | Bass, walleye, inshore fishing |
| 12–20 lb | 1/4 – 1/2 oz | Catfish, surf casting, lakes |
| 30 lb and up | 1/2 – 2 oz | Heavy current, deep sea, striped bass |
Braided line is thinner for its strength, so you can push slightly heavier weights, but the knot strength is different. We’ll cover that in the testing section.
Essential Knots for Attaching a Sinker
There are three main ways to attach a sinker, and each serves a different purpose. You don’t need to know a dozen knots — just these three will cover almost every situation you’ll encounter.
The Improved Clinch Knot (Fixed)
This is the standard knot for tying a sinker directly to your line. It works well with monofilament and fluorocarbon, but it can slip on braided line, so test it carefully.
- Thread the line through the sinker’s eye. Leave about 6 inches of tag end.
- Wrap the tag end around the standing line five to seven times. For heavier line, use fewer wraps; for lighter line, use more.
- Pass the tag end through the small loop just above the eye, then back through the big loop you just created.
- Moisten the knot with saliva or water. Pull the tag end slowly to tighten the wraps against the eye.
- Trim the tag end to about 1/8 inch.
The key is to pull slowly and evenly. If you yank it, the friction can weaken the line.
The Sliding Sinker Rig (Fish-Finder)
For bottom fishing, the fish-finder rig is the standard. It lets the fish run with the bait without feeling the weight. Here’s how to set it up:
- Slide an egg sinker onto your main line. The hole should be wide enough to move freely.
- Add a small plastic bead above the sinker. This protects the knot from the sinker’s impact during the cast.
- Tie a barrel swivel to the end of your main line using an improved clinch knot.
- Attach a leader (usually 12 to 24 inches) to the other end of the swivel. Tie your hook to the leader.
This rig is snag-free because the sinker sits on the bottom while the leader floats up with the bait. It’s the best choice for rivers and lakes with rocky bottoms.
The Drop Loop for Multi-Hook Rigs
If you’re targeting catfish or surf fishing with multiple hooks, a drop loop lets you attach a sinker below the hooks. This keeps the bait off the bottom and the sinker anchored.
- Tie a dropper loop knot about 18 inches above the end of your line. This creates a loop that sticks out perpendicular to the line.
- Attach your first hook to the loop.
- Tie a second dropper loop about 12 inches below the first, and attach another hook.
- At the very end of the line, tie a swivel or directly tie your sinker using an improved clinch knot.
The drop loop knot is a bit fiddly to learn, but it’s worth it for multi-hook setups. Practice it at home with a thick rope before you try it on the water.
Step-by-Step: How to Tie a Sinker on a Fishing Line
Let’s walk through the most common scenario: attaching a fixed sinker to a monofilament line. This is what you’ll use for still fishing with a single hook or a jig.
- Cut your line at a clean angle. A dull cut leaves a frayed end that can slip through the knot.
- Thread the line through the sinker’s eye. If the eye is small, wet the line tip to make it easier.
- Form a loop by bringing the tag end back alongside the standing line.
- Wrap the tag end around the standing line five times. Keep the wraps tight and even, but don’t overlap them.
- Pass the tag end through the loop closest to the sinker eye.
- Now pass it through the larger loop you just formed. This is the ‘improved’ part of the clinch knot.
- Wet the knot thoroughly. Pull the tag end slowly while holding the standing line. You should see the wraps slide down to the eye.
- Pull hard to set the knot. Trim the tag end to 1/8 inch.
Test the knot by pulling on the line with moderate force. If it slips, you likely didn’t wet it enough, or you used too few wraps.
Testing Your Knot and Avoiding Common Failures
A knot that looks perfect can still fail. The line’s material, the knot’s moisture, and the force of your cast all play a role. Here’s how to make sure your setup holds.
How to Test Knot Strength
Before you cast, give the knot a solid tug. Hold the line above the sinker and pull hard, like you’re setting a hook. If it holds, you’re good. If it slips, cut it off and retie.
For braided line, the improved clinch knot can slip because braid is slick. Use a Palomar knot instead — it’s stronger and won’t slip. For fluorocarbon, add an extra wrap or two to the clinch knot because the material is stiffer and can loosen over time.
Fixing Line Twists and Snags
Line twist usually happens when you reel against the drag or when a sinker spins on the retrieve. To fix it, let out 20 yards of line behind the boat and troll it slowly for a minute. That usually takes the twists out.
Snags are a different problem. If your sinker gets stuck on the bottom, don’t just yank. Give the line a few sharp tugs, then let it go slack. Often the sinker will fall free. If it doesn’t, point your rod at the snag and pull straight back — this often breaks the line at the weakest point, which is usually the hook, not your main line.
Lead vs. Non-Lead Sinkers: What You Need to Know
Lead sinkers are cheap and dense, which makes them the default for most anglers. But lead is toxic, and several states have banned small lead sinkers (usually under 1 ounce) because waterfowl and other birds ingest them. New Hampshire, Maine, Vermont, and parts of New York have restrictions, and the list is growing.
Non-lead options include steel, bismuth, and tungsten. Tungsten is the best for split shots because it’s denser than lead, so you get the same weight in a smaller size. Steel is cheaper but bulkier. Bismuth is a good middle ground, though it’s softer and can deform.
If you fish in a state with restrictions, check the local regulations before you buy. It’s not worth a fine, and the non-lead options work just as well for most freshwater applications.
Frequently Asked Questions
How deep should I fish with a sinker?
That depends on where the fish are. A general rule is to add 1/4 to 1/2 ounce of weight for every 10 feet of water depth when fishing in a lake. In a river with current, you’ll need more weight to hold bottom. Start light and add weight until you feel the sinker ticking along the bottom on each cast.
Can I use braided line with a sinker?
Yes, but you need to adjust your knots. Braided line is slick and doesn’t stretch, so the improved clinch knot can slip. Use a Palomar knot for fixed sinkers, or use a swivel with a leader for sliding rigs. Braid also has zero stretch, so you’ll feel every bump, but you’ll also break off more easily if you snag.
How do I stop my sinker from sliding?
If you’re using a split shot, pinch it tightly with pliers, but don’t crush it so hard that you damage the line. For egg sinkers on a sliding rig, add a bead and a swivel to stop it. If the sinker is still sliding, the hole is too large for the line — switch to a smaller sinker or use a rubber core sinker that grips the line.
Putting It All Together
You don’t need a dozen knots or a tackle box full of weights. Master the improved clinch knot for fixed setups, learn the fish-finder rig for bottom fishing, and practice the drop loop for multi-hook presentations. Match your sinker weight to your line test, and always test your knot before casting.
- Use a fixed sinker for precise presentations and still fishing.
- Use a sliding sinker rig for catfish, carp, and wary bottom feeders.
- Match sinker weight to line test: 1/8 oz for 6 lb line, 1/2 oz for 20 lb line.
- Wet every knot before tightening to prevent friction damage.
- Switch to a Palomar knot when using braided line.
- Check local regulations for lead restrictions; tungsten is a great alternative.
- If a knot slips, cut it off and retie — don’t trust it on the water.
Now get out there and put this to work. The fish are waiting, and now you’ve got the right setup to reach them.