
You just got back from a morning chasing stripers. The rod is rinsed, the reel is wiped down, but your lures are sitting in a heap in the tackle box, still dripping with saltwater. You tell yourself you’ll deal with them later. Then later turns into next week, and by the time you open the box, the hooks have that orange bloom and the split rings won’t move.
Every saltwater angler has been there. Salt doesn’t just sit on the surface—it creeps into hook eyes, under skirts, and through the seams of hard baits. It pulls moisture out of the air and keeps working long after the tide has gone out. The good news is that a proper cleaning routine takes less than ten minutes per lure and will double or triple the life of your tackle.
This guide walks you through the full salt lifecycle—from the splash to the storage box. You’ll learn the right way to rinse, what cleaning solutions actually work (and which ones ruin your lures), how to handle different lure types, and the drying and storage steps most people skip. You’ll also pick up a few tricks for reviving hooks and keeping skirts from turning into salt-encrusted mops.
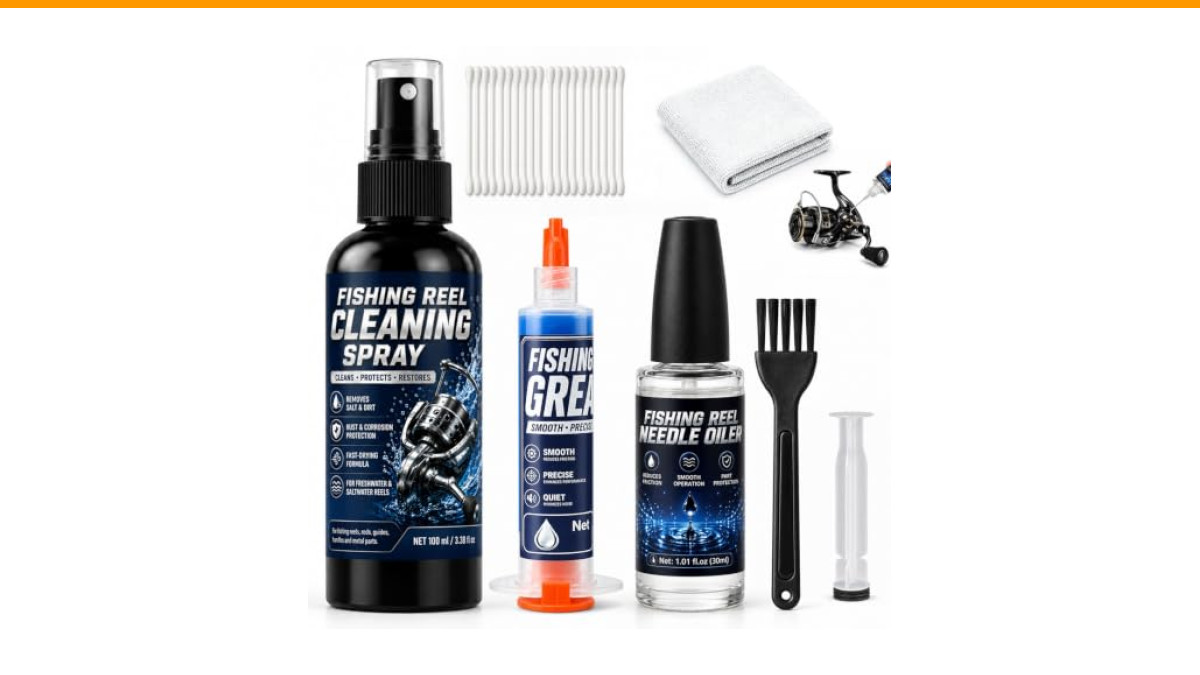
While you’re at it, don’t forget the reel. A lure is only as good as the reel that casts it, and saltwater tears up reels just as fast. A kit like the DINGSEN Fishing Reel Oil Kit covers the full maintenance routine—cleaner, oil, grease, and brushes—so you can handle both lure care and reel care in one sitting.
Why Saltwater Demands a Different Cleaning Routine
Freshwater lures need a wipe-down maybe once a season. Saltwater lures need attention after every trip. The difference comes down to what salt does at the microscopic level.
When saltwater evaporates, it leaves behind salt crystals. Those crystals are hygroscopic, which means they pull moisture from the air. So a lure that looks dry can actually be wet at the surface, creating a thin film of saltwater that keeps corroding hooks, split rings, and hardware. That’s why a quick rinse with freshwater isn’t just a good habit—it’s the single most important step you can take.
Salt also accelerates galvanic corrosion. When two different metals touch—like a stainless steel split ring against a nickel-plated hook—saltwater acts as an electrolyte, causing one metal to corrode faster. You’ll see this as pitting or a white powdery crust around the connection points. Once that starts, the structural integrity of the hook or ring is compromised.
Then there’s the fish slime. Every lure that catches a fish is coated in mucus, blood, and scales. Slime dries into a tough film that traps salt against the lure body and hardware. It also carries bacteria that can degrade soft plastics over time, making them stiff and brittle.
So the saltwater cleaning routine has four jobs: remove salt crystals, wash away fish slime, dry everything completely, and apply a protective barrier. Each step matters, and skipping any one of them leaves your lures vulnerable.
Pre-Rinse: The 60-Second Rule That Saves Your Lures
The best time to start cleaning your lures is while you’re still at the launch ramp or cleaning station. You don’t need soap or a brush—just fresh water. The goal is to knock off the bulk of the salt and slime before it has a chance to dry.
Here’s the rule: within 60 seconds of taking a lure out of saltwater, give it a dunk or a spray with fresh water. If you’re moving between spots, keep a small spray bottle filled with freshwater in the boat. A quick spritz after every few casts makes a huge difference.
For shore anglers, a bucket of freshwater works fine. Drop your lures in as you reel them in, or at least when you switch baits. Let them soak while you tie on the next lure, then shake them off and set them aside.
This pre-rinse does more than just remove salt. It keeps fish slime from drying on the lure, which makes the deeper cleaning later much easier. It also reduces the chance of salt crystals forming in hook eyes and split rings, where they can cause rust and make the hardware stiff.
One caution: don’t leave lures soaking in freshwater for hours. Freshwater can still cause corrosion, especially if the lure has nicks or scratches in its finish. A 30-second rinse is plenty.
The Right Cleaning Solution (And What to Avoid)
For a thorough clean after a day on the water, you need more than just water. But you also don’t need a shelf full of specialty products. A simple solution of warm water and a few drops of mild dish soap works for most lures. Dish soap cuts through fish slime and grease without being so harsh that it damages finishes.
For lures with heavy salt buildup or stubborn grime, you can use a 50/50 mix of white vinegar and water. The mild acid in vinegar dissolves salt crystals and helps break down mineral deposits. But vinegar is acidic, so you need to be careful with it. Never soak a lure in vinegar for more than a few minutes, and always rinse thoroughly afterward. Prolonged exposure can eat away at epoxy finishes and weaken the glue that holds hooks and split rings.
Avoid using any cleaner that contains bleach, ammonia, or strong solvents. These can strip paint, dissolve plastic, and corrode metal hardware. Also avoid petroleum-based degreasers like WD-40 on soft plastics—they’ll make the plastic swell and become sticky.
For soft plastic lures, you can also use a dedicated plastic cleaner or just plain warm water with a little dish soap. The key is to avoid anything that leaves a residue, because that residue can attract dirt and salt on the next trip.
Here’s a quick comparison of the most common cleaning methods:
| Method | Best For | Time | Risks |
|---|---|---|---|
| Freshwater rinse | Quick post-trip removal of salt and slime | 30 seconds | None if done properly |
| Dish soap + warm water | General deep cleaning of all lure types | 2-3 minutes per lure | None if rinsed well |
| Vinegar/water (50/50) | Dissolving heavy salt crust and mineral deposits | 5-10 minutes soak | Can damage finishes if left too long |
| Commercial lure cleaners | Quick no-rinse cleaning on the water | Spray and wipe | Some leave residue; test on one lure first |
| Bleach or ammonia | Never | N/A | Corrodes metal, damages plastic |
Whichever method you choose, always finish with a freshwater rinse to remove any cleaning solution residue.
Step-by-Step Cleaning by Lure Type
Different lures have different weak points. A crankbait’s seams and bill take a beating, a soft plastic’s body absorbs odors, and a skirted lure’s fibers trap salt like a sponge. Here’s how to handle each type.
Soft Plastics (Jigs, Shads, Grubs)
Soft plastics are porous, so they absorb fish slime and saltwater. That’s why they can start to smell after a few trips—and why fish sometimes refuse them.
Rinse each soft plastic under warm running water, rubbing the surface gently with your fingers to work out any slime. For stubborn odors, soak them in a bowl of warm water with a drop of dish soap for five minutes, then rinse thoroughly.
Pay special attention to the hook slot. Salt and slime accumulate inside the slit where the hook exits, and that can cause rust on the hook shank. Use an old toothbrush or a cotton swab to clean inside the slot.
After cleaning, pat them dry with a towel and let them air dry completely before storing. Soft plastics that go into a tackle box while still damp can develop mold or mildew, especially in a sealed plastic bag.
Hard Baits (Crankbaits, Poppers, Spoons)
Hard baits have seams, hook hangers, and a bill that takes a beating. Saltwater can seep into any tiny crack and start corrosion from the inside out.
Start by rinsing the lure under warm water to remove loose salt and slime. Then use a soft toothbrush with a little dish soap to scrub the surface, paying extra attention to the seams around the bill, the hook hangers, and the split rings. These are the spots where salt and grime hide.
For surface poppers, check the concave face. That hollow area collects water and debris, and it’s easy to miss. Use a cotton swab to clean it out.
For deep-diving crankbaits, inspect the bill for cracks or chips. If the bill is damaged, water can get inside the lure body, which will ruin the action and eventually cause rust. If you find a crack, you can seal it with a drop of superglue or epoxy, but if the lure is already waterlogged, it’s best to retire it.
Spoons and metal lures need extra care because they’re solid metal. Rinse them well and dry them immediately to prevent water spots. A light coat of reel oil or a corrosion inhibitor on the surface can help, but make sure it’s safe for the finish.
Skirted Lures (Bucktails, Spinnerbaits)
Skirted lures are the worst offenders for trapping salt. The fibers, whether rubber or silicone, hold saltwater against the hook shank and the collar, leading to rust and stiff skirts.
To clean them, hold the lure under warm running water and work the skirt fibers with your fingers, separating them so water can flow through. Then fill a small bowl with warm water and a drop of dish soap, and swish the skirt back and forth for about a minute. Rinse thoroughly.
For rubber skirts, you can also use a silicone-safe conditioner after cleaning to keep them supple. But avoid petroleum-based products, which can degrade rubber.
After rinsing, gently squeeze the water out of the skirt fibers, then hang the lure upside down to dry. This lets water drain out of the skirt and away from the hook hanger.
Drying: The Most Overlooked Step for Corrosion Prevention
You can clean a lure perfectly, but if you put it away wet, you’ve wasted your time. Drying is the step that separates anglers who replace lures every season from those who keep them for years.
The fastest way to dry lures is to lay them out on a towel, but that only dries the surface. Water hides in hook eyes, under skirts, and inside the gaps of split rings. A better approach is to use a drying rack or a simple setup with a wire hanger.
Here’s a simple drying rack you can make in five minutes: take a wire coat hanger, bend it into a horizontal line, and attach small binder clips along the bottom. Clip each lure by its hook or split ring, and hang the hanger in a well-ventilated area. Gravity does the rest—water drips off, and air circulates around all surfaces.
For soft plastics, lay them flat on a towel and pat them dry, then let them air dry on a separate towel. Don’t hang them by the hook, because the weight can stretch the plastic.
Drying time depends on humidity. In a dry climate, lures can be ready in an hour. In coastal areas with high humidity, give them overnight. You’ll know they’re dry when the hook eyes and split rings feel completely dry to the touch.
Once dry, you can move to the next step: maintenance.
Post-Clean Maintenance: Hooks, Rings, and Split Rings
Cleaning removes the salt, but it doesn’t restore what salt has already damaged. After your lures are dry, take a few minutes to inspect and maintain the hardware.
Check each hook for rust. Surface rust can often be removed with a fine abrasive pad or a piece of 400-grit sandpaper. Rub gently along the shank and the bend, then rinse and dry. If the rust has pitted the metal, the hook is weakened—replace it. A hook that snaps on a big fish is a heartbreaker.
Hook points also need attention. Saltwater dulls hooks faster than freshwater because the salt crystals act like sandpaper on the point. After cleaning, run a hook file or a sharpening stone across the point a few times to restore a sharp edge. A hook is sharp if it catches on your thumbnail with light pressure.
Split rings and hook hangers collect salt and can become stiff. Work each split ring back and forth a few times to loosen it, then apply a tiny drop of reel oil or a corrosion inhibitor to the ring. This keeps it moving freely and prevents rust.
For lures with metal lips or bills, check for corrosion on the metal. A light coat of oil can protect it, but avoid getting oil on the body of the lure if it’s painted—oil can soften some paints.
If you have a reel that needs the same kind of attention, the DINGSEN kit mentioned earlier includes a cleaner, oil, and grease that work on reels and also on lure hardware. A drop of that oil on a sticky split ring works wonders.
Storage Tactics to Keep Lures Salt-Free Until Next Trip
Even after cleaning and drying, your lures can pick up salt from the air if you store them improperly. The key is to keep them in a dry, sealed environment.
Use tackle boxes with individual compartments or plastic lure cases with foam inserts. These keep lures separated so hooks don’t tangle or scratch each other. If you’re storing soft plastics, keep them in their original bags or in a sealed plastic container to prevent them from absorbing moisture and odors.
Add a desiccant pack to your tackle box. Silica gel packs absorb moisture and help keep the interior dry. You can buy them in bulk or save the ones that come in product packaging. Replace them every few months or when they feel saturated.
For long-term storage—like the off-season—consider spraying lures with a corrosion inhibitor. There are products specifically designed for fishing tackle that leave a thin, dry film that protects metal without being greasy. Just make sure it’s safe for the lure’s finish.
One more tip: don’t store lures in direct sunlight. UV rays can fade paint and weaken plastic over time. Keep your tackle box in a cool, dark place.
FAQ: Quick Answers for Common Saltwater Lure Care Questions
How often should I clean my saltwater lures?
After every saltwater trip. Even a quick rinse with freshwater makes a big difference. If you don’t have time for a full cleaning, at least rinse and dry them. Lures that sit with salt on them for more than a day start to corrode.
Can I use vinegar to clean salt off lures?
Yes, but use it sparingly. A 50/50 mix of white vinegar and water works well for dissolving salt crust, but don’t soak lures for more than a few minutes. Rinse thoroughly afterward. Vinegar is acidic and can damage finishes if left on too long.
Is it okay to put my lures in the dishwasher?
No. The heat and detergent can damage paint, soften plastic, and ruin hooks. Stick to hand washing with warm water and mild dish soap.
How do I get rust off my hooks?
For light surface rust, use a fine abrasive pad or 400-grit sandpaper to rub it off. For heavier rust, you can soak the hook in white vinegar for a few hours, then scrub. But if the rust has pitted the metal, replace the hook—it’s not worth losing a fish over a compromised hook.
Should I oil my lures after cleaning?
You don’t need to oil the whole lure, but a drop of reel oil on hook hangers and split rings helps keep them moving and prevents rust. Avoid oil on painted surfaces, as it can soften some finishes.
What to Remember for Next Time
- Rinse lures with freshwater within 60 seconds of leaving saltwater—this is the most important step.
- Use warm water and a few drops of dish soap for deep cleaning; reserve vinegar for heavy salt crust and rinse well after.
- Clean soft plastics separately to avoid odor transfer, and dry them completely to prevent mold.
- Inspect and sharpen hooks after every cleaning; replace any that are pitted or bent.
- Dry lures on a hanging rack overnight, especially in humid climates.
- Store lures in sealed containers with a desiccant pack to keep moisture out.
- Maintain your reel with a proper cleaning kit like the DINGSEN reel oil kit to keep everything in top shape.
Saltwater fishing is tough on tackle, but a few minutes of care after each trip will keep your lures looking new and fishing strong for years. Your future self, standing on the bow with a fresh tie-on, will thank you.
