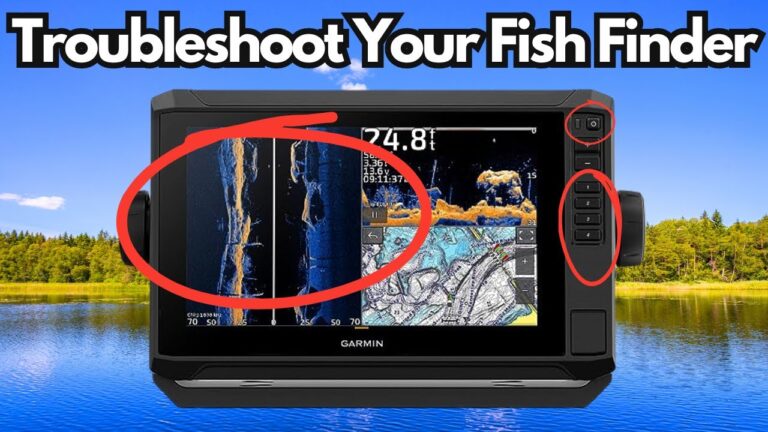
You drop the trolling motor, ease up on the throttle, and stare at the screen. The bottom shows up, sure, but it’s just a hard line with a few blobs. You know there’s a brush pile or a submerged stump somewhere below, but the 2D sonar won’t tell you where. Then you switch to ClearVü, and suddenly the tree appears with its branches intact, the fish holding tight to the trunk show up as distinct marks, and you realize what you’ve been missing.
That’s the gap Garmin ClearVü fills. It’s not a gimmick or a marketing term. It uses a focused, high-frequency beam to paint a near-photographic picture of what’s under the boat. This article walks through the technology, the best transducer models, and the installation details that separate a crisp image from a noisy mess. You’ll learn why placement and power matter more than the model number on the box, and you’ll get a practical comparison against Lowrance and Humminbird so you can buy with confidence.
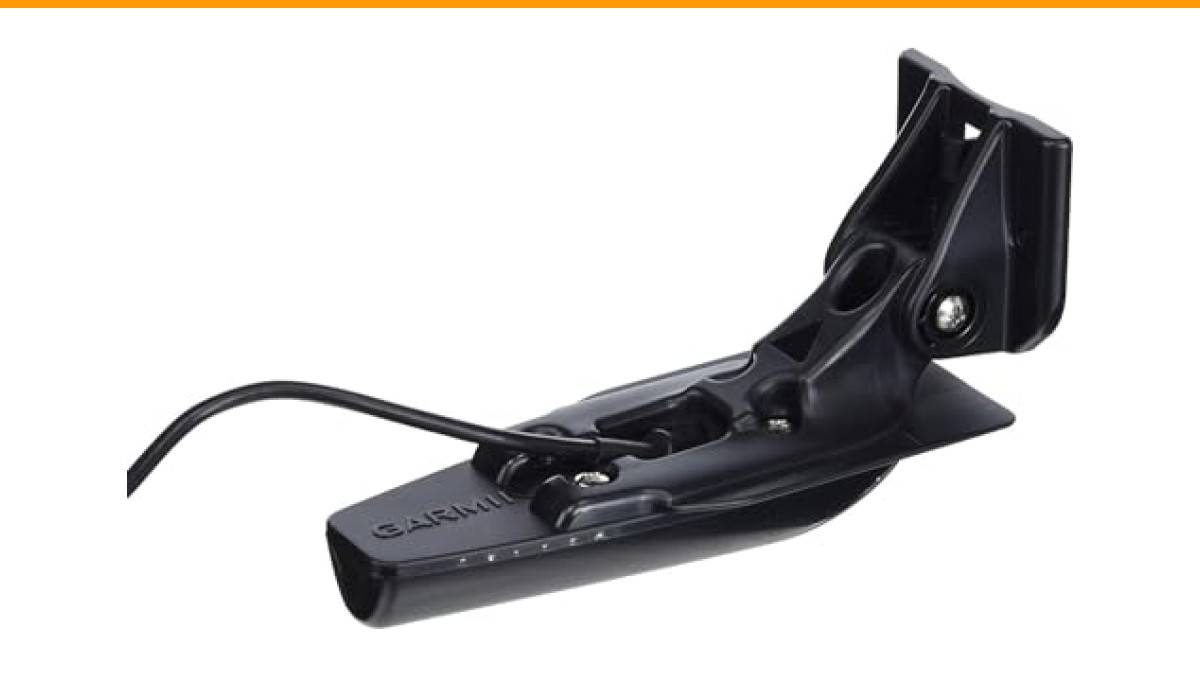
If you’re running a smaller boat or a kayak and want a solid entry point, the Garmin GT20-TM transducer is a popular choice. It gives you traditional 77/200 kHz sonar plus ClearVü at 455 kHz, all in a compact transom mount with a 20-foot cable. It’s a straightforward upgrade that works with many Garmin units.
What Exactly is Garmin ClearVü and Why Does It Matter?
ClearVü is Garmin’s brand name for down-scan sonar. Instead of the wide cone of traditional 2D sonar, ClearVü uses a narrow, high-frequency beam (455 kHz or 800 kHz) that sweeps a thin slice of water directly under the boat. That narrow beam returns much more detail because it sees less clutter and resolves objects closer together.
Think of it this way. Traditional sonar is like looking at a forest from a helicopter at night with a floodlight. You see the treetops but not the undergrowth. ClearVü is like shining a laser pointer straight down. You see individual branches, the gap between two logs, and the fish holding tight to a sunken boat.
The practical benefit is huge. You can identify bottom hardness, spot isolated stumps, and mark fish that are glued to structure. It doesn’t replace 2D sonar for finding fish at distance, but it changes how you fish once you’re on top of them.
One caveat: ClearVü won’t show fish suspended far off the bottom as well as traditional sonar. The beam is so narrow that you might miss fish sitting 10 feet above a deep ledge. Most anglers run both views split-screen for that reason.
The Core Technology: CHIRP, Frequencies, and Beam Angles Explained
Garmin’s ClearVü transducers work with CHIRP, which stands for Compressed High-Intensity Radiated Pulse. Instead of sending out a single frequency pulse, CHIRP sends a sweep of frequencies, from low to high, in one burst. The transducer then listens to the returning echoes and correlates them by frequency. This produces a much cleaner return with better target separation.
For ClearVü, the two frequencies you’ll deal with are 455 kHz and 800 kHz. Each has its own trade-off.
Why 455kHz vs 800kHz is a Critical Choice
At 455 kHz, the beam is wider and the depth penetration is better. You can run ClearVü down to about 750 feet with the GT20-TM, and you’ll still get decent detail at 100 feet. The wider beam covers more ground, so you see more structure per pass.
At 800 kHz, the beam narrows and the resolution sharpens dramatically. You’ll see individual fish and small details like a single rock or a baitfish ball. But the depth range drops to roughly 200 feet, and the coverage is much narrower. You have to pass directly over the target to see it.
Here’s the rule of thumb: use 455 kHz when you’re searching or fishing deeper than 60 feet. Switch to 800 kHz when you’re idling over a specific piece of structure in less than 40 feet of water. The difference is stark. On a shallow rock pile, 800 kHz will show you the cracks in the rocks. 455 kHz will show you the pile.
Most Garmin units let you set a favorite frequency and switch with one tap. Do that before you start fishing, not when you’re already on top of the fish.
Top Garmin ClearVü Transducers: A Model-by-Model Breakdown
Garmin makes several ClearVü transducers, and they’re not all equal. Here’s a practical look at the three you’ll see most often.
GT20-TM (Budget & Kayak)
The GT20-TM is the entry point. It runs traditional sonar at 77/200 kHz and ClearVü at 455 kHz. The power rating is 500 watts, which is plenty for most freshwater situations. Depth capability is 1,900 feet for traditional and 750 feet for ClearVü, though you’ll rarely use that much.
This transducer works well on kayaks, small aluminum boats, and as a secondary unit on the bow. The transom mount is simple, and it also includes a trolling motor mount adapter. The 20-foot cable is long enough for most transom installations.
It’s not perfect. Without 800 kHz, you lose the ultra-fine detail that serious structure fishermen want. And the 500-watt power means you might see more noise in deep saltwater. But for the price and simplicity, it’s a solid choice.
GT24UHD-TM (All-Arounder)
The GT24UHD is a step up. It adds 800 kHz to the ClearVü frequencies, so you get the full resolution range. It also has a higher power rating (600 watts) and a slightly narrower 455 kHz beam, which improves clarity.
This is the transducer most anglers should buy. It handles freshwater and coastal saltwater well, and the UHD (Ultra High Definition) processing makes a visible difference on compatible Garmin units. You’ll see individual baitfish and the subtle contours of a drop-off.
The trade-off is price and size. It’s bigger than the GT20, and it costs more. But if you’re serious about reading structure, the extra money is worth it.
GT36 (High-End SideVü Combo)
The GT36 is for anglers who want SideVü as well as ClearVü. It combines a 1 kW CHIRP traditional element with ClearVü at 455/800 kHz and SideVü at 455/800 kHz. This is the transducer that comes with premium Garmin units like the GPSMAP 12x and 9x series.
SideVü is a different beast. It shoots beams out to the sides of the boat, covering up to 750 feet of water on each side. It’s excellent for finding offshore structure, bait pods, and fish holding on points. The GT36 gives you the full suite in one package.
The downside is complexity. You need a unit that supports the 1 kW CHIRP and the full frequency range, and installation is more involved. This isn’t a beginner transducer.
| Model | Frequencies | Power | Max Depth (ClearVü) | Best For |
|---|---|---|---|---|
| GT20-TM | 77/200 kHz, 455 kHz | 500 W | 750 ft | Kayaks, small boats, budget setups |
| GT24UHD-TM | 50/200 kHz, 455/800 kHz | 600 W | 1,000 ft (455 kHz) | Freshwater and coastal saltwater all-around |
| GT36 | CHIRP 1 kW, 455/800 kHz | 1 kW | 1,000 ft (455 kHz) | Serious anglers needing SideVü plus ClearVü |
Installation Deep Dive: Placement, Wiring, and Power for Clear Performance
You can buy the best transducer on the market, but if you mount it wrong, you’ll get garbage on the screen. The physics of performance start with placement.
The transducer must sit in clean, undisturbed water flow. That means it needs to be below the hull’s bottom edge and away from any strakes, rivets, or through-hull fittings that create turbulence. On a V-hull, the transducer should be mounted on the side of the hull that goes down when the boat lists. In most cases, that’s the starboard side, because the prop torque from a standard rotation engine tends to lift the starboard side.
Here’s the step-by-step for a transom mount:
- Mark the hull at a point where the deadrise (the angle of the hull) is less than 10 degrees. Too much deadrise means the beam will be tilted and you’ll lose bottom contact at speed.
- Position the transducer so the bottom of the element is just below the hull line. If it’s too deep, you’ll get spray and drag. If it’s too high, you’ll get air bubbles at speed.
- Use the bracket to set the tilt so the face of the transducer is parallel to the water surface. A bubble level helps, but you can also use the water line on the boat as a reference.
- Route the cable up and over the transom, not through a sharp hole. Use a cable clamp to secure it, and leave a drip loop so water doesn’t run down into the hull.
- Inside the boat, route the cable away from the engine’s alternator wiring and any high-voltage cables. Sonar cables are shielded, but interference from a 12V system can still create noise.
Wiring is where most people mess up. The transducer cable connects directly to the sounder, not to the boat’s power. But the sounder itself needs clean power. If your unit is wired to a fuse panel that shares a circuit with the bilge pump or trim tabs, you’ll see interference spikes on the screen.
Run a dedicated power wire from the battery to the sounder, using a fuse rated for the unit’s draw (usually 3 to 5 amps for most Garmin units). Use 16-gauge wire for runs under 20 feet, and 14-gauge for longer runs. The voltage drop over a long, thin wire can cause the unit to reboot when the trolling motor kicks in.
Pro tip: install a ferrite bead on the transducer cable near the sounder if you see noise. It costs a few dollars and often fixes 90% of interference issues.
Real-World Performance: Reading Structure and Fish Arches Correctly
Once the transducer is installed and powered, the next challenge is interpreting what you see. ClearVü images look like photographs, but they’re not. They’re a time-series of echoes, and the screen refreshes as you move.
Fish arches on ClearVü look different than on 2D sonar. On a 2D screen, a fish passing through the cone produces a classic arch. On ClearVü, the beam is so narrow that a fish appears as a short, bright line, often with a shadow underneath. The shadow is the acoustic shadow cast by the fish against the bottom. It’s a reliable indicator of a fish holding tight to structure.
When you see a stump or a rock pile, slow down. The image quality improves dramatically at lower speeds. At 3 to 4 mph, you’ll see individual branches. At 10 mph, the same stump looks like a blurry lump. If you’re marking fish, drop the trolling motor and make a second pass over the exact spot.
One thing that surprises new users: ClearVü doesn’t show fish that are suspended far off the bottom well. The narrow beam is fantastic for bottom-hugging fish, but a school of bass suspended 15 feet down will show as faint dots. That’s why you should always run a split-screen with traditional 2D sonar. The 2D view marks the suspended fish, and the ClearVü view shows you the structure they’re relating to.
Another common mistake is cranking the gain too high. ClearVü is sensitive, and high gain turns the bottom into a solid white mass with no detail. Start with the gain around 65% and adjust down until you can see the subtle texture of the bottom. You want to see the contrast between hard and soft bottom, not a white-out.
Troubleshooting Common ClearVü Issues (Noise, Air Bubbles, Lost Bottom)
Every transducer user runs into problems. Here are the three most common and how to fix them.
Noise and interference. If you see vertical streaks or random speckles on the screen, you have electrical noise. Check the power wiring first. Make sure the sounder has a dedicated circuit. Then check the transducer cable routing. If it runs parallel to a trolling motor cable, move it. If the noise persists, add a ferrite bead.
Air bubbles at speed. This shows up as a loss of bottom or a broken, fuzzy image above 10 mph. The transducer is likely mounted too high, or it’s in the turbulence from the hull. Lower the transducer one notch on the bracket. If that doesn’t fix it, move it to a different spot on the transom, usually closer to the centerline.
Lost bottom in deep water. If the bottom disappears at depth, the transducer might be running at too high a frequency. Switch from 800 kHz back to 455 kHz. Also check the depth range on the unit. If the range is set to auto and the bottom is at 200 feet, the unit might be trying to display a 500-foot range, which reduces the target size. Set the range manually to 1.5 times the actual depth.
One more issue that’s less common but worth knowing: if you have a stepped hull or a pad hull, the water flow separates from the hull at the step. Mounting the transducer right behind a step will cause constant aeration. You need to mount it ahead of the step or use a bracket that extends below the step.
Maintenance and Winterization for Longevity
Transducers are tough, but they’re not indestructible. The element face is a ceramic or epoxy composite that can be damaged by impact or chemical exposure.
After every trip, wipe the transducer face with a soft cloth to remove algae, oil film, and debris. Don’t use a pressure washer directly on the face; it can crack the epoxy. If you have hard water spots, use a mild vinegar solution.
Anti-fouling paint is a tricky subject. If you leave your boat in the water, you’ll get growth on the transducer, which kills performance. You can paint the transducer with a water-based anti-fouling paint, but never use a copper-based or ablative paint on the element face. Copper reacts with the epoxy and can delaminate it. Use a non-metallic, water-based paint, and apply only a thin coat. Alternatively, you can use a transducer shield or cover when the boat is moored.
Winterization is simple. If the boat stays outside, remove the transducer and store it indoors. If it stays mounted, make sure the element is clean and dry. Freezing water in the bracket can crack the housing, so check for any water traps. For the cable, disconnect it from the sounder and coil it loosely to avoid kinks.
Pro tip: check the transom screws at the start of each season. They work loose from vibration, and a loose transducer will wobble, causing erratic readings.
Garmin ClearVü vs. The Competition (Lowrance & Humminbird)
You’re not limited to Garmin, and it’s worth knowing how the alternatives compare before you commit to a transducer ecosystem.
Lowrance’s DownScan Imaging is the direct competitor to ClearVü. It works on the same principle, using a 455/800 kHz beam. In practice, Lowrance’s DownScan images look very similar to Garmin’s ClearVü. The difference is in the software and the transducer quality. Lowrance’s HDI and TotalScan transducers are solid, but they tend to have a narrower 800 kHz beam and less detail at the edges. Garmin’s GT series generally produces a cleaner image at depth, especially on the UHD models.
Humminbird’s Mega Imaging is a different animal. It uses a 1.2 MHz frequency, which is higher than Garmin’s 800 kHz. That higher frequency gives Humminbird a resolution advantage in shallow water, but the depth range is limited to about 125 feet. Garmin’s 800 kHz reaches roughly 200 feet with better clarity at the mid-range. For shallow-water bass fishing, Humminbird has the edge. For deep structure or coastal fishing, Garmin wins.
There’s also the ecosystem factor. If you already own a Garmin unit, you’re locked into Garmin transducers (or third-party adapters that often don’t work well). The same goes for Lowrance and Humminbird. Switching brands means replacing the head unit too, which is a major cost.
My honest take: Garmin ClearVü offers the best balance of image quality, depth capability, and ease of use. Humminbird is better for extreme shallow water, and Lowrance is a close second to Garmin overall. But the differences are small compared to the impact of proper installation.
Final Verdict: Which Transducer Should You Buy?
Your choice should come down to your boat, your fishing style, and your budget, not the marketing hype.
If you fish from a kayak or a small tiller boat, the GT20-TM is the smart buy. It gives you ClearVü at 455 kHz, which is enough to see most structure, and it’s compact enough to mount on a trolling motor. You’ll miss the 800 kHz detail, but you’ll save money and weight.
If you fish from a 16- to 20-foot boat in freshwater or light saltwater, get the GT24UHD. The 800 kHz frequency is a game-changer for reading submerged timber and docks, and the UHD processing is noticeably sharper on compatible units. This is the transducer I recommend to most people.
If you’re running a high-end Garmin unit and want SideVü, the GT36 is the way to go. It’s expensive and more complex, but it’s the only way to get the full suite of Garmin sonar in one package.
Regardless of which model you choose, spend the time on installation. A $200 transducer mounted poorly will perform worse than a $100 transducer mounted perfectly. The physics of water flow and clean power matter more than any specification sheet.
Frequently Asked Questions
Can I use a Garmin ClearVü transducer with a non-Garmin fish finder?
No, not directly. Garmin transducers use proprietary connectors and signals that only work with Garmin units. There are third-party adapters, but they often lose the CHIRP or high-frequency capabilities. If you’re switching brands, you’ll need to replace the transducer too.
What is the difference between ClearVü and SideVü?
ClearVü looks straight down and shows a thin slice of the bottom in high detail. SideVü looks out to the sides of the boat and covers a wide area, showing structure and fish that are not directly under you. You need a transducer that supports SideVü (like the GT36) to use it.
Does the GT20-TM work in saltwater?
Yes, but with limitations. The 500-watt power and 455 kHz frequency are fine for coastal fishing down to about 200 feet. Beyond that, the signal gets weak and noisy. For deeper saltwater, you’d want a 1 kW transducer like the GT36 or a dedicated thru-hull model.
Why does my ClearVü image look blurry at high speed?
That’s almost always aeration. The transducer is picking up air bubbles from the hull or the prop wash. Lower the transducer on the bracket, or move it to a cleaner spot on the transom. Also, slow down. ClearVü is designed for idle speeds and slow trolling, not planing speeds.
Can I mount the transducer inside the hull (shoot-through)?
Not for ClearVü. The high-frequency beams (455/800 kHz) cannot penetrate a solid fiberglass hull effectively. They need direct contact with the water. You must use a transom or trolling motor mount. Some thru-hull options exist, but they require a hole in the hull and are much more expensive.
What to Take From This
- ClearVü is down-scan sonar that shows detailed structure and bottom-hugging fish; it doesn’t replace 2D sonar for suspended fish.
- Use 455 kHz for deeper water and searching; switch to 800 kHz for shallow, high-detail passes over specific targets.
- The GT20-TM is a solid budget pick for kayaks and small boats; the GT24UHD is the best all-around choice for most anglers.
- Installation matters more than the transducer model. Mount it in clean water flow, below the hull line, and away from turbulence.
- Run a dedicated power wire to your sounder to avoid electrical noise and voltage drops.
- Clean the transducer face after each trip and use only water-based anti-fouling paint, never copper-based.
- Check your transducer’s mounting screws at the start of each season to prevent loose, erratic readings.
“,”related_product”:{“asin”:”B