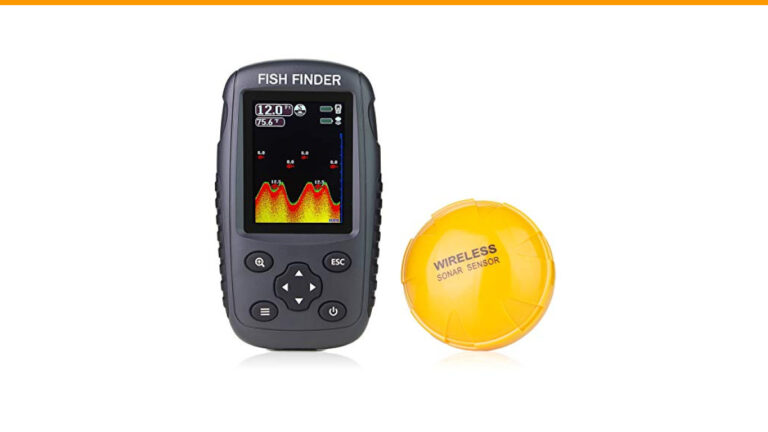
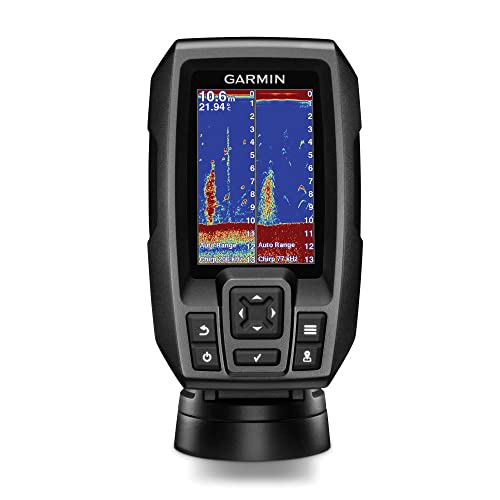
You just bought a new fish finder. You open the box, look at the tangled mess of cables, and then look at your pontoon’s smooth aluminum siding. The thought of drilling holes and running wires through those sealed tubes makes you want to close the box and deal with it later.
Most pontoon owners assume this job requires a full day of labor, pulling off interior panels, and fighting with wires in tight spaces. It doesn’t have to be that way. With the right approach, you can install a fish finder on a pontoon boat in about two hours using basic hand tools. This guide walks through the exact process, including the tricks for routing cables through the internal chase and getting the transducer angle right on the lifting strakes.

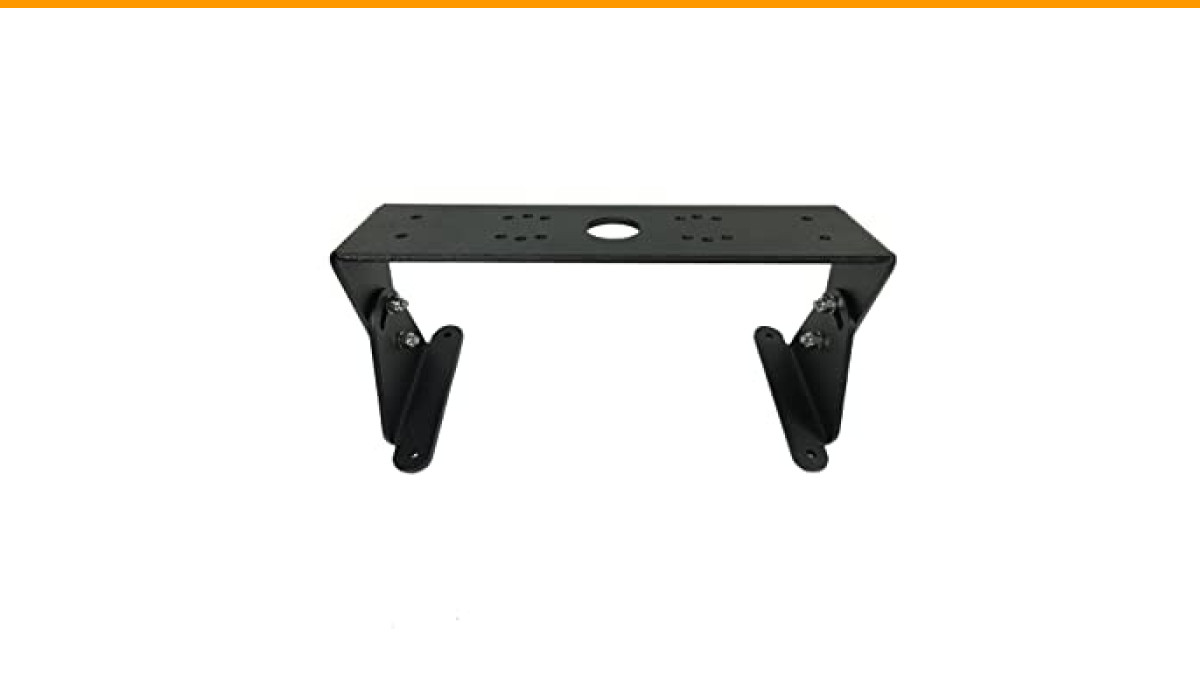
Generic
Universal Adjustable Fish Finder-Graph-Electronics Mount (8 Inch)
- Adjustable 40 degrees
- Made From 3/16 Aluminum Stainless Steel Hardware
- Universal Graph Bolt Pattern
You’ll learn where to mount the transducer, how to run the power cable safely, and how to avoid the most common mistake that leaves you staring at a blank screen. No guesswork.
Why Pontoon Installations Are Different (and Easier)
Pontoon boats have a flat underside with two or three aluminum logs. That design gives you something most fiberglass boats don’t: a clean, flat mounting surface for the transducer. You don’t need to shape a mounting bracket to match a curved hull. You bolt it flat and go.
But the tubes create a problem too. You can’t easily access the inside of the hull to run wires. On a fiberglass boat, you pull cables through a rigging tube or under the deck. On a pontoon, the inside of the log is sealed. You have to run cables along the outside of the tubes or through the internal chase that runs between the deck and the top of the logs.
That chase is the key. Most pontoons have a gap between the deck flooring and the top of the aluminum tube, covered by the rub rail or siding. You can fish a wire through that space without removing a single panel. It takes patience and a stiff wire, but it works.
One more thing that makes pontoons easier: the console. Most pontoons have a helm console with plenty of flat space for the display unit. You don’t need a fancy swivel mount unless you want one. A simple flat mount works fine.
If you’re using a universal mount, the Universal Adjustable Fish Finder-Graph-Electronics Mount (8 Inch) is worth a look. It’s made from 3/16 aluminum with stainless steel hardware, so it won’t corrode in saltwater. The 40-degree adjustment range helps you angle the screen toward your line of sight, which matters when the sun hits the console at a bad angle. It uses a universal bolt pattern, so it fits most major brands without drilling extra holes.
Tools and Materials Checklist
Before you start, gather everything. Running back to the hardware store mid-install wastes time.
- Fish finder with transducer and power cable (in the box)
- Mounting bracket for the transducer (included or aftermarket)
- Marine sealant (3M 4200 or similar, not silicone)
- Cordless drill with 3/16-inch and 1/8-inch bits
- Stainless steel screws (avoid plain steel, they rust)
- Zip ties and adhesive cable clips
- Multimeter for testing power
- In-line fuse holder with fuse (if not pre-wired)
- Wire strippers and crimpers
- Heat shrink tubing or electrical tape
- A stiff wire or fish tape (copper wire works in a pinch)
- Rubbing alcohol and a rag to clean surfaces
That’s the whole list. You probably own most of it already.
Step 1: Choosing the Right Transducer Location (Avoiding Strakes and Bubbles)
Transducer placement makes or breaks the install. Get it wrong and you’ll see a depth reading at idle, but lose it the moment you throttle up. The culprit is usually air bubbles or cavitation streaming across the transducer face.
On a pontoon, the lifting strakes are the flat strips running lengthwise along the bottom of the tubes. They create lift at speed, but they also disrupt water flow. If you mount the transducer directly behind a strake, turbulent water and bubbles will pass over it. The sonar signal scatters, and you get a flickering or blank screen.
The fix is simple: mount the transducer on the inboard side of the strake, not directly behind it. Look at the bottom of the tube and find the strake. Place the transducer at least 2 inches to the side of the strake, with the face angled slightly downward and forward. The exact angle depends on your boat, but a 2 to 4 degree downward tilt is a good starting point.
Also keep the transducer away from the center of the tube where the water splashes up between the logs. That area is turbulent at speed. The outer edges of the tubes, near the back, are usually the cleanest water.
The “Test Before You Drill” Method
Don’t drill holes until you confirm the location works. Here’s how to test without committing.
Attach the transducer to the mounting bracket, but don’t screw it into the boat yet. Use a C-clamp or a heavy-duty zip tie to hold the bracket in place at your chosen spot. Run the cable to the display unit, power it on, and idle the boat out of the harbor.
Watch the depth reading. If it holds steady at idle, throttle up to planing speed. If the reading drops out or flickers, move the transducer an inch or two and repeat. This takes 20 minutes and saves you from drilling holes in the wrong spot.
Once you find a spot that holds a reading at all speeds, mark the bracket holes with a pencil. Then drill and mount it for real.
Step 2: Mounting the Transducer (Bracket vs. Epoxy)
Two main ways to attach the transducer to the tube: a bracket or epoxy. Each has trade-offs.
| Method | Pros | Cons | Best For |
|---|---|---|---|
| Stainless bracket | Easy to remove for cleaning or replacement; adjustable angle | Requires drilling holes; screws can loosen over time | Most pontoon owners |
| Epoxy mount | No holes in the tube; permanent and smooth | Hard to remove; requires 24-hour cure time; less adjustable | People who never want to touch it again |
I recommend the bracket for pontoons. The aluminum tubes are thick enough to hold screws securely, and you’ll want to remove the transducer for winter storage or cleaning. Epoxy is fine, but if you ever need to reposition it, you’re grinding it off and starting over.
When drilling into the tube, use a sharp bit and go slow. Aluminum is soft and strips easily. Apply marine sealant to the screw threads before driving them in. That prevents water from seeping into the tube and corroding the aluminum from the inside.
Step 3: Routing the Cable Through the Tubes (The Chase Trick)
This is the part most guides skip. They say “run the cable to the console” and leave you to figure out how. Here’s the actual method.
Look at the top edge of the pontoon tube where it meets the deck. There’s a gap, usually covered by a rub rail or aluminum siding. That gap is the chase. It runs the full length of the boat, from the transom to the bow.
To use it, remove the rub rail or siding at the transom end, just enough to expose the opening. Feed a stiff wire or fish tape into the gap and push it toward the console. This takes some wiggling. The chase isn’t a straight pipe; it has cross-members and obstructions.
If the wire gets stuck, don’t force it. Pull it back and try angling it differently. You can also use a vacuum to pull a string through, but that only works if the chase is open at both ends.
Once the wire reaches the console area, tape the transducer cable to the end of the wire. Pull it back through the chase toward the transom. Leave a loop of cable at the transducer end so you can remove the transducer without pulling the cable tight.
If your pontoon has a closed chase with no access, you have a harder choice. You can remove a section of siding to create access, or run the cable along the outside of the tube using adhesive clips. The outside route is easier but leaves the cable exposed to sun and chafing. Use a wire loom to protect it.
Step 4: Mounting the Display Unit (Visibility and Theft Protection)
Where you mount the display matters more than you think. If it’s too low, you’ll glance down and lose sight of the water. Too high, and the sun washes out the screen. Aim for eye level when you’re seated at the helm, tilted slightly toward you.
Most pontoons have a flat console surface that works fine. But a fixed mount has a problem: it’s visible and easy to steal. A quick-disconnect mount solves this. You attach a base plate to the console and the display snaps on and off. When you leave the boat, you take the display with you. It takes five seconds and removes the temptation for thieves.
The universal mount mentioned earlier works well here. It’s adjustable and uses a standard bolt pattern, so it fits most displays. Just make sure the base plate is screwed into something solid, not just thin fiberglass. If the console is hollow, add a backing plate underneath to spread the load.
Step 5: Wiring to Power (Fuse Box vs. Battery)
Power wiring is where most people make mistakes. You have two options: tap into an existing accessory circuit or run a dedicated wire to the battery.
Tapping into the fuse box is cleaner if your pontoon has one. Find an accessory slot that’s switched with the ignition. That means the fish finder only powers on when the key is on, so you can’t accidentally drain the battery. Use an in-line fuse rated for the fish finder’s draw, usually 2 to 5 amps.
Running a dedicated wire to the battery is more direct but requires more work. You’ll need to route the power cable from the console back to the battery compartment. Use the same chase method from Step 3. Connect the positive wire to the battery terminal via an in-line fuse. Connect the negative wire to the negative terminal or a common ground bus.
Never connect the fish finder directly to a battery without a fuse. A short circuit can melt the wire and start a fire. The fuse is your safety net.
How to Test for a Switched Power Source
You need a multimeter for this. Set it to DC voltage, put the black probe on a known ground, and touch the red probe to the wire you want to test. Turn the ignition key to the on position. If you read 12 volts, that’s a switched source. Turn the key off. If the voltage drops to zero, you found the right wire.
If the voltage stays at 12 volts with the key off, that’s a constant power wire. Using it means the fish finder stays on until you manually turn it off. That’s not ideal, but it works if you remember to power down. A switched source is better.
Step 6: Final Setup, Testing, and Troubleshooting
With everything wired and mounted, power on the fish finder. Go through the initial setup: set the units to feet and miles per hour, adjust the sonar frequency, and set the alarm depths.
Now the real test. Take the boat out and idle over a known depth. The display should show a solid bottom reading. If it shows a depth but the reading is erratic, check the transducer angle. If it shows nothing at all, you have one of two problems.
The most common issue is an air bubble under the transducer face. The transducer needs direct contact with water to transmit sonar. If it’s mounted too high, or if air gets trapped under the face, the signal won’t pass. Lower the transducer so it sits just below the bottom of the tube. If you used a bracket, loosen the screws and tilt it down a few degrees.
The second issue is a bad connection. Check the power cable at the battery and the display. A loose connection causes intermittent power loss. Also check the transducer cable for cuts or pinches, especially where it passes through the chase.
Maintenance Tips for Longevity
Pontoon fish finders take a beating from sun and water. A little maintenance goes a long way.
- Spray the transducer and bracket with a silicone lubricant every few months to prevent corrosion on the screws.
- Check the cable clips and zip ties each season. Replace any that are cracked or loose.
- Clean the transducer face with a soft cloth and mild soap. Don’t use abrasive cleaners, they scratch the plastic and reduce sensitivity.
- If you store the boat outside, cover the display or remove it. UV rays fade the screen and crack the plastic housing.
- Inspect the in-line fuse holder for corrosion. A corroded fuse holder causes voltage drops and random shutdowns.
Common Questions, Straight Answers
Can I mount the transducer inside the pontoon tube?
No. The sonar signal won’t pass through aluminum. The transducer must have direct contact with the water outside the tube. Some people try shooting through the hull on fiberglass boats, but that doesn’t work on aluminum pontoons.
What angle should the transducer be set at?
Start with the transducer face parallel to the water, then tilt it down 2 to 4 degrees. If you lose bottom reading at speed, tilt it down slightly more. If you get excessive spray, tilt it up a touch. It’s a trial and error process, but small adjustments make a big difference.
Do I need a separate GPS antenna?
Most modern fish finders have a built-in GPS receiver in the display unit. You don’t need a separate antenna unless you bought a model without GPS. Check your unit’s manual. If it has an external GPS puck, mount it on the console with a clear view of the sky, not under a metal roof.
How do I stop the fish finder from draining my battery?
Wire it to a switched power source so it turns off with the ignition. If you must use constant power, get into the habit of turning the unit off manually. A fish finder draws very little power, but over a week of sitting, it can drain a battery.
Can I use a trolling motor transducer instead?
Yes, if your trolling motor has a built-in transducer mount. That’s a simpler install because the transducer mounts on the motor shaft and the cable runs alongside the motor power cable. The trade-off is that you only get depth readings when the trolling motor is in the water. For main engine operation, you still need a transom-mounted transducer.
What to Do With This Information
You have everything you need to finish this install in an afternoon. The key steps are straightforward.
- Test the transducer location before drilling any holes. It takes 20 minutes and prevents a frustrating redo.
- Mount the transducer clear of the lifting strakes, angled down 2 to 4 degrees.
- Use the internal chase to route cables, not the outside of the tubes.
- Wire through a fused, switched power source to protect the battery and the unit.
- Use marine sealant on every screw that penetrates the aluminum.
- Install a quick-disconnect mount and take the display with you when you leave the boat.
- Check the transducer face and cable connections at the start of each season.
Take your time with the cable routing. That’s the part that frustrates people. The rest is just drilling a few holes and tightening screws. Once it’s done, you’ll wonder why you put it off.