
You just bought a new fish finder for your center console. The box is open on the dock, and you’re staring at the transducer, the power cable, and a mounting bracket that looks like it belongs on a different boat. Every center console owner hits this moment. The console itself seems simple enough, but the reality of running cables through a rigging tube, sealing a cored roof, and keeping the screen readable in direct sun is a different story.
This guide walks you through the entire process, from planning the layout to bench-testing the unit before you drill a single hole. You’ll learn where to mount the transducer for clean readings at speed, how to route cables through the console without chafing them on sharp edges, and how to wire power safely without introducing interference into your sonar signal. The focus stays on the specific quirks of center consoles, because a generic install guide won’t tell you about the cored fiberglass roof or the chase tube that’s too narrow for a pre-made connector.

WINDFRD
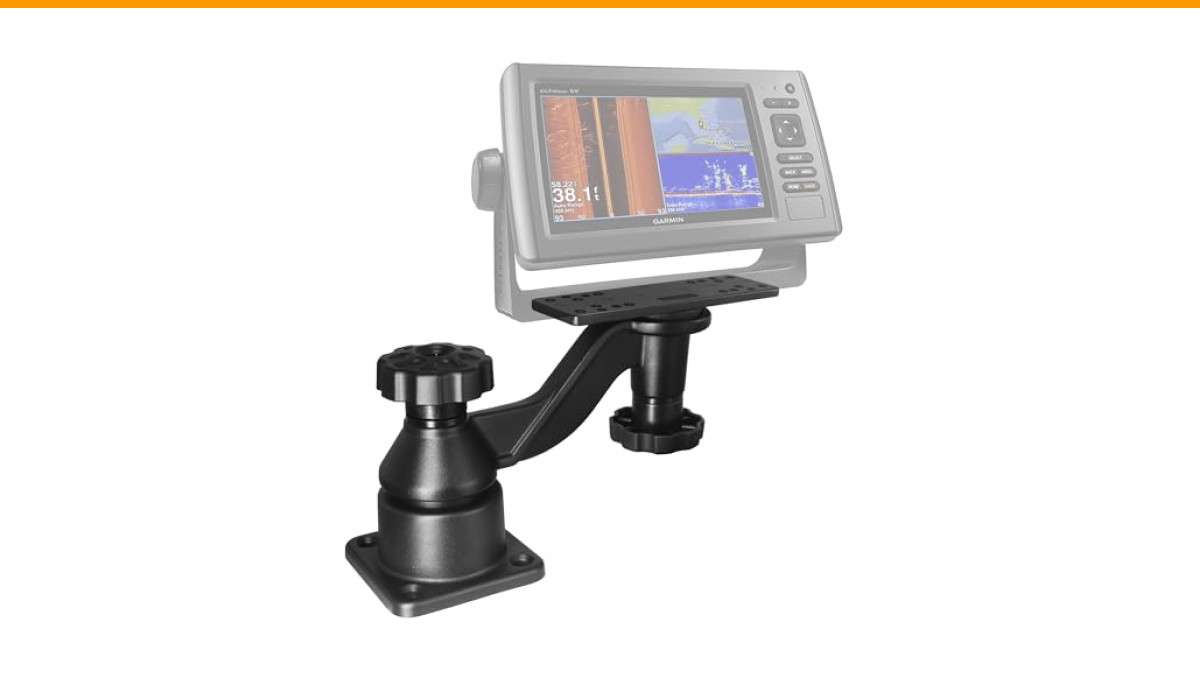
WINDFRD Aluminum Swing Arm Fish Finder Mount for 5"-12" Screens
- Heavy Duty - Extra strong load-bearing marine electronic mount is made of all aluminium and can hold up to 110 lbs. static and 22…
- Designed for High Salt Marine Environment - Constructed of Powder-Coated Marine-Grade Aluminum and Stainless Steel Hardware. The m…
- Superior Compatibility - Heavy-duty mounting base down-drilled to mount on any flat surface, such as the dashboards, decks of boat…
After reading this, you’ll have a clear plan and the confidence to do the job right the first time. No more guessing, no more re-drilling holes.
Before you start, consider a solid mounting solution. The WINDFRD Aluminum Swing Arm Fish Finder Mount handles screens from 5 to 12 inches and uses a powder-coated marine-grade aluminum frame with stainless steel hardware. It holds up to 110 lbs. static and 22 lbs. dynamic, so it stays put when you slam through a wave. The two pivot points let you tilt the screen to cut glare, which is half the battle on a sunny day.
Tools and Materials Checklist for a Clean Install
Gather everything before you start. Running back to the truck for a missing tool mid-install is a waste of time, and it’s how mistakes happen.
- Drill and bits: A variable-speed drill with a set of titanium bits. You’ll need a step bit for the transducer cable hole and standard bits for the mounting screws.
- Marine sealant: Use a high-quality polyurethane or silicone sealant rated for below-waterline use. Don’t cheap out here; this is your primary defense against water intrusion.
- Pull wire or fish tape: A 20-foot length of stiff wire or a fiberglass fish tape for pulling cables through the rigging tube.
- Heat shrink connectors: Marine-grade heat shrink butt connectors with adhesive lining. They seal the connection against moisture, which is critical in a salt environment.
- Wire strippers and crimping tool: Get a good ratcheting crimper. A cheap one won’t make a solid connection.
- Multimeter: You’ll use this to check voltage and continuity. Essential for the power wiring step.
- Zip ties and adhesive mounts: For securing cables inside the console. Use UV-resistant ties.
- Mounting screws: 316 stainless steel machine screws or sheet metal screws, depending on your console material.
- Rubbing alcohol and a rag: For cleaning the mounting surfaces before drilling and sealing.
That’s the core kit. You might also want a Dremel with a cutting wheel if you need to enlarge an existing hole in the console for the cable grommet.
Planning the Layout: Display Position and Transducer Location
Take a step back and look at your boat before you drill anything. Where you put the display and the transducer determines how well the whole system works.
Choosing the Display Mount (Gimbal vs. Flush)
You have two main options for mounting the display on the console: a gimbal bracket or a flush mount. A gimbal bracket holds the unit on a swivel arm, letting you tilt and rotate the screen. This is the better choice for a center console because you can angle the display to kill glare. The sun is brutal on open water, and a fixed flush mount will leave you squinting at a washed-out screen half the day.
Flush mounting recesses the unit into the console, giving a clean, built-in look. It’s great for a cuddy cabin or a hardtop, but on an open console, the screen sits flat and catches the sun. Stick with a gimbal or a swing arm mount unless you have a shaded helm.
The WINDFRD mount mentioned earlier is a gimbal-style arm with two pivot points. It lets you move the screen up, down, and sideways, which is exactly what you need to keep the display in a shaded spot or angle it away from direct light.
Transducer Placement: Transom vs. Inside Hull
This is the most important decision of the whole install. The transducer is the part that sends and receives sonar signals. If it’s not placed right, your depth readings will be garbage.
Transom mount: This is the standard choice. You bolt the transducer to the transom, below the waterline. It gives the best performance at speed and the most accurate depth readings. The downside is that it sticks out and can get damaged if you beach the boat or hit debris. You also have to route the cable up and over the transom, which adds a bit of work.
Inside hull (shoot-through): You glue the transducer to the inside of the hull with epoxy. This works well on fiberglass boats, but it has limitations. It won’t read through a cored hull, and it can struggle to maintain a lock at planing speeds. It’s a clean install with no holes in the transom, but the performance trade-off is real.
For a center console, I recommend the transom mount. You’re usually running at speed to get to a spot, and you want reliable readings while you’re moving. A shoot-through transducer will often lose the bottom at 20 mph, which defeats the purpose.
| Feature | Transom Mount | Inside Hull (Shoot-Through) |
|---|---|---|
| Depth reading at speed | Excellent | Fair to poor |
| Installation effort | Moderate | Low |
| Holes in hull | Yes, 2-4 small screws | None |
| Compatibility with cored hulls | Yes | No |
| Risk of damage | Higher (sticks out) | Lower (protected) |
| Water temperature reading | Accurate | Often inaccurate |
If you have a cored hull, the inside mount is not an option. The core material blocks the sonar signal. Go with the transom mount.
Step-by-Step Installation: Mounting the Transducer
Let’s get to work. Follow this order, and you’ll avoid most common mistakes.
- Find the spot: On the transom, look for a spot that’s in clean water flow, away from strakes, thru-hull fittings, or the propeller. The transducer needs a solid stream of water over its face. Ideally, it sits about 1 to 2 inches below the hull bottom line. If you have a stepped hull, mount it just ahead of the step.
- Dry fit the bracket: Hold the transducer bracket against the transom. Mark the screw holes with a pencil. Make sure the transducer face is parallel to the waterline. A slight downward angle at the back (tilted nose down) can help with readings at high speed, but start level.
- Drill pilot holes: Use a drill bit slightly smaller than your screws. If the transom is cored, drill through the outer skin, then fill the hole with marine sealant before driving the screw. This prevents water from getting into the core, which is a common cause of rot.
- Apply sealant: Put a generous amount of marine sealant on the screw threads and a bead on the back of the bracket. This creates a waterproof seal.
- Attach the transducer: Screw the bracket down. Do not over-tighten; you’ll strip the hole in the fiberglass. Snug is enough.
- Route the cable: Run the transducer cable up and over the transom. Leave a drip loop (a small U-shape in the cable) below the point where it enters the boat. This lets water run off the cable instead of following it into the hull.
That’s the mechanical part. The cable routing is the next challenge.
Running Cables Through the Console (The Right Way)
Center consoles have a unique feature: a rigging tube or chase that runs from the transom area up to the console. It’s a plastic or rubber conduit designed to carry cables. Using it is the only clean way to get wires from the back of the boat to the helm.
Using the Rigging Tube and Avoiding Chafing
First, check the tube. Is it clear, or is it full of steering cables and wiring from other electronics? Often, it’s packed. You’ll need to pull some cables out, run yours, and then carefully push everything back.
Attach your pull wire to the transducer cable. Wrap the connection with electrical tape so it’s smooth and won’t snag. Pull the cable through the tube slowly. If it binds, don’t force it. Pull it back and try a different angle. Forcing it can damage the cable jacket.
Once the cable is through, inspect the ends of the tube. They often have sharp edges from the factory. Use a file or sandpaper to smooth them, or add a rubber grommet. A chafed cable will eventually short out, and you’ll be chasing an intermittent electrical gremlin for a season.
Inside the console, secure the cable with zip ties, leaving a little slack at the transducer end so you can service it later. Keep the cable away from sharp metal edges and moving parts like the steering helm.
Power Wiring: Fuse Block vs. Direct Battery
Now, the power source. You have two options: wire to the fuse block or wire directly to the battery. Each has its place.
Fuse block: Most center consoles have a small fuse block or a breaker panel. Wiring to this is cleaner and easier to troubleshoot. It’s also safer because the circuit is already protected. The downside is that the fuse block might be on the same circuit as other electronics, which can introduce electrical interference into your sonar signal. You’ll hear this as erratic depth readings or random noise on the screen.
Direct battery: Wiring straight to the battery gives you a clean, dedicated power source. It reduces the chance of interference from other devices. You must add an inline fuse (usually 3 to 5 amps, check your unit’s manual) within 12 inches of the battery terminal. This is the method I prefer for a fish finder. The voltage drop is minimal, and the signal stays clean.
Whichever you choose, use the correct wire gauge. Most fish finders require 18 or 20 AWG wire for runs under 20 feet. If your console is far from the battery, step up to 16 AWG to avoid voltage drop. A low voltage condition will make the unit reboot randomly, which is infuriating.
Mounting the Display Unit on the Console
You’re almost there. The display mount is the last big step.
If your console top is cored fiberglass (many center consoles are), you need to be extra careful. Drilling through the top skin and into the core creates a path for water. The core is usually balsa or plywood, and once it gets wet, it rots.
Here’s the trick: use a mounting plate or a larger backing plate under the console top. This spreads the load and lets you seal the holes properly.
- Mark the holes: Hold the mount base on the console where you want it. Ensure it’s not blocking your view of the water or the gauges. Mark the four mounting holes.
- Drill the holes: Use a drill bit sized for your screws. Drill through the top skin only. Do not go through the inner liner if you can avoid it.
- Fill the holes with sealant: Fill each hole completely with marine sealant. This seals the core from moisture.
- Mount the base: Place the mounting plate over the holes, then screw the mount base down. The sealant will squeeze out, which is good. Wipe away the excess.
- Attach the display: Slide the display onto the mount or screw it to the gimbal bracket. Adjust the angle so the screen faces you, tilted slightly down to cut glare.
Position the screen so it’s not in direct line with the sun. A slight tilt toward you can make a huge difference in readability. The swing arm mount is handy here because you can adjust it on the fly as the sun moves.
Testing, Calibration, and Waterproofing Final Checks
Before you put the boat in the water, bench-test the unit. Connect the power leads to a 12V battery and plug in the transducer. Power on the unit. You should see the startup screen and the sonar page. Without water, the depth reading will be blank or show an error, but the unit should not reboot or flicker. If it does, you have a power issue. Check your connections and the fuse.
Now, go through this checklist:
- Check all sealant: Inspect every screw hole and cable penetration. Is there a gap? Add more sealant.
- Secure all cables: Zip tie any loose wires inside the console. They can rattle and chafe against the hull.
- Verify the fuse: Make sure the inline fuse is properly seated and the correct amperage.
- Water test: Launch the boat. Turn on the fish finder. At idle, you should see a solid bottom reading. Slowly increase speed. Watch for the depth to become erratic or drop out. If it does, the transducer is likely not aligned correctly. You may need to tilt it down slightly at the back.
The water test is non-negotiable. A mount that looks perfect on the trailer can be completely wrong at 25 mph. Give yourself time to adjust the transducer angle after the first run.
Frequently Asked Questions (FAQs)
What is the best way to run the transducer cable through a rigging tube?
Use a pull wire or a fish tape. Tape the connector to the pull wire, making a smooth, tapered joint. Pull slowly, and if it binds, back off and try again. After pulling, check the tube ends for sharp edges and add a grommet if needed.
Should I connect my fish finder to the fuse block or the battery?
Direct to the battery is better for a clean signal. It avoids interference from other electronics on the same circuit. Always add an inline fuse near the battery terminal. A fuse block is more convenient but risks noise on the sonar.
Can I mount the transducer inside the hull instead of on the transom?
Yes, but only if your hull is solid fiberglass, not cored. A shoot-through mount works fine at idle and low speeds, but it often loses the bottom at planing speed. It also gives inaccurate water temperature readings. Transom mounting is the more reliable choice for a center console.
How do I prevent water from getting into a cored console roof when mounting the display?
Drill through the outer skin, fill the hole completely with marine sealant, then insert the screw. Use a backing plate to spread the load. The sealant seals the core and prevents rot. Never leave a raw hole in a cored surface.
Why does my fish finder lose the depth reading at high speed?
This is almost always a transducer alignment issue. The transducer face is not parallel to the water flow, causing turbulence across the face. Adjust the bracket so the back edge of the transducer is slightly lower than the front edge. This helps it stay in contact with clean water at speed.
Final Checks Before You Hit the Water
- Bench-test the unit and transducer before drilling any holes. It’s easier to return a faulty unit than to re-drill a console.
- Always use marine-grade sealant on every screw that penetrates the hull or console. This is not optional.
- Route power directly to the battery with an inline fuse. It’s the surest way to avoid electrical noise on your sonar.
- Leave a drip loop on the transducer cable where it enters the boat. This stops water from running into the hull.
- Adjust the display angle to reduce glare. A swing arm mount makes this easy and is worth the extra cost.
- Do a water test after the install. Adjust the transducer angle if you lose the bottom at speed. Expect to fine-tune it.
- Check the current price and specs of the WINDFRD aluminum swing arm mount on Amazon if you need a robust mounting solution.
