Fishing is fun. It gets better with a Garmin Fish Finder. This guide will help you learn how to use it.
What is a Garmin Fish Finder?
A Garmin Fish Finder is a tool. It helps you find fish in the water. It shows you where the fish are. It also shows you the water depth. It is a great tool for any fisherman.
Parts of a Garmin Fish Finder
- Display Screen: This shows you the fish and water details.
- Buttons: These help you control the device.
- Transducer: This part goes in the water. It sends and receives signals.
- Power Cable: This gives power to your device.
Step-by-Step Guide to Operate a Garmin Fish Finder
1. Setting Up Your Garmin Fish Finder
First, you need to set up your device. Follow these steps:
- Attach the transducer to your boat.
- Connect the power cable to the device.
- Connect the transducer to the device.
- Turn on the device using the power button.
Now your device is ready.
2. Understanding The Display Screen
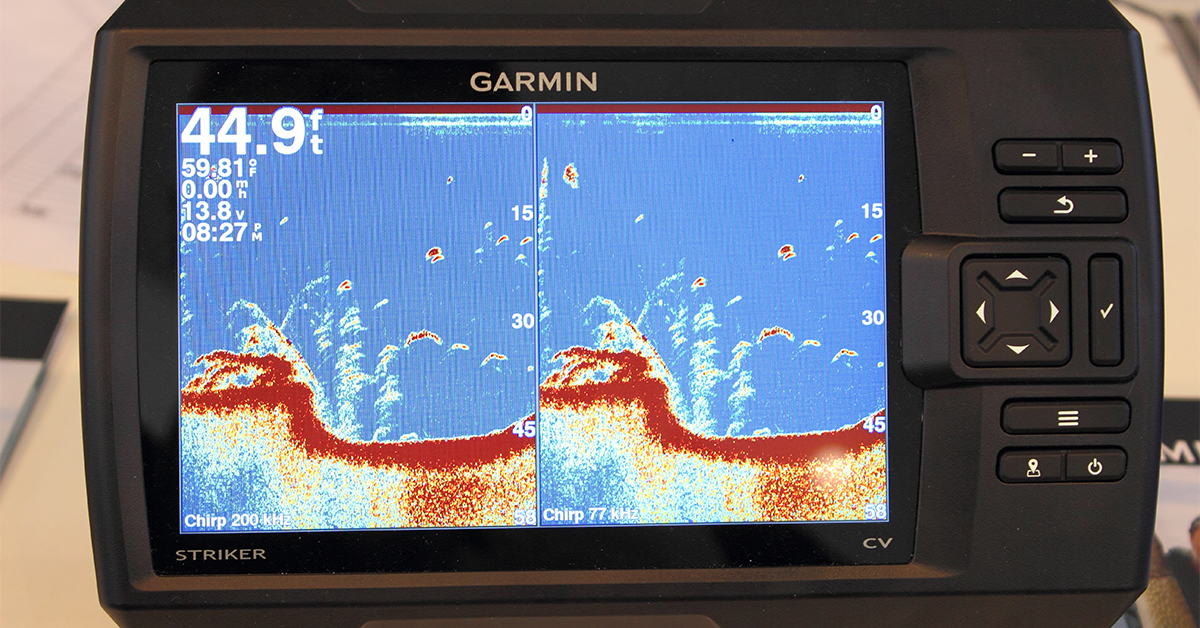
Look at the display screen. You will see different things. Here is what you need to know:
- Fish Icons: These show where the fish are.
- Depth Numbers: These show the water depth.
- Bottom Line: This shows the bottom of the water.
3. Using The Buttons
The buttons help you control the device. Here are the main buttons:
- Power Button: Turns the device on and off.
- Menu Button: Opens the menu for settings.
- Zoom Buttons: Zoom in and out on the display screen.
- Arrow Buttons: Move through the menu options.
- Select Button: Choose a menu option.
4. Adjusting The Settings
To get the best results, adjust the settings. Here’s how:
- Press the Menu button.
- Use the Arrow buttons to move through the menu.
- Press the Select button to choose a setting.
- Change the setting as needed.
- Press the Menu button to exit.
5. Reading The Display Screen
Now, look at the display screen. It shows you the water details. Here is what you will see:
- Fish Icons: These look like small fish. They show where the fish are.
- Depth Numbers: These numbers show the depth of the water.
- Bottom Line: This is a thick line. It shows the bottom of the water.
6. Using The Zoom Feature
Sometimes you need to zoom in. This helps you see more details. Here is how to use the zoom feature:
- Press the Zoom In button to zoom in.
- Press the Zoom Out button to zoom out.
Zoom in to see more details. Zoom out to see a wider view.
7. Interpreting The Fish Finder Data
The display screen shows you a lot of information. Here is how to understand it:
- Fish Icons: These tell you where the fish are.
- Depth Numbers: These tell you how deep the water is.
- Bottom Line: This tells you where the bottom of the water is.

Credit: www.saltstrong.com

Credit: m.youtube.com
Tips for Using Your Garmin Fish Finder
Here are some tips to help you use your device:
- Keep the transducer clean.
- Check the settings often.
- Read the manual for more details.
- Practice using the device in different waters.
Frequently Asked Questions
How Do You Turn On A Garmin Fish Finder?
Press the power button for a few seconds.
How Do You Read A Garmin Fish Finder?
Look for fish symbols or arches on the screen.
How Do You Update Garmin Fish Finder Software?
Connect the device to a computer and use Garmin Express.
How Do You Set Up A Garmin Fish Finder?
Mount the device and transducer, then power it on.
Conclusion
Using a Garmin Fish Finder is easy. Follow this guide to learn the basics. Enjoy your fishing trips. Happy fishing!
